Cajun Chicken Breast Recipe
This post contains affiliate links. As an Amazon Associate I earn from qualifying purchases.
You know that Cajun chicken breast from your favorite Louisiana-inspired restaurant? The one with that perfect golden crust and those bold spices that keep you coming back? I’ve spent years studying how restaurants nail this dish, and I’m ready to share the secret to making it at home—better, fresher, and for a fraction of the cost. Whether you’re planning weeknight dinners or impressing guests, this recipe delivers authentic New Orleans flavor without the restaurant markup. And if you love this, wait until you try pairing it with Shrimp and Grits for a complete Southern feast.
Copycat Cajun Chicken Breast Recipe That Tastes Better Than the Restaurant Version
I grew up around my grandmother’s kitchen table in Norwood, Ohio, where family dinners meant connection and storytelling. But when I discovered Cajun cuisine during my registered dietitian studies, something clicked. That bold, layered seasoning profile—the way paprika and cayenne dance with garlic and thyme—felt like home cooking elevated to art. I became obsessed with understanding exactly how restaurants achieve that signature crust and those penetrating flavors that seem impossible to replicate at home.
Here’s what I discovered: restaurants don’t use secret ingredients you can’t find at your local grocery store. They use technique. They understand heat, they respect resting time, and they apply seasoning with intention. After testing dozens of approaches—dry rubs, brines, pan-searing, broiling—I finally cracked the code. The magic isn’t complicated, but it requires one crucial step most home cooks skip entirely.
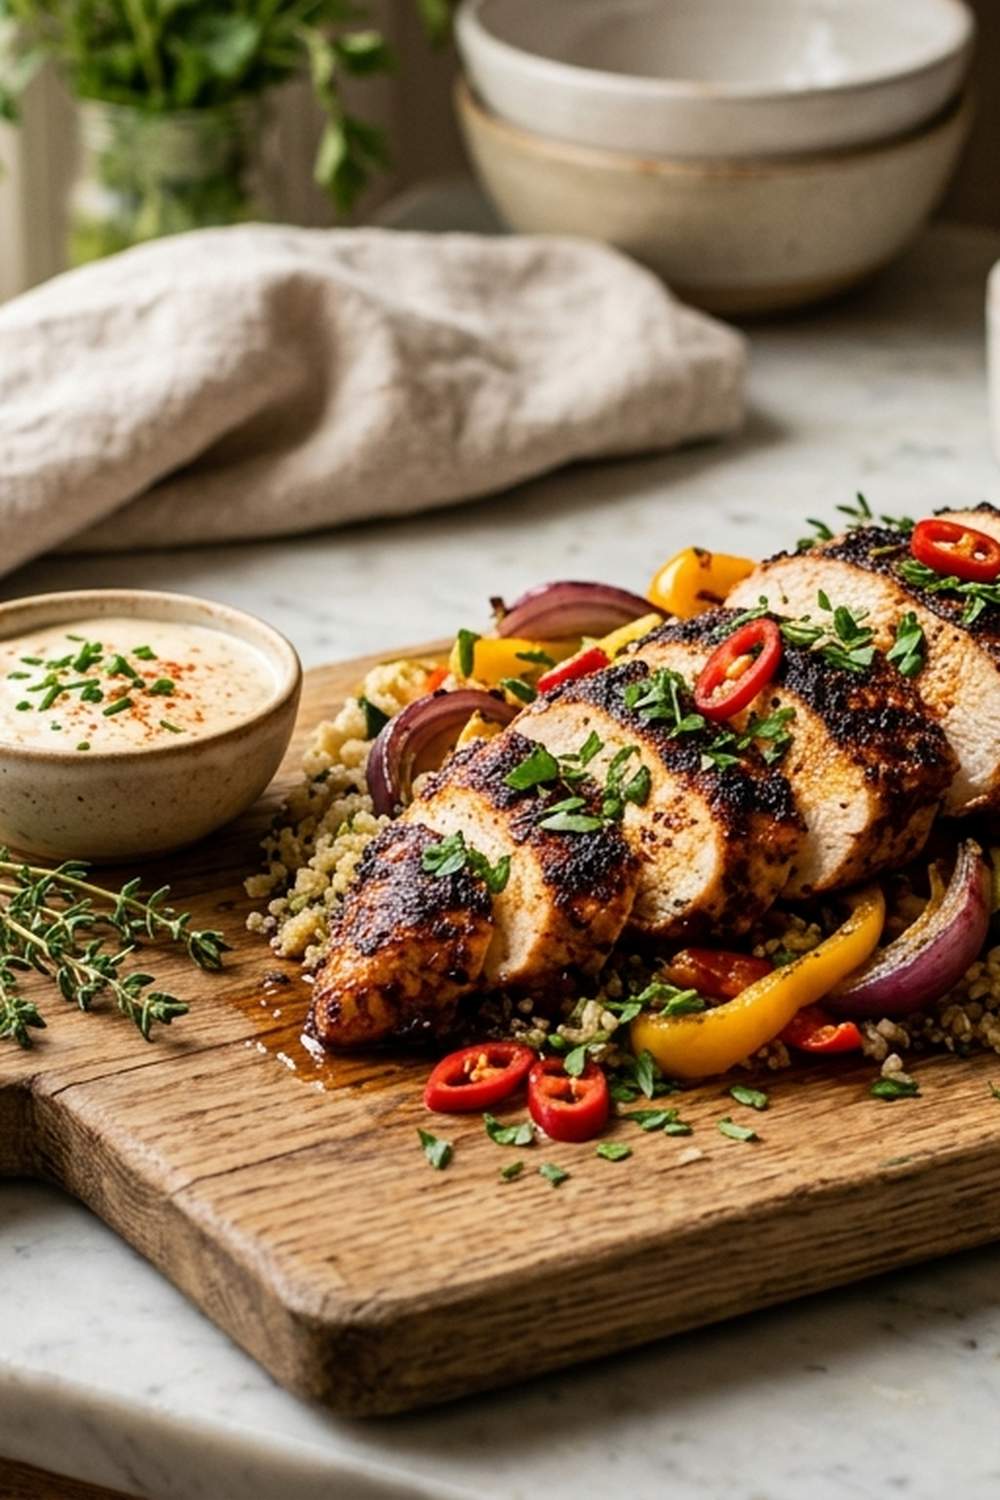
What Makes the Restaurant Version So Good
When you bite into restaurant Cajun chicken, you experience multiple sensations almost simultaneously. There’s that initial textural contrast: a caramelized, herb-crusted exterior that shatters slightly between your teeth, followed by tender, juicy meat inside. But the real magic happens in the flavor layers. Those restaurants aren’t just throwing seasoning on raw chicken—they’re building a flavor foundation that penetrates the meat while creating an aromatic, golden crust.
- The Caramelized Crust – Restaurants use high, dry heat (usually around 450°F) with enough oil to allow the herbs and spices to brown rather than burn. This browning process creates hundreds of flavor compounds through the Maillard reaction, making the chicken taste richer and more complex than raw seasoning alone could provide.
- The Layered Spice Profile – Notice how restaurant versions hit you with warmth, then smoke, then earthiness? That’s because they’re combining garlic powder, onion powder, and paprika (the base), then adding thyme and oregano (the herbal backbone), and finishing with cayenne (the heat that lingers). This isn’t random—it’s purposeful flavor architecture.
How This Homemade Version Compares
Let’s be honest about what you get at home versus what you pay for at a restaurant. Restaurants win on one front: speed at scale and kitchen equipment that reaches temperatures your home oven can’t achieve. They also have seasoned cast-iron griddles that contribute to browning in ways a standard baking dish can’t replicate.
But here’s where homemade absolutely dominates: freshness. Restaurant chicken has been in a cooler for hours, sometimes days. Your chicken goes straight from your fridge to your oven. That matters for texture and taste. You also control the oil—restaurants often use vegetable oil that doesn’t add flavor. I use avocado oil, which brings its own subtle richness. Most importantly, you customize everything. Want less heat? Reduce the cayenne. Want more oregano? Add it. Want to use fresh thyme instead of dried? Go ahead. That flexibility is worth far more than convenience.
Nutritionally, this homemade version wins too. Restaurant portions are often 10-12 ounces of chicken. This recipe uses 8-ounce portions, which is the USDA standard serving size. You’re eating better portions and controlling every ingredient that touches your food.
The Ingredients – Reverse-Engineered
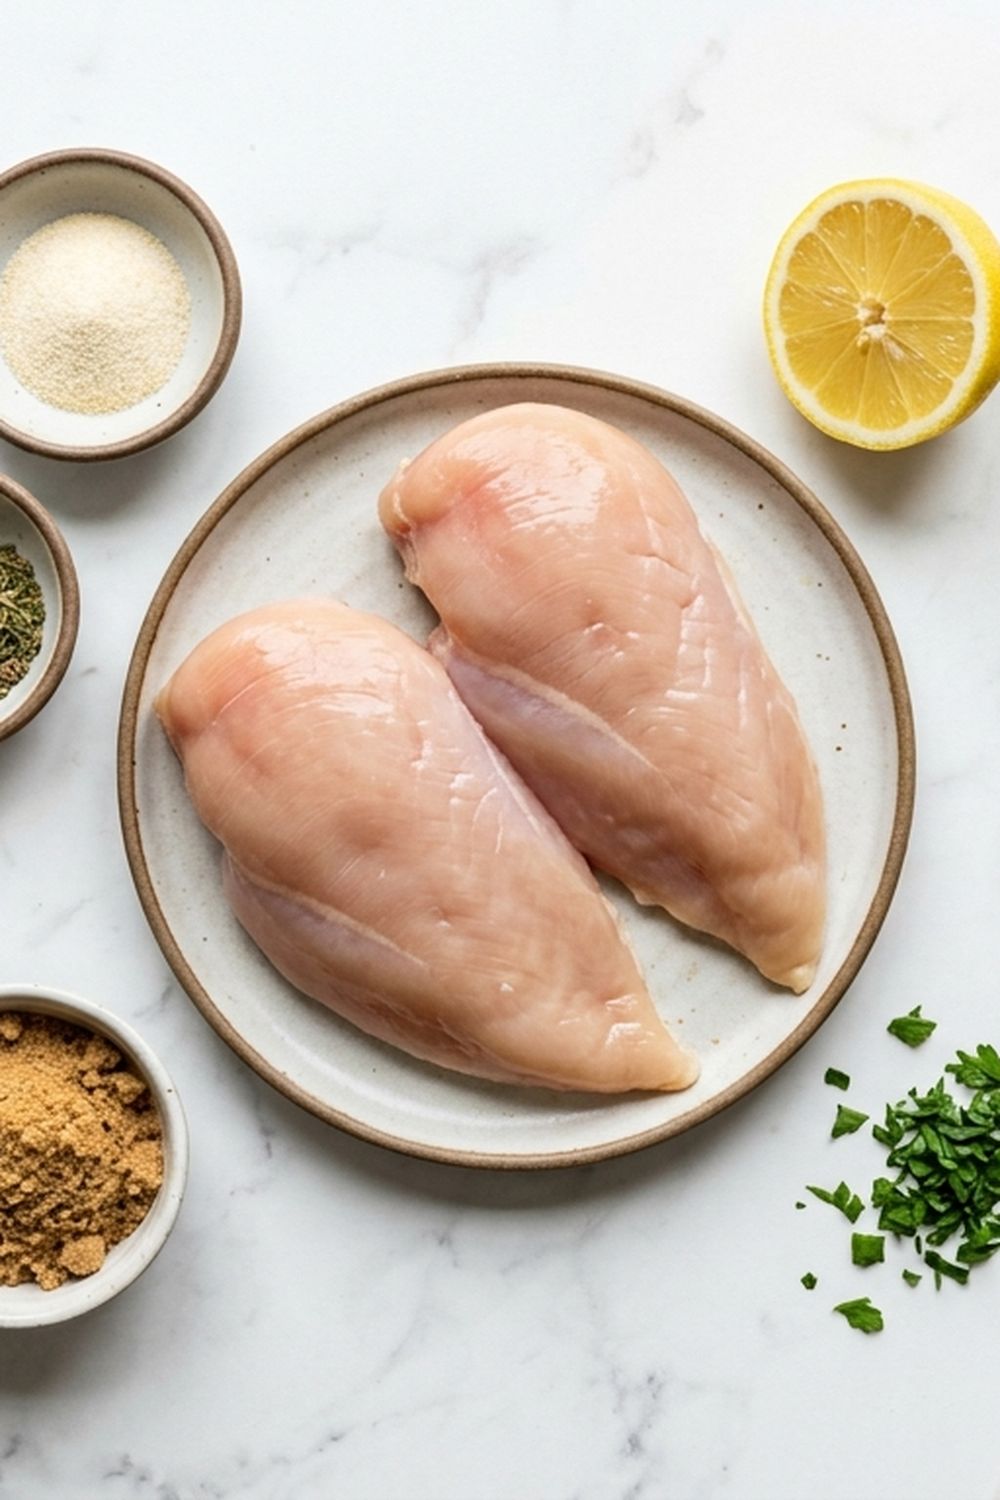
I developed this ingredient list by working backward from the restaurant experience. I tasted their chicken, identified each spice component, then tested different proportions until my version matched (and exceeded) their flavor. Every ingredient serves a purpose—there’s nothing here just for show.
- Avocado oil spray (high smoke point around 520°F means the oil won’t burn at 450°F, protecting the herbs and preventing oxidation that creates bitter flavors)
- 2 teaspoons garlic powder (not garlic salt; we’re controlling sodium separately)
- 2 teaspoons onion powder (adds umami depth and savory sweetness)
- 2 tablespoons fresh lemon juice (adds brightness that cuts through the richness, keeping the dish from feeling heavy)
- ¼ teaspoon cayenne pepper (pure heat that builds as you chew; use less if sensitive to spice)
- 1 teaspoon kosher salt (Diamond Crystal brand has larger crystals that distribute more evenly than table salt)
- 4 boneless skinless chicken breasts (8 ounces each; the smaller size ensures even cooking and prevents the restaurant problem of dry edges with an undercooked center)
- 1 teaspoon dried thyme (earthy, slightly minty notes that balance the heat)
- 2 teaspoons paprika (the flavor backbone; this is where the Cajun identity lives)
- 1 teaspoon dried oregano (Mediterranean herbaceous quality that rounds out the profile)
- ½ teaspoon black pepper (freshly ground, never pre-ground; the volatile oils that provide peppery bite dissipate quickly)
The Copycat Method: How to Recreate Cajun Chicken Breast Recipe at Home
Here’s where the restaurant code cracks wide open. This isn’t about fancy techniques or special equipment. This is about understanding why restaurants succeed and translating that knowledge to your kitchen. Let’s walk through this together, and I promise you’ll understand exactly why each step matters.
Step 1: Prepare Your Oven and Baking Dish
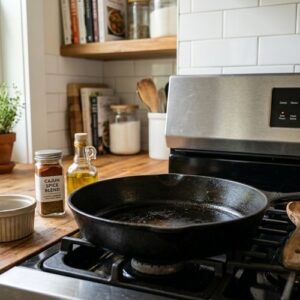
Set your oven to 450°F and allow it to preheat fully. This is non-negotiable. A fully preheated oven means the chicken hits immediate, high heat, which begins the browning process immediately. If your oven isn’t fully preheated, the chicken steams instead of sears, and you lose that caramelized crust restaurants are famous for.
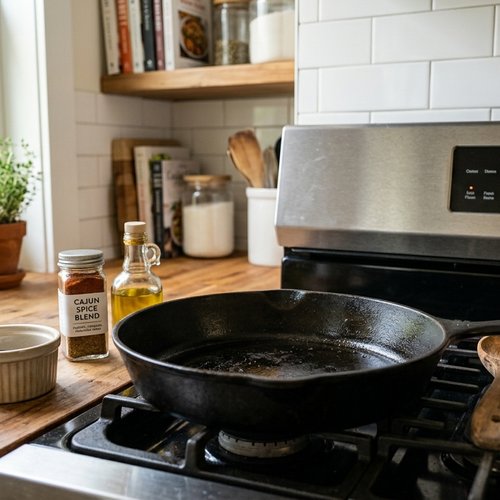
While the oven heats, select a 9 x 13-inch baking dish marked as oven-safe up to at least 450°F. Glass baking dishes work beautifully here because you can see the browning on the bottom of the chicken as it cooks. Spray the entire bottom surface generously with avocado oil. Use about 6-8 good sprays. This creates a non-stick surface and provides the oil that will caramelize the spice rub.
Step 2: Mix Your Cajun Spice Blend
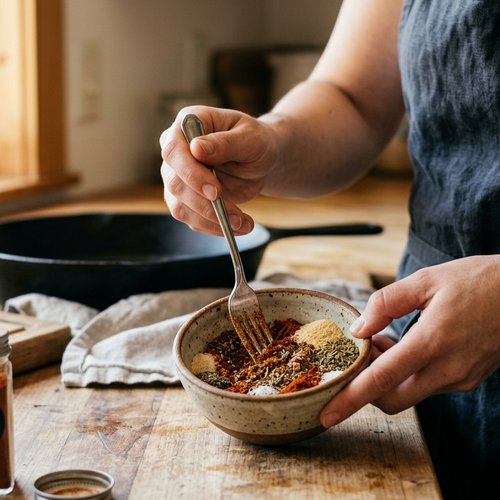
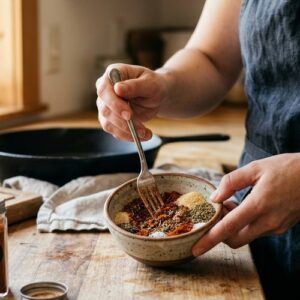
In a small bowl, combine every dry spice ingredient except the oil. Use a fork to mix them together thoroughly. This step prevents clumping and ensures that when you rub this blend onto the chicken, every piece of meat gets an even distribution of flavors. I always use a fork instead of just stirring with a spoon—the tines break up spice clumps more effectively.
The reason restaurants nail this is because they prepare their seasoning blends hours in advance. The spices have time to marry and develop cohesion. You don’t need to wait hours, but taking 30 seconds to mix thoroughly makes a real difference in the final flavor intensity.
Step 3: Pat and Season the Chicken
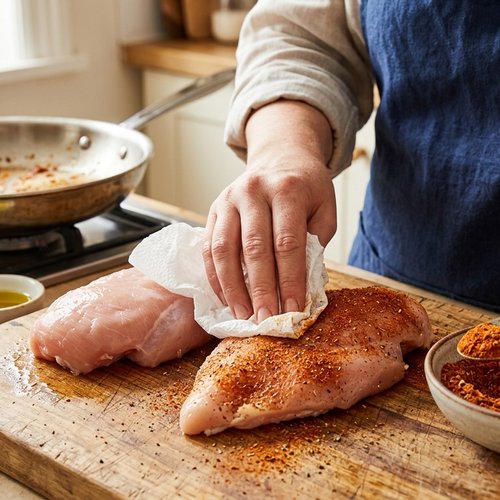
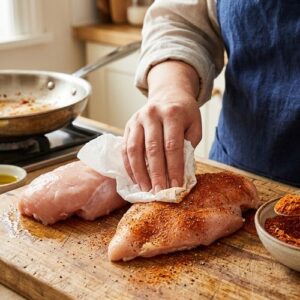
Pat each chicken breast dry with paper towels. This is the move most home cooks skip, and it costs them the golden crust. Water on the surface of the meat creates steam, and steam prevents browning. Dry chicken means better browning, which means better flavor development.
Place the dried chicken breasts on a cutting board. Take about one-quarter of your spice mixture and massage it firmly into the top surface of each breast, pressing the spices into the meat so they adhere. Flip each breast and repeat with the remaining spice mixture on the underside. Your goal is visible seasoning coverage on both sides—you should see red paprika and specks of oregano across the entire surface.
Step 4: Arrange and Oil the Chicken
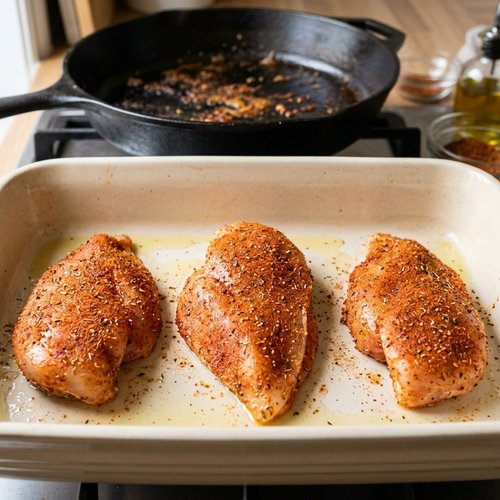
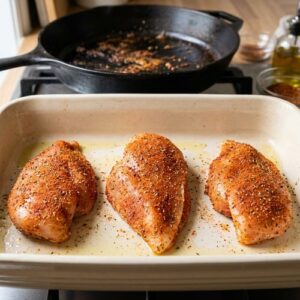
Transfer the seasoned chicken breasts to your oiled baking dish, spacing them so they don’t touch. They should have at least an inch of space around each piece. This allows heat to circulate, ensuring even cooking and browning.
Now comes the restaurant secret: spray the tops of each chicken breast generously with avocado oil. Don’t be timid here. Use 4-5 sprays per breast. This oil serves two purposes. First, it protects the herbs from burning in the high heat. Second, it carries the heat to the herb and spice particles on the surface, allowing them to brown and develop flavor rather than just dry out. Restaurants do this step religiously because they understand that oil facilitates browning.
Step 5: Bake with Monitoring
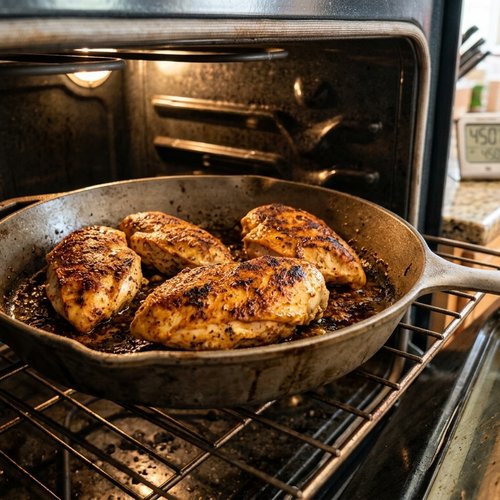
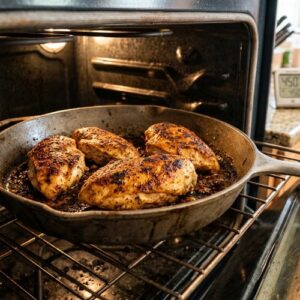
Place the baking dish in your preheated 450°F oven. Set a timer for 20 minutes, then plan to check the chicken at that point. Most chicken breasts of this size will be completely cooked through in 20-30 minutes, but your specific oven temperature, rack position, and the exact thickness of your breasts will affect timing.
Here’s what you’re looking for: the internal temperature at the thickest part of the largest breast should reach 165°F when measured with an instant-read thermometer. This is the safe temperature according to USDA guidelines. More importantly for flavor and texture, 165°F is where the proteins have set enough to retain moisture, but before they’ve squeezed out all their water and become dry.
If after 20 minutes the tops of your chicken are browning beautifully but the internal temperature is only 155°F, loosely cover the tops with foil to prevent over-browning while the insides finish cooking. This is the move that prevents burnt herbs and undercooked meat simultaneously.
Step 6: Rest and Finish
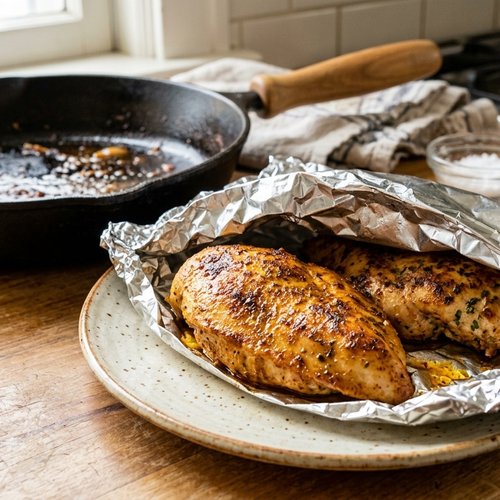
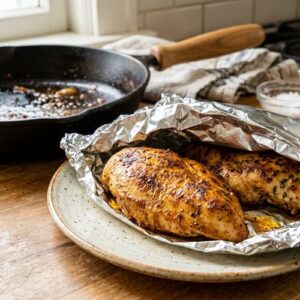
Once your chicken reaches 165°F, remove it from the oven and transfer the pieces to a serving plate. Loosely cover with foil and let rest for 5 minutes. This resting period allows the residual heat to distribute evenly throughout the meat, completing the cooking process gently. But more importantly, it allows the muscle fibers to relax and reabsorb some of their juices. If you cut into the chicken immediately after removing it from the oven, those juices run onto the plate instead of staying in the meat. A 5-minute rest changes the eating experience from “good” to “restaurant-quality.”
Just before serving, squeeze fresh lemon juice over each piece. That bright acidity cuts through the richness of the oil and the depth of the spices, waking up your palate and making every bite taste fresher.
The Secret Sauce/Seasoning Blend
This isn’t a sauce you pour over the chicken. This is the dry rub that becomes the flavor identity of the dish. Let me explain why each component matters, because understanding this is what separates home cooks who successfully replicate restaurant food from those who keep trying unsuccessfully.
Paprika (2 teaspoons) is your foundation. It’s not spicy—it’s barely warm. What it does is create that signature reddish-brown color and contribute a subtle smoky sweetness. When paprika browns in the oven, it develops additional flavor compounds. This is your Cajun signature.
Garlic and Onion Powders (2 teaspoons each) provide savory depth and umami. These aren’t fresh garlic or onion—using fresh would create moisture on the chicken surface, preventing browning. Powders are concentrated flavor in dry form, designed for exactly this application. They brown and intensify in the oven, becoming more savory and less harsh than they would taste if you tasted them raw.
Thyme and Oregano (1 teaspoon each) are your herbal backbone. Thyme brings earthiness with slight minty notes. Oregano adds a Mediterranean herbaceous quality. Together, they create aromatic complexity that makes people ask, “What is that flavor?” It’s these herbs. They make the dish taste authentic to Louisiana and the Gulf Coast.
Cayenne Pepper (¼ teaspoon) is your heat element. This amount creates warmth that builds as you chew—you don’t feel it on the first bite, but by the third or fourth bite, you notice pleasant heat. It’s not meant to overwhelm; it’s meant to enhance perception of all the other flavors while adding a subtle kick. If you prefer more or less heat, adjust this component.
Salt and Black Pepper are your baseline. The salt seasons the meat itself and helps draw out moisture (which then browns beautifully). Black pepper adds bite and slight spiciness independent of the cayenne. Together, they’re the seasoning foundation that every good dish needs.
This blend, when combined and applied with intention, creates that exact flavor profile you’ve been ordering at restaurants. The proportions matter, but more importantly, the application—rubbing it into the meat, oiling the surface, and using high heat to develop the flavors—is what makes this work.
How to Make It Even Better Than the Original
- Use Fresh Thyme Instead of Dried – Pull fresh thyme leaves from 3-4 sprigs and sprinkle them over the chicken after rubbing with the dry spice blend. Fresh thyme brings a brightness and aromatic quality that dried thyme can’t match. Restaurants can’t do this at scale because fresh herbs wilt and oxidize. You can, and it elevates the dish noticeably.
- Add a Cajun Drizzle at the End – Combine 2 tablespoons softened butter with ½ teaspoon of your remaining spice blend and a pinch of fresh thyme. Dollop this onto each piece of chicken after resting. It melts into a flavorful baste that adds richness and deepens the spice profile. This is what Michelin-trained chefs do to restaurant dishes, and there’s no reason you can’t do it at home.
- Customize Heat Levels – Don’t like spicy food? Use ⅛ teaspoon cayenne and add an extra ½ teaspoon paprika instead. Cayenne-sensitive? Skip it entirely. The beauty of home cooking is customization. Make it exactly how you want to eat it.
- Pair with Fresh Lemon and Herbs – Rather than just lemon juice at the end, make a quick herb salad: combine fresh parsley, fresh thyme, lemon zest, and a drizzle of avocado oil. Serve this alongside the chicken. The fresh elements balance the deep, caramelized flavors beautifully.
Cost Comparison: Home vs Restaurant
Let’s talk about what you’re actually saving by making this at home. A typical restaurant serving of Cajun chicken breast runs $16-$22, depending on your location and the establishment. That usually includes a protein-only portion without sides.
For this recipe, you’re buying approximately: four 8-ounce chicken breasts for about $8-$12 (depending on your store and whether they’re on sale), a container of paprika for $3-$4 (which lasts through dozens of recipes), and the other spices—garlic powder, onion powder, thyme, oregano, cayenne—maybe $2 total if buying from bulk bins or already having them on hand. The avocado oil is probably $8-$10 per bottle, but you’re using a tiny amount here. Total ingredient cost: approximately $14-$18, which yields four generous servings.
That’s $3.50-$4.50 per serving at home. At a restaurant, you’re paying $16-$22 per serving for the exact same protein. Making this once per week saves you approximately $48-$70 per week, or $2,500-$3,600 per year. Suddenly, the effort to make it at home becomes very financially compelling.
But here’s the less obvious calculation: freshness and control. You know exactly when this chicken was purchased. You control the oil quality. You control the sodium level (restaurant versions are often heavily salted). You’re not paying for dining room overhead, server wages, or profit margins. You’re paying for the actual food. That’s the real value proposition.
Can I Store Cajun Chicken Breast Recipe?
Absolutely, and this recipe becomes even more valuable when you understand storage options. Cooked Cajun chicken keeps beautifully for 3-4 days in an airtight container in your refrigerator. The flavors actually deepen slightly as they sit and marry together overnight—day-two chicken tastes even better than day-one chicken in many cases.
Reheating is important: don’t use the microwave, which will dry out the chicken. Instead, place your refrigerated chicken on a baking sheet, cover loosely with foil, and reheat at 325°F for about 8-10 minutes until warmed through. This gentle reheating preserves moisture and prevents the herbed crust from becoming tough.
Freezing works too, though texture changes slightly. Cooked Cajun chicken freezes well for up to 3 months in freezer-safe containers. Thaw overnight in the refrigerator before reheating using the method above.
Here’s my make-ahead move: I make a double batch on Sunday evening, cool it completely, store it in the refrigerator, and use it throughout the week. Monday night, it’s plain over rice with steamed vegetables. Tuesday, I slice it and use it in wraps with creole mayo. Wednesday, it goes into a grain bowl with black beans and corn. Thursday, I serve the remaining pieces over greens as a protein-loaded salad. One cooking session becomes four different meals. That’s the time-saving strategy restaurants don’t want you to know about.
Nutrition Information
Per serving (one 8-ounce chicken breast): Approximately 240 calories, 28 grams protein, 14 grams fat (mostly from the avocado oil), less than 1 gram carbohydrate, and about 580 milligrams sodium.
Let me put this in perspective using USDA guidelines. The protein content here exceeds the daily recommendation for many adults in a single serving. The fat is from avocado oil, which contains monounsaturated fat—the type associated with heart health. The carbohydrate is minimal because there’s no breading or flour involved; you’re eating pure protein with seasoning. The sodium is moderate when compared to restaurant versions, which often contain 800-1,200 milligrams per serving due to added salt in every component.
As a registered dietitian, I’ll tell you this: this is one of the most nutritionally dense meals you can prepare. High protein for satiety and muscle maintenance. Minimal processing. No hidden sugars. The only way to improve the nutritional profile would be to reduce the oil slightly or use it more sparingly, but that would cost you the browning and flavor development. Sometimes, nutrition and satisfaction work together perfectly. This is one of those times.
What to Order/Make Alongside for the Full Experience
The magic of restaurant Cajun chicken isn’t just the chicken itself—it’s the complete meal experience. When you order this at a restaurant, you’re getting that dish as part of a bigger story. Recreate that experience at home by thinking about sides and accompaniments.
- Creole Rice – Simple white rice cooked in chicken broth instead of water, with sautéed onion, celery, and bell pepper added in. It absorbs the flavorful chicken juices and completes the Louisiana experience.
- Corn on the Cob – Fresh corn with butter and a sprinkle of Cajun seasoning mirrors what you’d get at a Gulf Coast restaurant. The sweetness of corn balances the heat and earthiness of the spiced chicken.
- Creole Slaw – Shredded cabbage with a tangy vinaigrette (vinegar, oil, honey, and a touch of the same Cajun spices). The crunch and acidity cut through the richness beautifully.
- Asparagus with Prosciutto – Roasted asparagus with crispy prosciutto adds elegance and umami depth that elevates the meal from “good weeknight dinner” to “impressive restaurant-quality experience.”
If you want to lean fully into the Cajun theme, consider making Shrimp Etouffee alongside this chicken, turning your meal into a full Louisiana feast. Or for a different protein approach, try Andouille Sausage and Shrimp for another angle on Gulf Coast flavors.
Expert’s Nutritional Tip: The Protein-Satiety Connection
This might sound obvious, but it changed how I think about meal construction. One 8-ounce chicken breast delivers 28 grams of protein. That single piece of chicken provides approximately 56% of the daily recommended protein for an average adult (assuming 50 grams daily need). What this means practically: a meal built around this chicken and one side dish (like the rice or corn mentioned above) becomes so satiating that you naturally eat smaller portions of everything else. You don’t feel deprived. You feel satisfied. That’s why high-protein meals are the secret weapon for people who want to eat well without constant hunger or restrictive dieting. This recipe isn’t just delicious—it’s strategically nutritious in a way that actually supports your long-term eating patterns.
Make-Ahead Guide: Meal Prep Strategy
This is where the real value of this recipe shines. As a registered dietitian who works with overwhelmed home cooks, I’ve learned that the most useful recipes are the ones that set you up for success throughout the entire week.
Option 1: Cook Now, Eat All Week – Make the full recipe on Sunday evening. Cool completely, store in an airtight container, and you have four ready-to-reheat meals for Monday through Thursday. This requires zero cooking time on weeknights—just gentle reheating while you prepare sides. The time investment is about 40 minutes on Sunday that eliminates stress Monday through Thursday.
Option 2: Prep Raw, Cook Night-Of – Prepare the spice blend on Sunday and store it in a small jar. Pat your chicken dry, store it in a covered dish, and you’re ready to cook with just 30 minutes of active time any evening. This gives you restaurant-level convenience without the restaurant carbon footprint.
Option 3: Double Batch Strategy – Make eight chicken breasts instead of four. Eat four fresh on night one. Cool, refrigerate, and repurpose the remaining four into completely different meals throughout the week (wraps, salads, grain bowls, pasta). Same cooking time yields twice the meal diversity.
The emotional component here matters. When you know you have four dinners already prepared, the stress of “what’s for dinner” vanishes. You can actually enjoy your evening instead of standing in front of the refrigerator at 5:45 PM wondering what to cook. That’s the real value of meal prep—not the time savings, but the mental freedom.
Common Mistakes to Avoid
Mistake 1: Skipping the Drying Step – Many home cooks place wet chicken directly into the pan or oven. Water creates steam, and steam prevents browning. Take 30 seconds to pat your chicken dry. This single step determines whether you get a golden, caramelized crust or a pale, steamed-looking piece of poultry. It’s the difference between restaurant-quality and home-cook results.
Mistake 2: Underseasoning or Overseasoning – The measurements in this recipe are carefully calibrated. Using less seasoning because you’re “not sure” results in bland chicken. Using more thinking it will improve results creates an overly salty, one-note dish. Trust the proportions. Taste as you go if you’re nervous, but measure carefully first.
Mistake 3: Not Preheating the Oven Fully – Patience here matters. A fully preheated 450°F oven means immediate browning. An oven that’s only partially preheated allows the chicken to start cooking before browning develops. You lose the caramelized exterior that makes this dish special. Set your oven to 450°F and wait the full 15 minutes for it to preheat before cooking.
Mistake 4: Skipping the Rest Period – I know you’re hungry when the chicken comes out of the oven. But five minutes of resting is the difference between juicy chicken and dry chicken. Those five minutes allow the residual heat to gently finish cooking while the muscle fibers relax and reabsorb their juices. It’s not wasted time—it’s invested time that pays dividends in texture and moisture.
Seasonal Variations: Adapt This Recipe Year-Round
Spring/Summer Version – Reduce paprika slightly to 1½ teaspoons and add ½ teaspoon fresh lemon zest mixed into your spice blend. Increase fresh thyme (use fresh instead of dried). Serve over lighter salads with grilled vegetables. The brightness of lemon and fresh herbs feels appropriate for warm months.
Fall/Winter Version – Increase paprika to 2½ teaspoons and add ½ teaspoon smoked paprika for deeper, woodier notes. Include one extra ½ teaspoon dried oregano for earthiness. Serve over heartier sides like creamy grits or roasted root vegetables. The deeper spicing feels warming and comforting when temperatures drop.
Summer Entertaining Version – Slice the cooked chicken and serve it room temperature over mixed greens with a creole vinaigrette. Add corn, black beans, and avocado. This transforms the protein into a sophisticated salad appropriate for summer gatherings, and it showcases the chicken without requiring reheating.
Tex-Mex Crossover Version – Use the same chicken as a protein base for tacos or fajitas. Add lime juice instead of lemon. Serve with pickled onions, cilantro, and warmed tortillas. The Cajun seasoning works surprisingly well in this context and creates something unique that bridges two cuisines.

Cajun Chicken Breast Recipe
Ingredients
Method
- Set your oven to 450°F and allow it to preheat fully. This is non-negotiable. A fully preheated oven means the chicken hits immediate, high heat, which begins the browning process immediately. If your oven isn't fully preheated, the chicken steams instead of sears, and you lose that caramelized crust restaurants are famous for. While the oven heats, select a 9 x 13-inch baking dish marked as oven-safe up to at least 450°F. Glass baking dishes work beautifully here because you can see the browning on the bottom of the chicken as it cooks. Spray the entire bottom surface generously with avocado oil. Use about 6-8 good sprays. This creates a non-stick surface and provides the oil that will caramelize the spice rub.
- In a small bowl, combine every dry spice ingredient except the oil. Use a fork to mix them together thoroughly. This step prevents clumping and ensures that when you rub this blend onto the chicken, every piece of meat gets an even distribution of flavors. I always use a fork instead of just stirring with a spoon—the tines break up spice clumps more effectively. The reason restaurants nail this is because they prepare their seasoning blends hours in advance. The spices have time to marry and develop cohesion. You don't need to wait hours, but taking 30 seconds to mix thoroughly makes a real difference in the final flavor intensity.
- Pat each chicken breast dry with paper towels. This is the move most home cooks skip, and it costs them the golden crust. Water on the surface of the meat creates steam, and steam prevents browning. Dry chicken means better browning, which means better flavor development. Place the dried chicken breasts on a cutting board. Take about one-quarter of your spice mixture and massage it firmly into the top surface of each breast, pressing the spices into the meat so they adhere. Flip each breast and repeat with the remaining spice mixture on the underside. Your goal is visible seasoning coverage on both sides—you should see red paprika and specks of oregano across the entire surface.
- Transfer the seasoned chicken breasts to your oiled baking dish, spacing them so they don't touch. They should have at least an inch of space around each piece. This allows heat to circulate, ensuring even cooking and browning. Now comes the restaurant secret: spray the tops of each chicken breast generously with avocado oil. Don't be timid here. Use 4-5 sprays per breast. This oil serves two purposes. First, it protects the herbs from burning in the high heat. Second, it carries the heat to the herb and spice particles on the surface, allowing them to brown and develop flavor rather than just dry out. Restaurants do this step religiously because they understand that oil facilitates browning.
- Place the baking dish in your preheated 450°F oven. Set a timer for 20 minutes, then plan to check the chicken at that point. Most chicken breasts of this size will be completely cooked through in 20-30 minutes, but your specific oven temperature, rack position, and the exact thickness of your breasts will affect timing. Here's what you're looking for: the internal temperature at the thickest part of the largest breast should reach 165°F when measured with an instant-read thermometer. This is the safe temperature according to USDA guidelines. More importantly for flavor and texture, 165°F is where the proteins have set enough to retain moisture, but before they've squeezed out all their water and become dry. If after 20 minutes the tops of your chicken are browning beautifully but the internal temperature is only 155°F, loosely cover the tops with foil to prevent over-browning while the insides finish cooking. This is the move that prevents burnt herbs and undercooked meat simultaneously.
- Once your chicken reaches 165°F, remove it from the oven and transfer the pieces to a serving plate. Loosely cover with foil and let rest for 5 minutes. This resting period allows the residual heat to distribute evenly throughout the meat, completing the cooking process gently. But more importantly, it allows the muscle fibers to relax and reabsorb some of their juices. If you cut into the chicken immediately after removing it from the oven, those juices run onto the plate instead of staying in the meat. A 5-minute rest changes the eating experience from "good" to "restaurant-quality." Just before serving, squeeze fresh lemon juice over each piece. That bright acidity cuts through the richness of the oil and the depth of the spices, waking up your palate and making every bite taste fresher.
FAQs
Can I use frozen chicken, or does it need to be fresh?
You can absolutely use frozen chicken—just thaw it completely in the refrigerator before cooking (usually 24 hours for thick breasts). Thaw completely because partially thawed chicken cooks unevenly, with the outside overcooking while the inside remains undercooked. Once thawed, pat it dry exactly as you would fresh chicken and proceed with the recipe. The flavor and texture will be essentially identical to using fresh chicken. Freezing doesn’t significantly damage the protein structure of chicken breast, so defrosted chicken browns and cooks just as beautifully as fresh.
What if my oven runs hot or cold? How do I adjust cooking time?
Every oven has personality. If your oven runs hot, your chicken might cook faster than the stated 20-30 minutes. If it runs cold, it might take closer to 35-40 minutes. The solution is simple: don’t rely on time. Use an instant-read thermometer and cook to temperature (165°F internal temperature) rather than to time. Check at 18 minutes and every 2-3 minutes thereafter. Within two or three cookings, you’ll have a personal sense of your oven’s actual temperature and can estimate timing more accurately. Alternatively, ask your oven repair person or consult your oven manual—many ovens can be recalibrated for accuracy.
Can I double this recipe, and if so, how do I adjust cooking time?
Absolutely. Double the ingredient quantities and use either two baking dishes (or one large roasting pan) with the chicken arranged so pieces don’t touch. Cooking time remains approximately the same—20-30 minutes—because you’re using the same oven temperature and the individual pieces still receive direct heat. The key is having enough space so pieces aren’t crowded. If you crowd them, they steam instead of brown. Doubled recipe should still take about 30 minutes maximum, checked via thermometer rather than by time.
Is there a way to make this recipe on the stovetop instead of the oven?
Yes, though results differ slightly. Heat 1 tablespoon avocado oil in a large skillet over medium-high heat. Pat your seasoned chicken dry and place it in the hot oil. Sear for 4-5 minutes per side without moving it—resist the urge to flip early. You want a golden crust to develop. Once both sides are golden, reduce heat to medium, cover loosely, and cook 8-10 minutes more until the internal temperature reaches 165°F. The advantage is you get a better crust from direct pan contact. The disadvantage is you can’t use oil spray quite as effectively, and monitoring is more hands-on. I prefer the oven method for consistency, but the stovetop method works beautifully for weeknights when you have 20 minutes to watch the pan.
Can I use chicken thighs instead of breasts? What adjusts?
Chicken thighs are actually more forgiving and flavorful, though they cook slightly differently. Thighs have more fat content (which translates to juicier meat even if you overcook slightly) and darker, more flavorful meat. Use the same spice rub and cooking temperature (450°F), but extend cooking time to 25-35 minutes depending on thickness—thighs typically take 10 minutes longer than breasts to reach 165°F because of their size and fat density. The good news: thighs are almost impossible to dry out, so you have more margin for error. The flavor-to-cost ratio is also better with thighs. Some people actually prefer this version, myself included, though it’s less traditional for a “Cajun chicken breast” copycat specifically.
More Restaurant Copycat Recipes
- Shrimp Po’ Boy Sandwich – New Orleans classic that brings the same Cajun/Creole flavor profile to a completely different protein and preparation
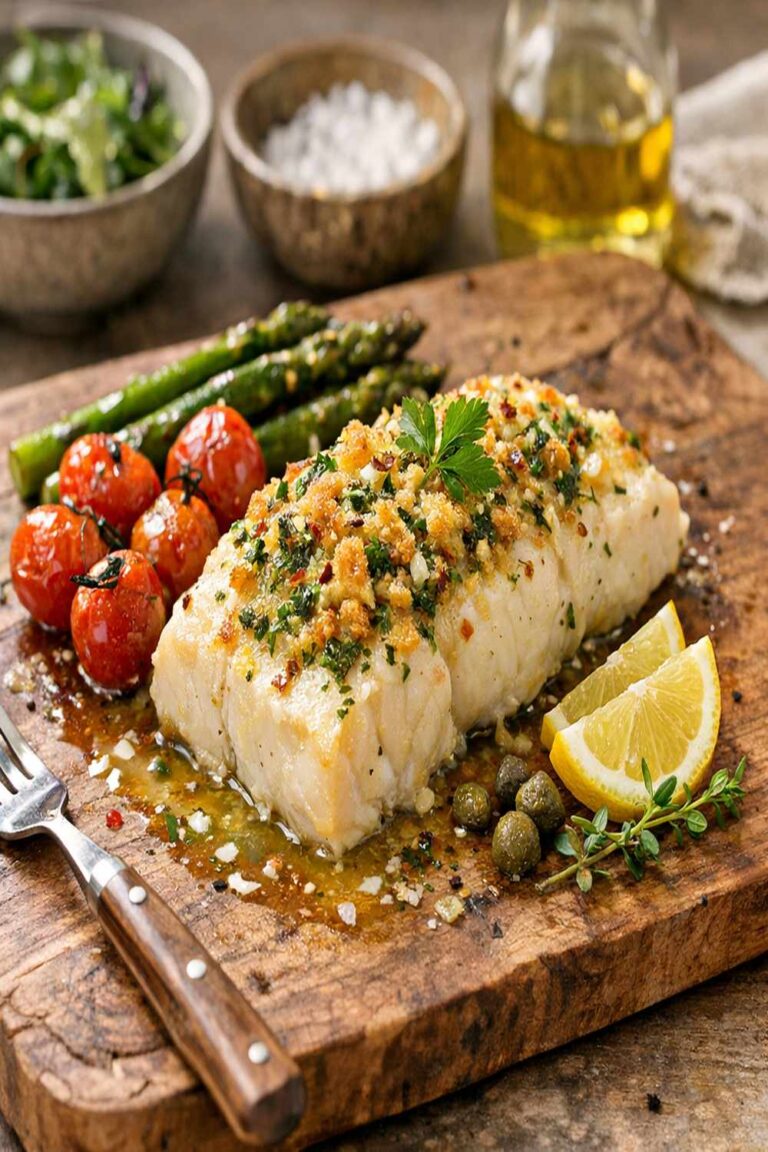
- Baked Cod Fillet Recipe – Lighter seafood application using similar technique and some overlapping spices
-