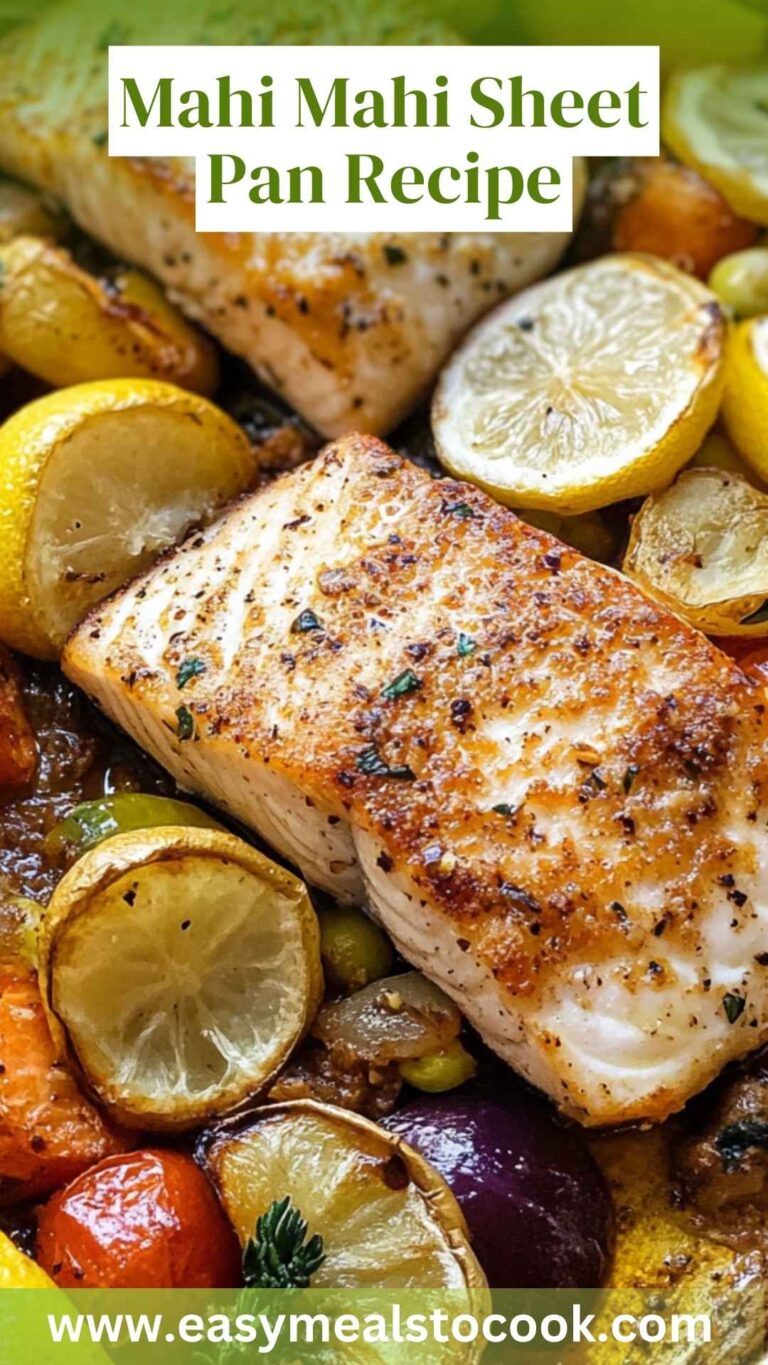
Baked Cod Fillet Recipe
This post contains affiliate links. As an Amazon Associate I earn from qualifying purchases.
If you’ve always wanted to make baked cod but felt intimidated by cooking fish, I’m here to tell you: this is your starting point. I see overwhelmed home cooks all the time who think fish requires fancy techniques or expensive equipment. Here’s the truth from my years as a registered dietitian: baked cod is one of the easiest proteins you can master, and it teaches you skills that carry into every other dish you’ll ever make. This recipe comes together in under 30 minutes with ingredients already living in your pantry. If you’re looking for inspiration beyond the basics, my Baked Cod With Lemon And Capers Recipe offers a slightly more advanced variation once you feel confident with this foundation.
How to Make Baked Cod Fillet Recipe for the First Time (You’ve Got This)
My first attempt at baked cod happened during a particularly stressful week in my early nutrition career. I was overwhelmed with client consultations, and my family was tired of the same rotated meals. I remember standing in my Norwood kitchen at 6 p.m., knowing I had 45 minutes before dinner needed to hit the table, and all I had defrosted was a package of cod fillets.
I was terrified of overcooking it. I’d heard all the stories—fish turning into rubber, falling apart, tasting fishy. But my mom’s voice from my childhood came to me: “Meals don’t have to be complicated to bring people together.” So I grabbed what I had: lemon juice from the fridge, olive oil, a pinch of salt, and fresh parsley from my windowsill garden. Twelve minutes in a hot oven. That’s it.
My family ate in silence for the first minute, then my husband asked for seconds. My daughter asked when we were having “this one” again. And I realized something profound: the simplest dishes, made with intention and pantry staples, create the most memorable moments.
What to Expect Before You Start
Before you begin, let me set your expectations so you feel completely prepared. This recipe takes just 30 minutes from start to serving, with most of that time being passive oven work. The actual hands-on time is closer to 5 minutes. You’re not learning complex knife skills or managing multiple pans here—you’re learning the foundation of how heat, moisture, and timing work together to transform a simple ingredient into something delicious.
- The difficulty level is genuinely beginner-friendly. Fish cooks quickly, which seems scary but is actually your greatest advantage. There’s a wide window of doneness where your cod will be perfect. It won’t suddenly transform into rubber at minute 13 if you started at minute 10. Beginners often overthink this.
- You might worry about the fish falling apart or sticking to the pan. This doesn’t happen with proper technique, and I’ll show you exactly how to prevent it. Pat your cod dry before cooking, use a baking sheet lined with parchment paper, and you’re golden.
- The smell while cooking is not an indication of flavor. Some people get nervous about a “fishy” smell. Fresh cod has a mild aroma—nothing strong or unpleasant. If yours smells aggressively “fishy,” that’s a sign your fish wasn’t fresh to begin with, not that you’ve made a mistake. Choose fillets that smell like the ocean, not like a fish market from 1987.
Equipment You’ll Need (And What You Can Skip)
Here’s what I love about this recipe: you probably already own everything you need. I’m not going to sell you a fancy fish spatula or specialized baking sheet. Let’s keep this real and budget-friendly.
- A standard baking sheet – any metal baking pan you already have works perfectly. If you have an 9×13-inch pan, even better. If you have something smaller, that’s fine too—just arrange your fillets in a single layer without crowding.
- Parchment paper – this prevents sticking and makes cleanup effortless. It costs about a dollar and lasts forever. If you don’t have it, you can lightly oil your pan instead, though I truly recommend keeping a box on hand.
- A kitchen thermometer (optional but helpful for beginners) – I use mine to check doneness, especially when I’m teaching someone. Cod is done at 145°F internal temperature. But honestly? The visual cues I’ll teach you work just as well.
- A small bowl for mixing – any mixing bowl in your kitchen. You’ll combine your oil, lemon juice, and spices here before applying to the fish.
- A measuring spoon and tablespoon – basic kitchen tools you almost certainly own. These ensure consistency and prevent over-salting, which is the most common beginner mistake with fish.
The Ingredients – A Beginner’s Shopping Guide
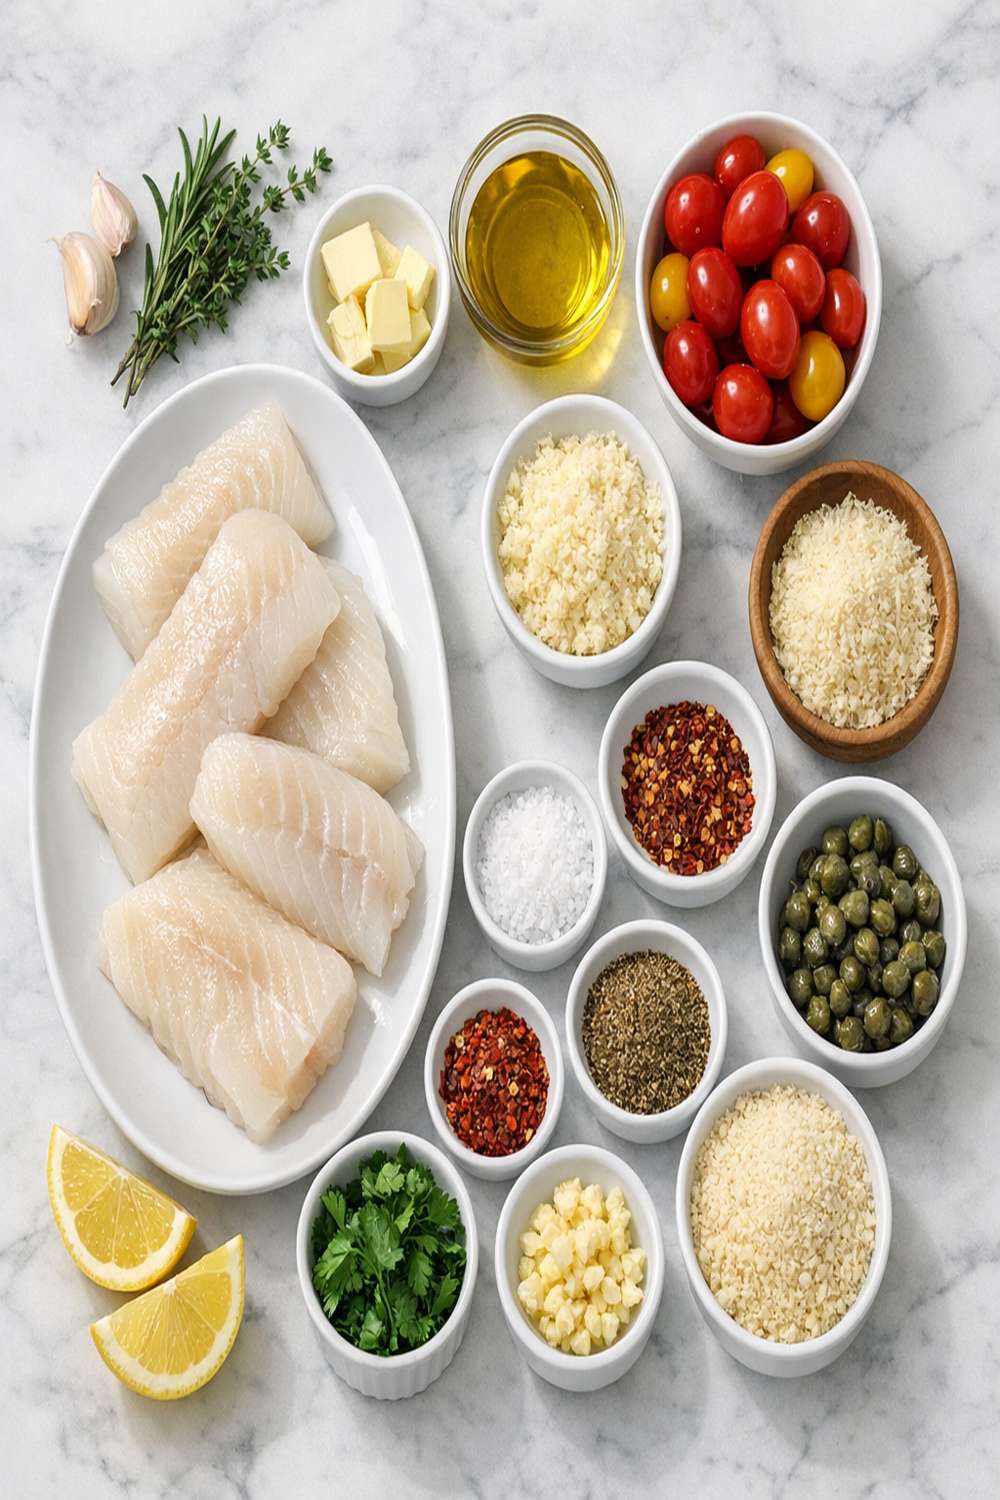
Every single ingredient in this recipe is something I keep in my pantry at all times. None of these are fancy or hard to find. Let me walk you through where to find each one and what to look for when you’re shopping, so you feel completely confident at the store.
- ½ teaspoon garlic powder (optional addition that I love; already in most pantries and adds subtle depth without any extra prep work)
- 3 small dashes cayenne pepper (this gives gentle heat without overwhelming the fish; if you don’t like spice, use white pepper instead, or skip it entirely—this is flexible)
- ¼ teaspoon fine sea salt (not table salt, which has additives and tastes metallic; sea salt is a staple pantry item that costs just a few dollars and lasts for months)
- 2 tablespoons low-sodium chicken or vegetable broth (optional; adds moisture and flavor to the pan while the cod bakes, which is a professional technique that home cooks often skip)
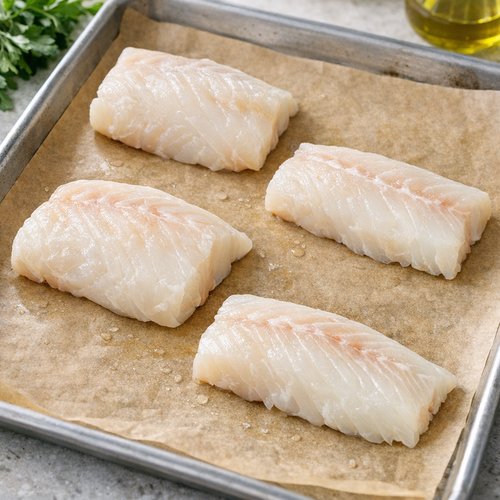
- 1 pound (450g) cod fillets, about ¾-inch thick (look for fillets that are pale white or off-white in color, with a slightly translucent appearance; they should smell fresh like the ocean, not pungent; buy from the fish counter and ask the fishmonger when they arrived—same-day delivery is ideal; frozen cod works beautifully too and often costs less)
- 1 tablespoon freshly squeezed lemon juice (fresh is non-negotiable here—bottled lemon juice lacks the brightness that makes this dish sing; keep lemons in your fruit bowl; one lemon yields about 2-3 tablespoons of juice)
- 1 tablespoon fresh flat-leaf parsley, chopped (fresh herbs make a visible difference in how appetizing your dish looks; buy a small bunch from the produce section; you can store parsley upright in a glass of water in the fridge for up to two weeks)
- 1½ tablespoons extra virgin olive oil (choose a bottle that says “cold-pressed” or “first-pressed”; this oil should live in your pantry year-round and is one of the most versatile ingredients in your kitchen)
Step-by-Step: Your First Baked Cod Fillet Recipe
I want you to feel absolutely confident before you start. Read through all the steps once without cooking, so there are no surprises. Then come back and cook along with my instructions. That’s what I tell every person who’s never made fish before, and it changes everything. You’ll recognize each step before you’re doing it.
Step 1: Prepare Your Workspace and Preheat Your Oven
Turn your oven on to 400°F (205°C). This takes about 10-12 minutes to preheat, and you want that done before your fish hits the pan. While your oven is heating, take out your baking sheet and line it with parchment paper. Tear off a piece large enough to cover the bottom and sides slightly. If parchment paper curls up, just anchor the corners with a tiny dab of oil on the sheet itself—it’ll stay flat once your fish is on top.
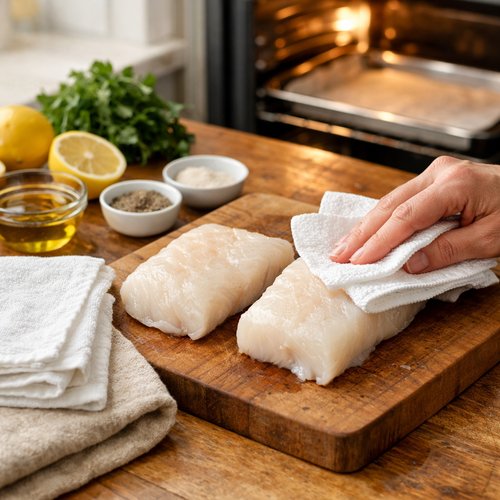
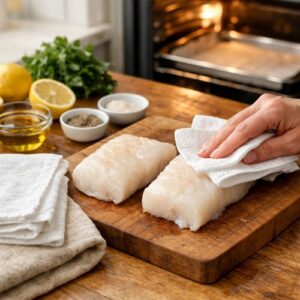
Now is when you prepare your cod fillets. Remove them from the refrigerator and gently pat them completely dry with paper towels. This is the most important step for getting a beautiful texture. Moisture on the surface prevents browning and makes the fish steam instead of bake. Take your time here. It feels gentle, not aggressive. You’re removing surface water, not pressing out the moisture from inside the fish itself.
Step 2: Make Your Simple Flavor Mixture
Pour your 1½ tablespoons of olive oil into a small bowl. Add the 1 tablespoon of freshly squeezed lemon juice (squeeze it right from half a lemon if you have one—it takes 10 seconds). Now add your ¼ teaspoon of sea salt, 3 dashes of cayenne pepper, and if you’re using it, ½ teaspoon of garlic powder. Stir this together with a small spoon for about 15 seconds until combined.
Here’s what this mixture does: the oil carries fat-soluble flavor compounds that coat the fish beautifully. The lemon juice adds brightness without any heaviness. The salt enhances the natural sweetness of the cod. The cayenne adds a whisper of heat. Together, they create flavor while you sleep—well, while the fish bakes.

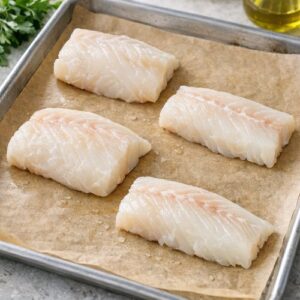
Step 3: Arrange Your Cod on the Prepared Pan
Place your dry cod fillets on the parchment-lined baking sheet in a single layer. They should not be touching each other—leave about an inch of space around each fillet. This allows heat to circulate evenly and prevents them from steaming each other instead of baking.
If you have fillets of different thicknesses, position them so the thicker ends are toward the hotter corners of your oven (usually the back corners). This helps everything cook at the same pace.
Step 4: Apply Your Flavor Mixture and Add Moisture
Drizzle your oil-lemon mixture evenly over the top of each fillet. Use a spoon to do this slowly and deliberately. The oil should coat the top and some should pool slightly on the pan itself—this is perfect. You want to use all of your mixture; nothing should be left in the bowl.
Now—and this is the professional touch that most home cooks skip—pour about 2 tablespoons of low-sodium broth into the bottom of the pan, around (not on top of) the fish. This creates steam that keeps the cod impossibly moist while it bakes. If you don’t have broth, use water. If you use nothing, your cod will still be delicious, just slightly less tender. But I encourage you to try it this way.

Step 5: Bake Until Perfect Doneness
Place your baking sheet into the preheated 400°F oven. Set a timer for 10 minutes. At the 10-minute mark, open your oven and peek at your cod. You’re looking for specific visual cues that I’ll explain in the next section. If your fillets are ¾-inch thick, they’ll likely be done at 10 minutes. If they’re thicker (closer to 1 inch), they might need 12 minutes. Close the door and check every 1-2 minutes after the 10-minute mark until doneness is achieved.
Do not walk away from the oven during this time. I know it feels paranoid, but fish cooks so quickly that you want to be present. This is actually a gift—it means you’ll know exactly what “done” looks like, and you’ll recognize it instantly every single time you make this recipe.

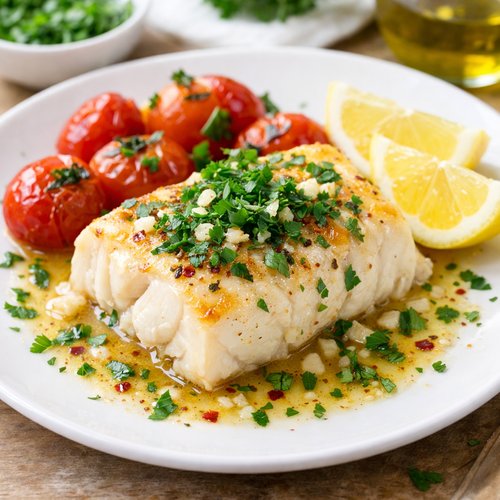
Step 6: Finish and Serve Immediately
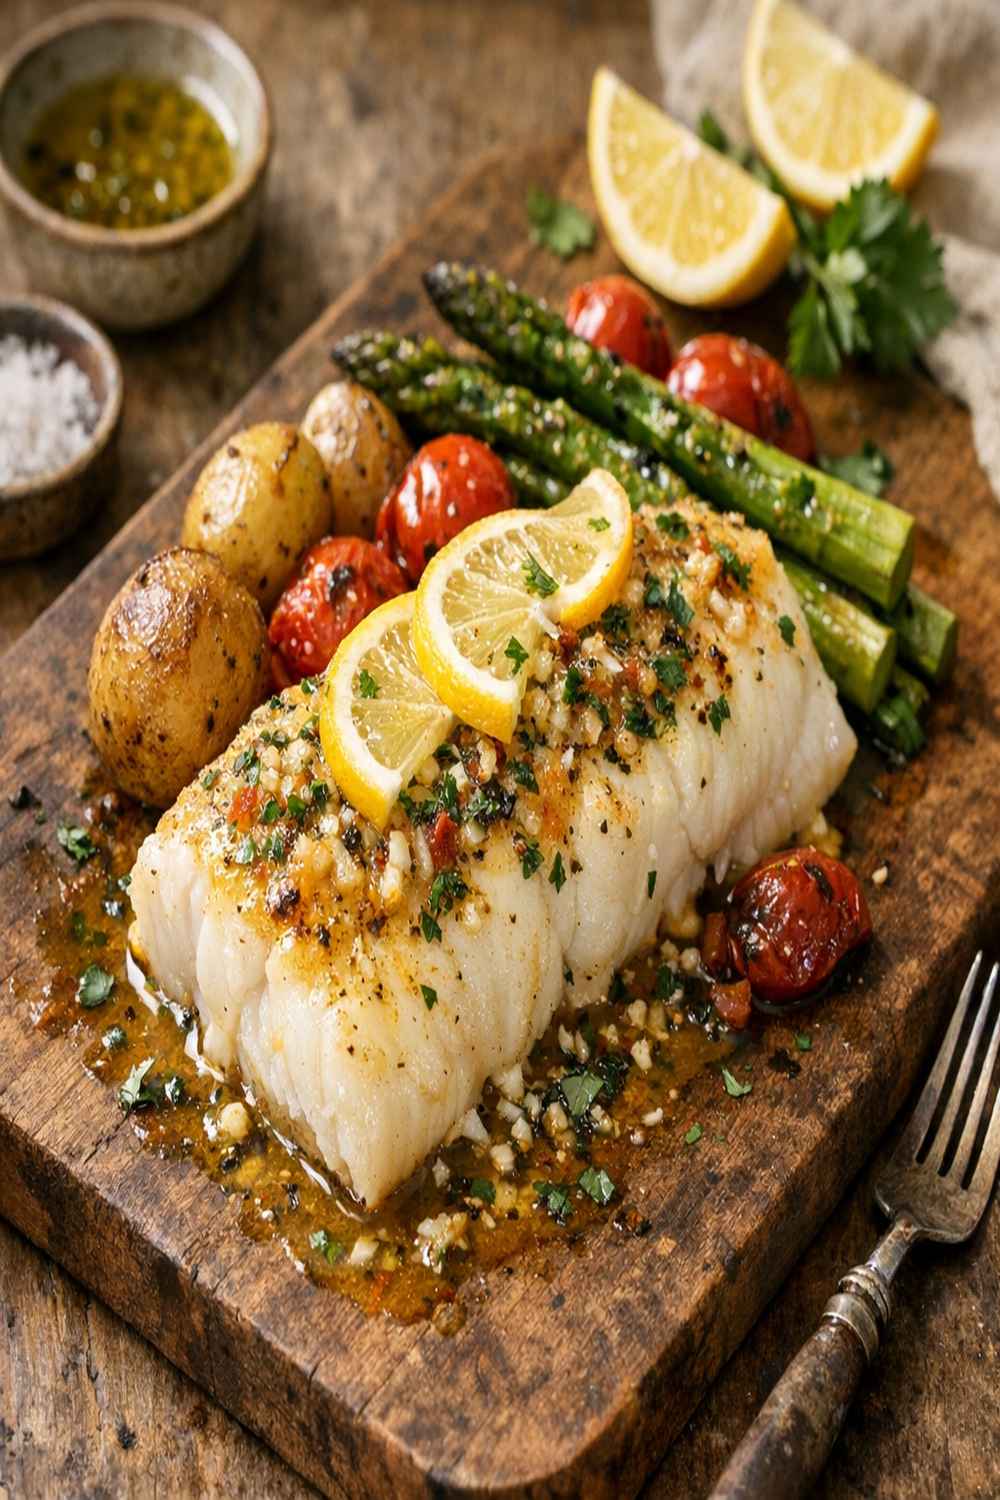
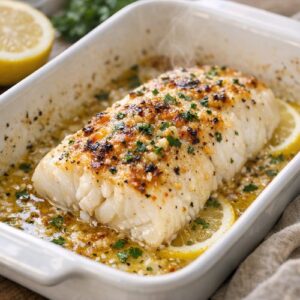
When your cod is ready, remove it from the oven using oven mitts (the pan and any liquid will be hot). Sprinkle your 1 tablespoon of fresh chopped parsley evenly over the top of each fillet. The parsley should still be bright green—not wilted, not yellowed. This brightens the appearance and adds a fresh herbal note that makes people think you spent hours cooking when you spent 30 minutes.
Serve immediately onto plates while the fish is still hot. Cold baked cod loses its texture and appeal, so don’t let it sit. Plate it, eat it, enjoy it.
How to Tell If You Did It Right
Success in cooking comes down to recognizing what “done” actually looks, smells, and feels like. Let me give you the exact signs that your cod is perfectly cooked, because this knowledge will serve you forever—not just with fish.
- Visual doneness: Your raw cod is translucent and almost glass-like. As it bakes, it gradually turns opaque and white. When it’s done, it will be completely opaque from edge to edge, with no translucent or raw-looking areas remaining. The flesh should look moist and tender, not dry or gray. If you gently push a fork into the thickest part, the flesh should flake apart easily into tender, moist pieces—not shred, not stay solid, but flake naturally along the muscle fibers.
- Temperature check: If you’re using a thermometer, the internal temperature should read 145°F in the thickest part of the fillet. This is the USDA standard for cooked fish and ensures food safety while maintaining moisture. If you don’t have a thermometer, the visual flake test (fork pressing gently into the flesh) is equally reliable once you’ve done it a few times.
- Aroma: Your cod should smell fresh and lemony, with a subtle hint of sea-like aroma. It should smell pleasant and appetizing. If it smells strongly fishy, pungent, or unpleasant, something went wrong earlier—either with the freshness of your fish or something else. But if the smell is mild and fresh, you’ve succeeded.
- Texture upon eating: Take your first bite. The texture should be tender, moist, and delicate. It should never be rubbery, dry, or tough. It should melt on your tongue slightly. If you’re experiencing this, you’ve absolutely nailed it.
What Went Wrong? Beginner Fixes
Not everything goes perfectly on the first try, and that’s completely normal. Let me address the most common beginner mistakes I’ve seen in my nutrition practice and in my own kitchen, along with exactly how to prevent or fix them next time.
- Your fish came out dry and tough. This happens when beginners overcook. Cod goes from perfectly moist to dry in about 2-3 minutes once it hits the threshold. The fix: don’t skip the broth in the pan—it creates humidity that prevents drying. Set your timer for 10 minutes, then check every minute after that. Your eyes are more trustworthy than time alone. For next time, remove the fish 30 seconds before it looks fully opaque—carryover cooking will finish it while you’re plating.
- Your fish was still slightly translucent in the center. You pulled it out just a tiny bit early. This is an easy fix: put it back in for just 1-2 more minutes. It’s impossible to “ruin” partially cooked fish by putting it back in. Unlike overcooked fish (which you can’t fix), underdone fish is recoverable in seconds.
- Your fish stuck to the pan or fell apart when you tried to remove it. You either skipped the parchment paper or didn’t let it rest for 1-2 minutes before moving it. The fix: always use parchment. If it sticks anyway, slide a thin spatula under the fillet gently and let it release. Don’t force it. Parchment costs about a penny per use and eliminates this problem entirely.
- Your dish tasted too salty. You either used table salt instead of sea salt (which contains additives and tastes harsher), or you added extra salt beyond the recipe. Sea salt is more flavorful and you need less of it. Measure carefully using a measuring spoon, not a pinch or dash. You’re building flavor, not drowning it in salt.
- The fish was bland, even though you followed the recipe exactly. You probably used bottled lemon juice instead of fresh, or your fresh lemon was old and had lost its juice. Fresh lemon juice is essential—it’s the main flavor carrier in this dish. Store lemons at room temperature for about a week. You can tell they’re fresh when they feel slightly heavy for their size and yield immediately when gently squeezed.
Your Next Steps After Mastering This
Once you’ve made this baked cod successfully, you’ve actually learned multiple techniques that carry into dozens of other dishes. You’ve learned how to prepare delicate proteins, how heat and time work together, how seasoning at the right moment matters, and how simple ingredients create complex flavors.
Next, try my Baked Salmon Recipe, which uses the exact same technique but with a fattier fish, so you’ll learn how different proteins respond to the same cooking method. You could also explore Baked Pear Recipe to see how oven-baking works with vegetables and fruits—it’s the same foundation, completely different application.
These foundational skills—gentle heat, proper seasoning, respecting cooking times—become instinctive. You’ll start applying them everywhere: roasting vegetables, baking chicken, cooking shrimp. This one 30-minute recipe is actually your gateway to confident, intuitive cooking across your entire repertoire.
Expert’s Nutritional Tip: Why Cod Is a Nutrition Powerhouse
As a registered dietitian, I want to highlight something most recipes gloss over: cod is one of the most nutrient-dense proteins available, especially for people managing their weight or heart health. A 4-ounce serving of cooked cod contains only about 90 calories and less than 1 gram of fat, yet it delivers nearly 20 grams of complete protein. This means your body gets all nine essential amino acids needed for muscle repair, hormone production, and immune function.
What makes this particularly special is the omega-3 content. While fatty fish like salmon contain higher omega-3 levels, cod still provides meaningful amounts of these anti-inflammatory fatty acids, particularly EPA and DHA. The lemon juice in this recipe isn’t just for flavor—research shows that vitamin C from citrus enhances the absorption of iron found in fish, so that citric acid is doing nutritional work alongside its flavor work.
I often recommend this recipe to clients who are new to eating fish because the simplicity reduces the mental barrier. People who think they “don’t like fish” often discover they don’t like overcooked, heavily-sauced fish. Fresh, properly-cooked fish is completely different. This recipe proves that point beautifully.
Make-Ahead Guide: Meal Prep Like a Professional
You don’t have to cook this recipe fresh every single time. Here’s how I use it strategically in my meal planning:
The night before: Pat your cod dry, arrange it on your parchment-lined pan, cover loosely with plastic wrap, and refrigerate. Mix your oil-lemon-spice mixture in a small container. The next day, simply apply the mixture and bake—saves you 2 minutes of actual prep time. The fish is fresher when cooked within 24 hours of purchasing, so this is the ideal timeline.
Cooking in batches: Make a full pan (2 pounds of cod) instead of 1 pound. Bake exactly the same way. You now have leftovers for 2-3 additional meals. Cooked cod keeps for 3 days in an airtight container in the refrigerator. Use the leftovers in salads, grain bowls, or fish tacos. Cold baked cod flakes beautifully into sandwiches or mixed into mayo for a quick lunch.
Freezing for later: You can freeze uncooked cod fillets for up to 3 months. I recommend doing this the day you bring them home from the fish counter. Wrap each fillet individually in plastic wrap, then place all of them in a freezer bag. When you’re ready to cook, thaw them in the refrigerator overnight, then follow the recipe exactly. Do not refreeze after thawing—once thawed, cook it within 24 hours.
The professional move: Cook a batch of cod, let it cool completely, then portion it into small glass containers with the lemon oil drizzled over each piece. These become grab-and-go protein for breakfast (yes, fish for breakfast!), lunch, or snacks throughout the week. When hunger strikes unexpectedly, you already have cooked protein ready.
Can I Store Baked Cod Fillet Recipe?
Yes, and it’s actually easier to store than raw fish. Once cooked and cooled to room temperature, place your baked cod in an airtight glass container. Refrigerate for up to 3 days. It tastes best eaten within 2 days, but it’s safe for 3. The flavor and texture begin to diminish after day 2, but it’s still perfectly edible and nutritious.
To reheat: place your cold cod on a baking sheet, cover loosely with foil, and warm in a 325°F oven for about 5-8 minutes until heated through. Alternatively, you can eat it straight from the refrigerator—cold baked cod makes a wonderful addition to salads or grain bowls. Don’t reheat in the microwave; it will dry out noticeably. The oven method preserves texture beautifully.
Do not freeze cooked cod for longer than 1 month. It becomes mushy and loses its delicate flake. If you’re going to freeze seafood, do it before cooking, not after.
Nutrition Information
Based on USDA data, one serving of this baked cod fillet recipe (4 ounces of fish with the oil and lemon mixture, serves 4) provides:
- Calories: 115
- Protein: 19 grams
- Fat: 3.5 grams (mostly heart-healthy monounsaturated fat from the olive oil)
- Carbohydrates: 0 grams
- Fiber: 0 grams
- Omega-3 fatty acids: 200-250 mg (primarily EPA and DHA)
- Sodium: 150 mg (very low, thanks to using sea salt properly)
- Excellent source of selenium, phosphorus, and B vitamins, especially B12 and niacin
This makes baked cod an exceptionally nutritious choice for people managing diabetes, heart disease, or weight. The high protein-to-calorie ratio means you feel full and satisfied long after eating. The omega-3 content supports brain and heart health. The vitamins and minerals support energy metabolism and immune function.
What Can I Serve With Baked Cod Fillet Recipe?
The beauty of baked cod is its versatility. It pairs with nearly every vegetable and grain combination you can imagine. Here are my favorite, stress-free serving combinations that complement rather than compete with the delicate fish:
- Simple roasted vegetables: Toss broccoli, asparagus, or green beans with a drizzle of olive oil and salt. Roast at 400°F (the same temperature as your fish!) on a separate pan for 15 minutes. They finish at exactly the same time. The slight char on the vegetables creates beautiful color contrast with the white fish.
- Creamy white rice: Make a quick risotto or simply cook jasmine rice in low-sodium broth instead of water. Top with the pan juices from your cod for instant sauce.
- Baked potatoes or sweet potatoes: Start these first (they take 30-35 minutes), then add your cod pan to the oven 20 minutes later. Everything finishes together. The starch balances the lean protein perfectly.
- Fresh green salad with lemon vinaigrette: The acidity in the salad dressing echoes the lemon in your fish—they taste like they were made for each other. Try Baked Latke Recipe as a starchy side for a completely different meal option using the same protein.
- Roasted cabbage: I’m obsessed with Baked Cabbage Recipe as a side dish. It’s crispy, sweet, and creates beautiful contrast in both flavor and color. The earthiness of cabbage balances the delicate fish beautifully.
- Buttered egg noodles: Toss warm cooked noodles with a tablespoon of butter, a squeeze of lemon, and fresh dill. Serve the cod on top. Comfort food that still feels elegant.
Seasonal Variations: Adapt This Recipe Year-Round
While this basic baked cod recipe is perfect as-is, here’s how I adapt it seasonally to keep things fresh and to take advantage of what’s in season:
Spring: Add fresh asparagus to the pan around the cod about 5 minutes before it finishes cooking. Use fresh tarragon instead of parsley—it’s more delicate and pairs beautifully with spring vegetables. Add 1 tablespoon of fresh peas scattered over the top at serving.
Summer: Top the cod with thin lemon slices before baking (they bake right onto the fish!). Use fresh basil instead of parsley. Serve alongside simple tomato salad. The brightness of summer tomatoes mirrors the brightness of your lemon-baked fish.
Fall: Add root vegetables to your pan—thin-sliced carrots, parsnips, or beets work beautifully. They won’t cook in 10 minutes, so roast them for 15 minutes first, then add your cod and continue baking. Use dill instead of parsley for earthier flavor.
Winter: Keep it simple and cozy. Use the exact recipe as-is—it becomes your refuge meal when everything feels heavy and complicated. Serve with creamy mashed potatoes and braised winter greens. The simplicity feels intentional rather than bare.
Baked Cod Fillet Recipe
Ingredients
Method
- Turn your oven on to 400°F (205°C). This takes about 10-12 minutes to preheat, and you want that done before your fish hits the pan. While your oven is heating, take out your baking sheet and line it with parchment paper. Tear off a piece large enough to cover the bottom and sides slightly. If parchment paper curls up, just anchor the corners with a tiny dab of oil on the sheet itself—it'll stay flat once your fish is on top. Now is when you prepare your cod fillets. Remove them from the refrigerator and gently pat them completely dry with paper towels. This is the most important step for getting a beautiful texture. Moisture on the surface prevents browning and makes the fish steam instead of bake. Take your time here. It feels gentle, not aggressive. You're removing surface water, not pressing out the moisture from inside the fish itself.
- Pour your 1½ tablespoons of olive oil into a small bowl. Add the 1 tablespoon of freshly squeezed lemon juice (squeeze it right from half a lemon if you have one—it takes 10 seconds). Now add your ¼ teaspoon of sea salt, 3 dashes of cayenne pepper, and if you're using it, ½ teaspoon of garlic powder. Stir this together with a small spoon for about 15 seconds until combined. Here's what this mixture does: the oil carries fat-soluble flavor compounds that coat the fish beautifully. The lemon juice adds brightness without any heaviness. The salt enhances the natural sweetness of the cod. The cayenne adds a whisper of heat. Together, they create flavor while you sleep—well, while the fish bakes.

- Place your dry cod fillets on the parchment-lined baking sheet in a single layer. They should not be touching each other—leave about an inch of space around each fillet. This allows heat to circulate evenly and prevents them from steaming each other instead of baking. If you have fillets of different thicknesses, position them so the thicker ends are toward the hotter corners of your oven (usually the back corners). This helps everything cook at the same pace.
- Drizzle your oil-lemon mixture evenly over the top of each fillet. Use a spoon to do this slowly and deliberately. The oil should coat the top and some should pool slightly on the pan itself—this is perfect. You want to use all of your mixture; nothing should be left in the bowl. Now—and this is the professional touch that most home cooks skip—pour about 2 tablespoons of low-sodium broth into the bottom of the pan, around (not on top of) the fish. This creates steam that keeps the cod impossibly moist while it bakes. If you don't have broth, use water. If you use nothing, your cod will still be delicious, just slightly less tender. But I encourage you to try it this way.

- Place your baking sheet into the preheated 400°F oven. Set a timer for 10 minutes. At the 10-minute mark, open your oven and peek at your cod. You're looking for specific visual cues that I'll explain in the next section. If your fillets are ¾-inch thick, they'll likely be done at 10 minutes. If they're thicker (closer to 1 inch), they might need 12 minutes. Close the door and check every 1-2 minutes after the 10-minute mark until doneness is achieved. Do not walk away from the oven during this time. I know it feels paranoid, but fish cooks so quickly that you want to be present. This is actually a gift—it means you'll know exactly what "done" looks like, and you'll recognize it instantly every single time you make this recipe.
- When your cod is ready, remove it from the oven using oven mitts (the pan and any liquid will be hot). Sprinkle your 1 tablespoon of fresh chopped parsley evenly over the top of each fillet. The parsley should still be bright green—not wilted, not yellowed. This brightens the appearance and adds a fresh herbal note that makes people think you spent hours cooking when you spent 30 minutes. Serve immediately onto plates while the fish is still hot. Cold baked cod loses its texture and appeal, so don't let it sit. Plate it, eat it, enjoy it.

Notes
FAQs
Can I use frozen cod for this recipe?
Absolutely, yes. Frozen cod from the grocery store is often fresher than “fresh” cod because it’s frozen immediately after catch. Thaw it overnight in the refrigerator before cooking—never thaw at room temperature. Once thawed, it cooks exactly the same way and takes the same amount of time. The texture will be slightly less delicate than fresh, but still beautiful. Many professional chefs prefer frozen-then-thawed fish because the ice crystals actually help preserve the structure of the flesh.
What if I don’t like spicy food? Can I skip the cayenne pepper?
Absolutely. The cayenne is completely optional and adds only a whisper of heat. If you don’t like any spice, simply skip it. Your cod will be equally delicious. Alternatively, you could replace it with a pinch of white pepper or freshly ground black pepper for subtle complexity without heat. Some people love adding a tiny pinch of paprika (non-spicy) instead for a slight smoky note.
Is baked cod healthy?
This is genuinely one of the healthiest dinners you can make. Cod is extremely lean (only about 1 gram of fat per 4-ounce serving), rich in complete protein, and contains meaningful amounts of omega-3 fatty acids. The olive oil adds heart-healthy monounsaturated fat. The lemon adds vitamin C, which enhances iron absorption. This is a nutrient-dense meal that leaves you satisfied without weighing you down. People often eat more when they’re unsatisfied, so a truly nourishing meal like this actually supports your health in multiple ways.
Can I add vegetables directly to the pan with the fish?
Yes, but strategically. Quick-cooking vegetables like thinly sliced zucchini, asparagus spears, or snow peas can go directly on the pan with the fish. They’ll cook in the same 10-12 minutes. Harder vegetables like carrots, broccoli, or Brussels sprouts need about 10 minutes of a head start, so roast them separately for the first 10 minutes, then add them to the pan with your fish for the final 10 minutes. Planning ahead prevents either the vegetables or fish from being over- or undercooked.
My fish came out dry despite following the recipe perfectly. What’s happening?
Three possibilities: First, your fish was thicker than ¾ inch but you didn’t add extra baking time—thickness directly affects cooking time, and I should have emphasized this more. Second, your oven is running hotter than you think, which is common in older kitchens—every oven is slightly different. Third, you thawed frozen fish at room temperature, which damages the cell structure and causes moisture loss. For next time: arrange fish of equal thickness together, check doneness at 10 minutes and then every 60 seconds, and always thaw frozen fish in the refrigerator overnight. If your oven runs hot (and you can test this with an oven thermometer from any grocery store), reduce heat to 375°F and add 2-3 minutes to your baking time.
More Beginner-Friendly Recipes
- Baked Center Cut Pork Chop Recipe – uses the same oven-baking technique with a different lean protein that cooks in nearly identical timeframes
- Baked Alaskan Cod Recipe – another beautiful preparation of this versatile fish for when you want to explore variations
- Ahi Tuna Sauce Recipe – teaches you how to build complementary sauces to serve alongside simply cooked fish
Your Baked Cod Victory
Here’s what I want you to remember most: cooking this baked cod fillet recipe perfectly isn’t about being a “good cook.” It’s about following simple steps, showing up with fresh ingredients, and being present while something transforms in your oven. The same presence that made family mealtimes sacred in my childhood—that attention, that care, that intention—is still the most important ingredient in every meal I make as an adult.
Your first baked cod won’t just feed your body. It will teach you that cooking can be stress-free, quick, and delicious. It will show you that restaurant-quality meals live in