
Ingredients
Method
Step 1: Prepare Your Oven and Baking Dish
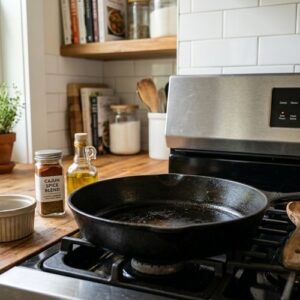
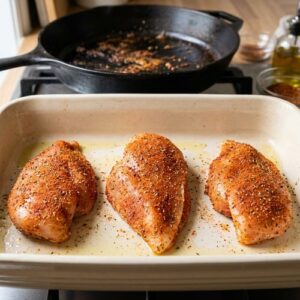
- Set your oven to 450°F and allow it to preheat fully. This is non-negotiable. A fully preheated oven means the chicken hits immediate, high heat, which begins the browning process immediately. If your oven isn't fully preheated, the chicken steams instead of sears, and you lose that caramelized crust restaurants are famous for. While the oven heats, select a 9 x 13-inch baking dish marked as oven-safe up to at least 450°F. Glass baking dishes work beautifully here because you can see the browning on the bottom of the chicken as it cooks. Spray the entire bottom surface generously with avocado oil. Use about 6-8 good sprays. This creates a non-stick surface and provides the oil that will caramelize the spice rub.
Step 2: Mix Your Cajun Spice Blend
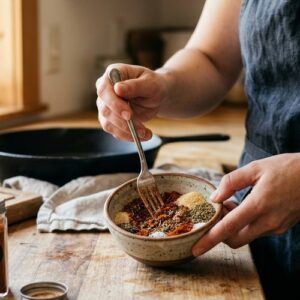
- In a small bowl, combine every dry spice ingredient except the oil. Use a fork to mix them together thoroughly. This step prevents clumping and ensures that when you rub this blend onto the chicken, every piece of meat gets an even distribution of flavors. I always use a fork instead of just stirring with a spoon—the tines break up spice clumps more effectively. The reason restaurants nail this is because they prepare their seasoning blends hours in advance. The spices have time to marry and develop cohesion. You don't need to wait hours, but taking 30 seconds to mix thoroughly makes a real difference in the final flavor intensity.
Step 3: Pat and Season the Chicken
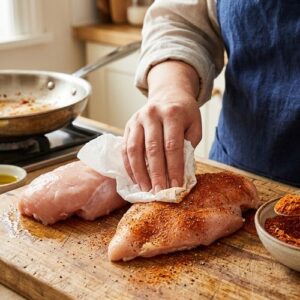
- Pat each chicken breast dry with paper towels. This is the move most home cooks skip, and it costs them the golden crust. Water on the surface of the meat creates steam, and steam prevents browning. Dry chicken means better browning, which means better flavor development. Place the dried chicken breasts on a cutting board. Take about one-quarter of your spice mixture and massage it firmly into the top surface of each breast, pressing the spices into the meat so they adhere. Flip each breast and repeat with the remaining spice mixture on the underside. Your goal is visible seasoning coverage on both sides—you should see red paprika and specks of oregano across the entire surface.
Step 4: Arrange and Oil the Chicken
- Transfer the seasoned chicken breasts to your oiled baking dish, spacing them so they don't touch. They should have at least an inch of space around each piece. This allows heat to circulate, ensuring even cooking and browning. Now comes the restaurant secret: spray the tops of each chicken breast generously with avocado oil. Don't be timid here. Use 4-5 sprays per breast. This oil serves two purposes. First, it protects the herbs from burning in the high heat. Second, it carries the heat to the herb and spice particles on the surface, allowing them to brown and develop flavor rather than just dry out. Restaurants do this step religiously because they understand that oil facilitates browning.
Step 5: Bake with Monitoring
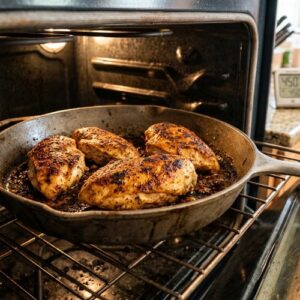
- Place the baking dish in your preheated 450°F oven. Set a timer for 20 minutes, then plan to check the chicken at that point. Most chicken breasts of this size will be completely cooked through in 20-30 minutes, but your specific oven temperature, rack position, and the exact thickness of your breasts will affect timing. Here's what you're looking for: the internal temperature at the thickest part of the largest breast should reach 165°F when measured with an instant-read thermometer. This is the safe temperature according to USDA guidelines. More importantly for flavor and texture, 165°F is where the proteins have set enough to retain moisture, but before they've squeezed out all their water and become dry. If after 20 minutes the tops of your chicken are browning beautifully but the internal temperature is only 155°F, loosely cover the tops with foil to prevent over-browning while the insides finish cooking. This is the move that prevents burnt herbs and undercooked meat simultaneously.
Step 6: Rest and Finish
- Once your chicken reaches 165°F, remove it from the oven and transfer the pieces to a serving plate. Loosely cover with foil and let rest for 5 minutes. This resting period allows the residual heat to distribute evenly throughout the meat, completing the cooking process gently. But more importantly, it allows the muscle fibers to relax and reabsorb some of their juices. If you cut into the chicken immediately after removing it from the oven, those juices run onto the plate instead of staying in the meat. A 5-minute rest changes the eating experience from "good" to "restaurant-quality." Just before serving, squeeze fresh lemon juice over each piece. That bright acidity cuts through the richness of the oil and the depth of the spices, waking up your palate and making every bite taste fresher.