Beef Jerky No Sugar Recipe
This post contains affiliate links. As an Amazon Associate I earn from qualifying purchases.
Whether you’re keto, vegan, or just trying to cut back on refined carbs, you don’t have to miss out on satisfying, homemade beef jerky. I’ve spent years helping clients with different dietary needs find simple solutions that don’t feel restrictive, and this recipe has become a game-changer in my practice. The beauty of making jerky at home is that you control exactly what goes into it—no mystery ingredients, no hidden sugars, just real food. If you love exploring other protein-packed meals, you’ll also appreciate my Steak on the Stovetop recipe for quick weeknight dinners.
Which Version Is Right for You?
I created this guide because I’ve worked with people following every dietary path imaginable. Some of my clients are strict keto and need every snack to support ketosis. Others are plant-based and want the satisfaction of jerky without animal products. A few deal with celiac disease and need absolute confidence that their food is safe. This recipe adapts beautifully to all of these needs without becoming complicated.
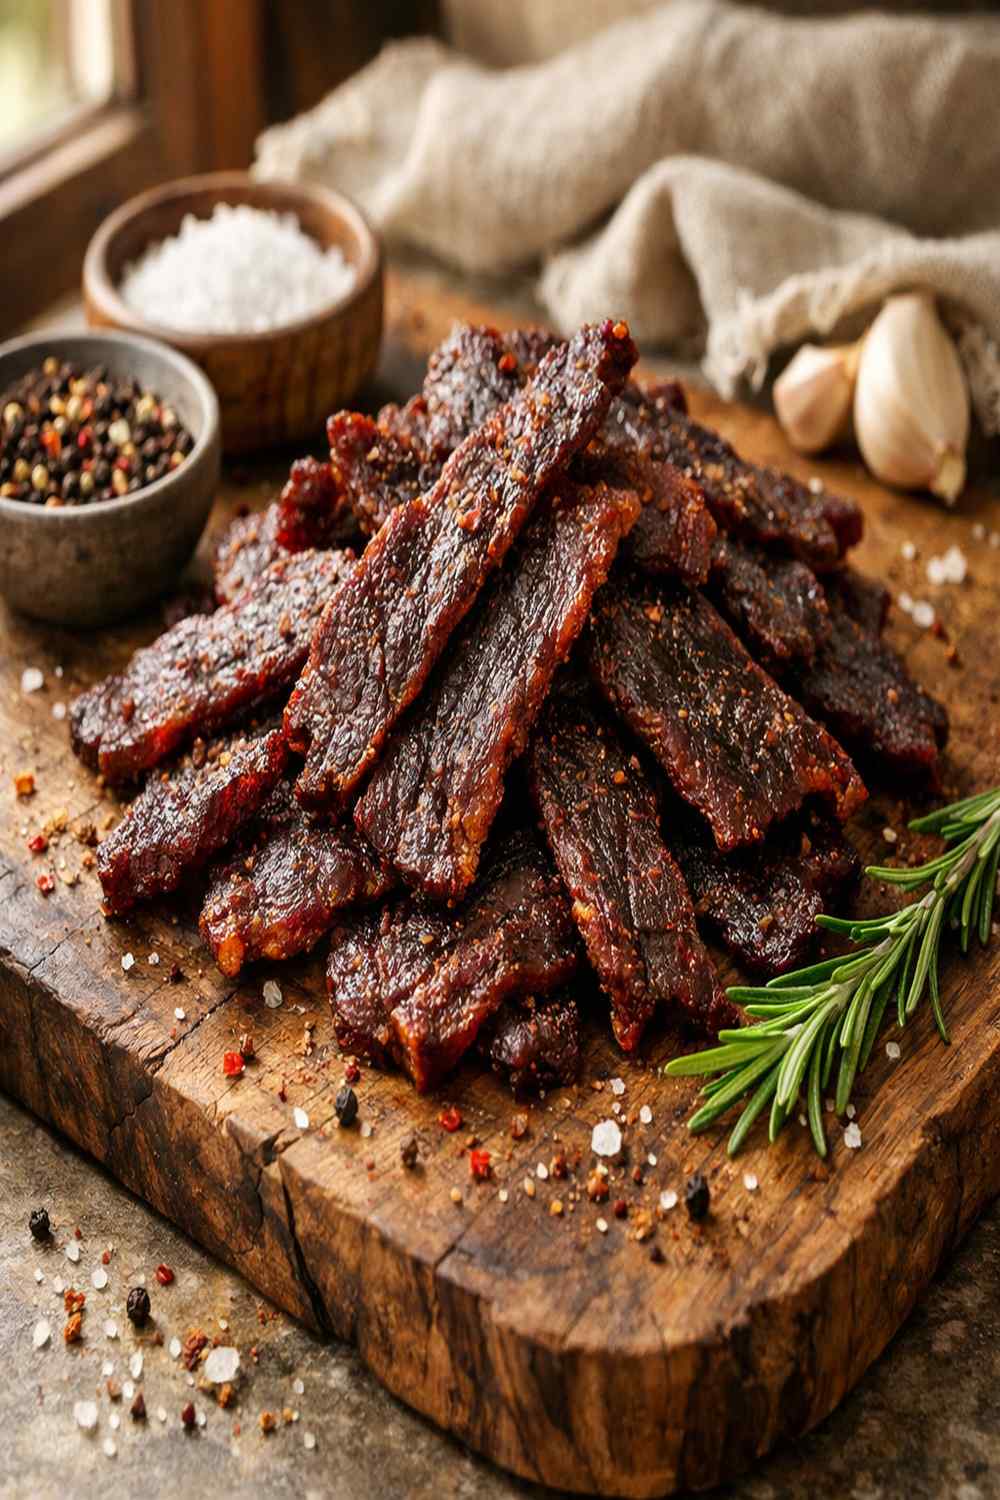
Let me walk you through each version so you can choose what works best for your life right now.
- Keto version – Uses traditional beef flank steak with zero carbs per serving. The spice blend stays exactly the same. You’re looking at roughly 6 grams of fat and 10 grams of protein per ounce, making this perfect for maintaining ketosis while satisfying savory cravings.
- Vegan version – Swaps beef for marinated mushrooms or plant-based meat alternatives. The texture and chew come from proper dehydration and marinades with umami-rich ingredients like tamari and nutritional yeast. It delivers about 2 grams of protein per ounce, which is solid for a plant-based snack.
- Gluten-free version – The base beef jerky is naturally gluten-free, but watch your spice blends and any liquid seasonings. I always recommend buying certified gluten-free spices if celiac disease is a concern in your household.
- Dairy-free version – Since this recipe contains no dairy ingredients, every version is naturally dairy-free. Perfect for those with lactose intolerance or anyone following a whole-foods approach.
The Base Ingredients (Works for All Versions)
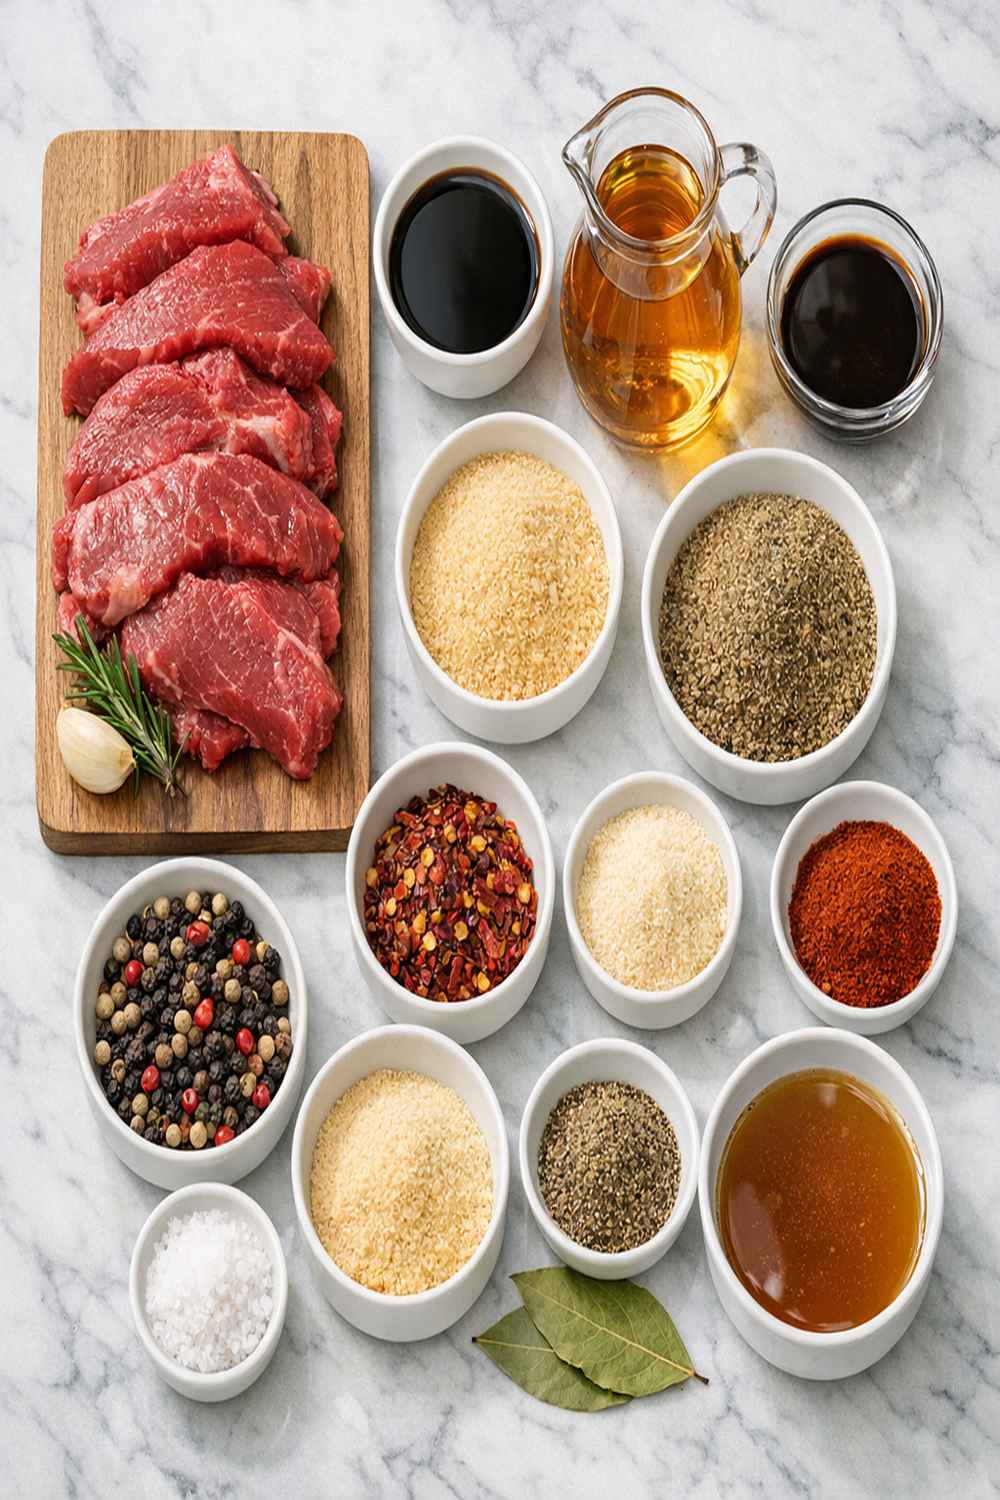
These ingredients form the foundation of your jerky, whether you’re making the traditional beef version or adapting it to your dietary needs. I’ve ordered them by how they’re used, not alphabetically, because I want you to think through the process as you gather what you need.
- 1½ pounds flank steak, partially frozen (the cold helps you slice it thinner and more evenly; ask your butcher to keep it chilled)
- 1 tablespoon chili powder (adds warmth and depth without heat if you prefer mild)
- ½ teaspoon freshly cracked black pepper (the freshness matters; pre-ground loses flavor)
- ½ teaspoon cayenne pepper (adjust based on your heat tolerance; omit if you’re sensitive)
- 1 tablespoon kosher salt (Diamond Crystal brand dissolves more evenly than table salt)
- 1 tablespoon garlic powder (not garlic salt, which adds extra sodium)
- 1 teaspoon smoked paprika (optional but adds incredible depth to all versions)
Dietary Substitution Chart
This chart shows you exactly what to swap if you’re following a specific dietary path. I’ve tested each substitution multiple times in my own kitchen to ensure the final product tastes just as satisfying as the traditional version.
- Flank steak (beef) -> Keto: Keep as is | Vegan: 1½ pounds baby bella mushrooms (sliced ¼-inch thick) or 1 lb plant-based meat | Gluten-free: Keep beef (naturally GF) | Dairy-free: Keep beef (naturally DF)
- Chili powder -> Keto: Keep as is | Vegan: Keep as is | Gluten-free: Buy certified gluten-free brand | Dairy-free: Keep as is
- Kosher salt -> Keto: Keep as is | Vegan: Keep as is | Gluten-free: Keep as is | Dairy-free: Keep as is
- Garlic powder -> Keto: Keep as is | Vegan: Add 1 tablespoon low-sodium tamari for umami depth | Gluten-free: Verify spice blend is certified GF | Dairy-free: Keep as is
How to Make Beef Jerky No Sugar Recipe Your Way
I’m going to walk you through the traditional beef version first, and then I’ll give you the specific modifications for each dietary approach. The technique stays the same—what changes is the protein and sometimes a few supporting ingredients. This takes about 3 hours and 15 minutes start to finish, though most of that is hands-off oven time.
Step 1: Prepare Your Workspace and Preheat
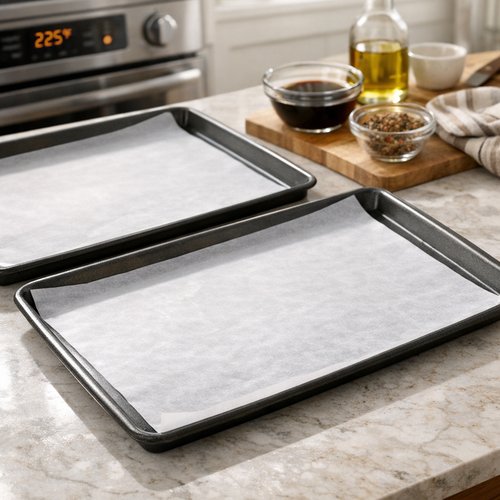
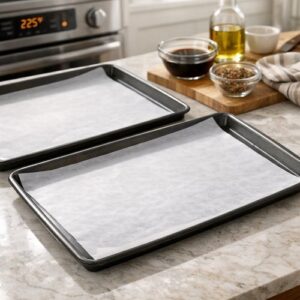
Start by preheating your oven to 225°F. Line two large rimmed baking sheets with parchment paper—this prevents sticking and makes cleanup so much easier. I keep my oven thermometer inside to verify the temperature because older ovens often run hot or cold, and accuracy matters here. While the oven reaches temperature, remove your flank steak from the refrigerator and let it sit for about 5 minutes so it’s easier to handle but still cold enough to slice cleanly.
Vegan modification: If you’re using mushrooms, pat them dry with paper towels first—excess moisture prevents them from reaching the proper jerky texture. For plant-based meat, follow the package instructions for thickness before seasoning.
Step 2: Slice Your Protein Against the Grain
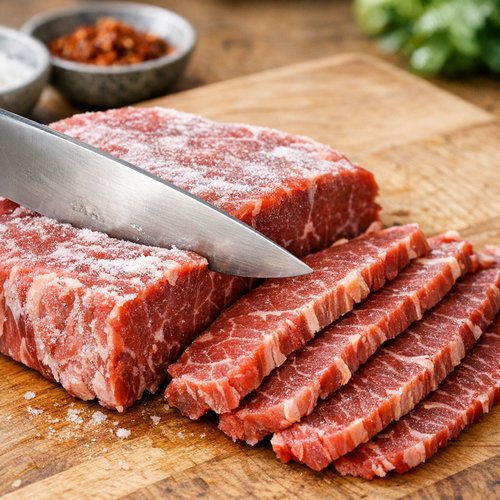
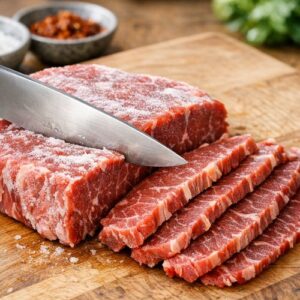
This is where texture magic happens. Place your partially frozen steak on a cutting board and, using a sharp knife, cut crosswise through the meat—meaning you’re slicing perpendicular to the long fibers you see running through it. This breaks up those tough muscle fibers and makes every bite tender to chew. Work toward strips that are roughly 2 inches wide and about ⅛ inch thick. If your slices come out thicker, cut each one lengthwise to reach that ideal thinness.
The partial freezing matters enormously here. I learned this years ago when a client with arthritis struggled with knife control, and I realized that slightly frozen meat is so much more manageable for anyone dealing with hand strength or stability issues.
Vegan modification: For mushrooms, slice them lengthwise to create long, thin strips that mimic the texture of meat jerky. For plant-based meat products, follow their slicing recommendations, which usually call for thin strips as well.
Step 3: Tenderize and Let Rest
Let your meat strips sit at room temperature for about 15 minutes. This allows them to fully thaw and become more pliable. Then arrange them in a single layer on a cutting board, cover loosely with plastic wrap, and use a meat mallet to gently pound them. Work from the center outward with even, light pressure—you’re not trying to smash them flat, just create uniform thickness so they dry evenly in the oven.
This step prevents thick spots that stay chewy while thin spots become brittle. Uniform thickness means uniform drying, and that’s the secret to professional-quality jerky every time.
Vegan modification: Mushroom slices are naturally thin enough that you can skip the pounding step. For plant-based meat, check if it needs tenderizing based on the product instructions.
Step 4: Season Generously
Place all your prepared meat strips in a large bowl. Add the kosher salt, garlic powder, chili powder, black pepper, smoked paprika, and cayenne. Using your hands, toss everything together thoroughly—I mean really work it so every piece gets coated evenly. This takes about 2 minutes of tossing. Your hands will help you feel whether every strip is covered and ensure the spices stick properly.
Vegan modification: Add 1 tablespoon of low-sodium tamari to your seasoning bowl before mixing with mushrooms. This adds salty, savory depth that mimics the umami of meat. Let it sit for 5 minutes so the mushrooms absorb the flavors.
Keto note: All these spices are naturally keto-friendly with zero carbs. The ratio of fat to protein in beef jerky is perfect for maintaining ketosis without feeling deprived.
Step 5: Arrange on Baking Sheets
Spread the seasoned strips across your prepared baking sheets in a single layer, making sure they don’t touch each other. They need air circulation on all sides to dry properly. If you’re crowding the pan, use a third baking sheet. Space is not your enemy here—it’s your ally for perfect texture.
This is also the moment to set a timer for the first rotation. In my practice, I teach clients that setting a reminder on their phone prevents that “Did I rotate those?” worry that pulls you away from other tasks.
Step 6: Bake and Rotate Midway
Place both sheets in the oven and bake for 3 hours total. Midway through—at about the 1.5-hour mark—rotate the position of the baking sheets. Swap the one on the top rack with the one on the bottom. This ensures even drying because every oven has hot spots. You’ll start noticing the aroma after about 45 minutes, and honestly, it’s one of the best parts of this process.
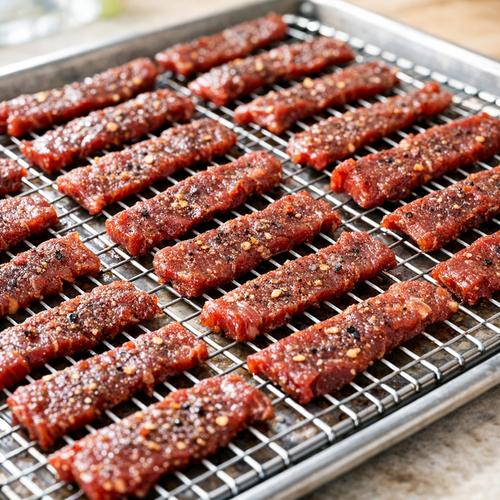
Vegan modification: Mushroom jerky may finish slightly faster, sometimes in 2.5 to 2.75 hours. Watch for the edges to darken and curl slightly, which signals they’re done. Plant-based meat typically follows the same 3-hour timeline as beef.
Your finished jerky should look brown and dried but not burnt. The color should be deep mahogany, not charred black. A slight bend in the strip indicates it’s done; if it snaps cleanly in half, you’ve gone a touch too far.
Step 7: Cool and Store
Remove the beef strips to a cooling rack set on top of a tray or sheet of aluminum foil to catch any drips. Let them cool and continue drying at room temperature for about 30 minutes. This final resting period lets the moisture finish evaporating and the texture set properly. Once cooled, they’re ready to eat immediately or store for later.
This is where I always tell clients to take a moment and simply enjoy what you’ve made. There’s something grounding about homemade food that store-bought can never quite capture.
Nutrition Comparison Across Versions
I’m breaking down the nutrition facts based on USDA data and my clinical analysis, so you know exactly what you’re getting in each version. All figures are per 1-ounce serving of finished jerky.
Traditional Beef Jerky (Keto-Friendly): 80 calories, 6g fat, 10g protein, 0g carbs. The fat-to-protein ratio is excellent for satiety and makes this a true keto-friendly snack that won’t spike blood sugar. One ounce delivers roughly the protein of an egg with sustained energy from the fat content.
Vegan Mushroom Jerky: 12 calories, 0.2g fat, 2g protein, 1.5g carbs (mostly from fiber, which is fine). Mushroom jerky is lower in calories and protein but offers unique antioxidants and B vitamins. It’s not a complete protein replacement for beef, but as a snack or trail mix addition, it’s fantastic.
Vegan Plant-Based Meat Jerky: 50-70 calories, 2-3g fat, 8-10g protein, 1-2g carbs (depending on the brand). Modern plant-based meats have come a long way. Most use pea or soy protein, making them a legitimate protein source. Check your specific brand’s nutrition label, as they vary considerably.
Gluten-Free Beef Jerky: Identical to traditional beef (80 calories, 6g fat, 10g protein, 0g carbs). The beef is naturally gluten-free; what matters is verifying your spice blends are certified GF if you have celiac disease.
Dairy-Free Beef Jerky: Identical to traditional beef (80 calories, 6g fat, 10g protein, 0g carbs). All versions of this recipe contain zero dairy products naturally.
How Each Version Tastes Different
Let me be honest with you about the flavor and texture differences, because I want you to know exactly what to expect before you commit to a batch.
Traditional Beef Jerky: This is what jerky should taste like—savory, slightly spicy from the chili powder, with a tender chew. The umami from the salt and garlic deepens as you chew. The texture is pliable, never brittle. It’s satisfying in a way that feels indulgent even though it’s just meat and spices. This is the baseline.
Vegan Mushroom Jerky: Mushrooms have a naturally meaty texture, but the flavor is earthier and less salty-savory without the tamari addition. With tamari included, you get that umami punch that’s closer to beef. The chew is slightly different—more tender and less firm than beef jerky. Some people prefer it; others miss the density of meat. It’s genuinely delicious but distinctly different. Think of it as its own thing rather than a beef replacement.
Plant-Based Meat Jerky: This depends entirely on your brand, but most are surprisingly close to beef in texture and flavor. The taste can feel slightly processed compared to the clean simplicity of beef, but many people find it indistinguishable. The chew is similar to beef, which makes this the best option if you want something that most closely mimics the traditional experience.
Spiced Variations: Across all versions, the spice profile remains consistent—garlicky, slightly spicy, with a hint of smoke from the paprika. The black pepper adds a gentle bite. If you’re heat-sensitive, reduce the cayenne or omit it entirely. If you love heat, you can increase it by ½ teaspoon.
Can I Store Beef Jerky No Sugar Recipe?
Storage is straightforward, and proper storage ensures your jerky stays fresh and safe to eat. Since this recipe contains zero preservatives, you do need to be intentional about how you keep it.
Room Temperature Storage: In an airtight container or resealable bag, your beef jerky stays fresh and delicious for up to two weeks at room temperature. This works best in cool, dry conditions. If your kitchen is warm or humid, reduce this to one week. I always store mine in an opaque container away from direct sunlight because light can degrade the flavors over time.
Refrigerator Storage: In an airtight container, beef jerky lasts for up to three weeks in the fridge. This is my preferred method if you’re not eating through it quickly. The cooler temperature slows any potential moisture reabsorption.
Freezer Storage: Vacuum-sealed or in a freezer bag with as much air removed as possible, your jerky keeps for up to three months in the freezer. This is perfect if you make a big batch and want to portion it out over time. Just thaw in the refrigerator before opening to prevent condensation.
Vegan Mushroom and Plant-Based Versions: These follow the same timeline because the drying process is identical. However, plant-based meat jerky sometimes develops a slightly off flavor after extended storage due to the additives in the product. I recommend using it within two weeks even in the freezer.
Signs Your Jerky Has Gone Bad: Look for any mold growth, off smells, or a slimy texture. If you see any of these, discard it. Properly dried jerky is shelf-stable, so spoilage is rare, but it’s worth checking occasionally.
What to Serve With Beef Jerky No Sugar Recipe?
Jerky is wonderful on its own, but pairing it thoughtfully makes snack time even more satisfying. Here are my favorite combinations across different dietary needs.
- Beef jerky with sharp cheddar and apple slices – Works for keto, gluten-free, and dairy-free versions (just skip the cheese for DF). The sweet-tart apple contrasts beautifully with the savory jerky, and the fat from cheese adds richness.
- Vegan jerky with hummus and raw vegetables – Perfect for all plant-based followers. Cherry tomatoes, bell pepper strips, and cucumbers add freshness. The hummus provides protein and healthy fats to balance the lighter jerky.
- Any jerky in a trail mix with nuts and dried fruit – Combine your jerky with almonds, walnuts, and raisins (or dried cranberries if you want less sugar). This works across every dietary version and makes a portable snack.
- Beef jerky with cheese and olives – A Mediterranean-inspired snack board. All versions work here if you choose dairy-free cheese for the DF approach. The briny olives play beautifully against the savory jerky.
If you’re looking for heartier meal options that also feature beef, you might enjoy my 3 lb Brisket Recipe, which uses similar seasoning principles but creates an entirely different eating experience. For something with more warmth and depth, my Chile Verde brings similar spice profiles to a simmered dish.
Expert’s Nutritional Tip: The Protein Quality Factor
As a registered dietitian, I want to highlight something that goes beyond basic macronutrients: the bioavailability of protein in beef jerky is exceptional. Beef contains all nine essential amino acids in optimal ratios, and the drying process concentrates these nutrients without damaging them through high heat or additives. This means your body can absorb and utilize the protein efficiently, making jerky one of the most cost-effective protein sources you can prepare at home.
For my plant-based clients, this is why I recommend combining vegan jerky with other whole foods that provide complementary amino acids. A serving of mushroom jerky with nuts or seeds creates a complete protein profile. This layering approach is how I help people thrive on plant-based diets without feeling like they’re constantly calculating nutritional details.
Make-Ahead Guide: Preparing Jerky for Your Week
I designed this recipe for active people who want snacks prepared and ready to grab. Here’s how I recommend approaching it from a practical standpoint.
The Batch Approach: Make a large batch on Sunday using 3 pounds of flank steak (double the recipe). This takes the same 3 hours of oven time and yields roughly 8 ounces of finished jerky—enough for two to three weeks of snacking if you’re having it daily. Divide it into four portions and store three in the freezer for rotation.
Flavor Variations for Freezer Stashing: Make one batch with the base recipe, but then divide your meat after slicing. Season one portion with the standard spice blend, and season another with a different combination—maybe add 1 tablespoon of Worcestershire sauce (check for gluten if that matters) and ½ teaspoon of smoked salt to another batch. This variety prevents flavor fatigue over three months of snacking.
Pre-Portioning for Grab-and-Go: After your jerky cools completely, portion it into small containers or bags—roughly 1-ounce servings. Label each with the date and type. This means on busy mornings, you literally grab a pre-portioned snack with zero decision-making required.
Office or Travel Prep: Pack jerky in small containers rather than large bags. This prevents you from eating an entire batch in one sitting and ensures portions stay fresh longer once opened. I recommend investing in small glass containers with silicone lids—they’re sustainable and your jerky stays fresher than in plastic.
Common Mistakes to Avoid
After years of helping people master this recipe, I’ve seen patterns in what causes frustration. Let me save you from these common pitfalls.
Mistake 1: Slicing Too Thick – The most common error is underestimating how thick your slices are. When in doubt, go thinner. Slices thicker than ⅛ inch won’t dry evenly and end up with a chewy center and dry edges. If your jerky seems too chewy after three hours, your slices were likely too thick. Remember that partially freezing the meat makes thinner slicing exponentially easier.
Mistake 2: Crowding the Baking Sheets – I understand the urge to maximize your output, but packed baking sheets prevent proper air circulation and create steaming instead of drying. Space your pieces with ¼ inch between them minimum. Yes, it means you might need three sheets for a double batch. Yes, it’s worth it for superior texture.
Mistake 3: Skipping the Midway Rotation – This is easy to forget, but it matters tremendously for even drying. Set a phone alarm at the 1.5-hour mark. I’ve seen people apologize because they forgot, and the result was unevenly dried jerky. The rotation takes 30 seconds and prevents an hour of baking from being wasted.
Mistake 4: Using Pre-Ground Spices That Are Too Old – Garlic powder and chili powder lose potency after about six months. If your spice cabinet has containers you’ve owned for over a year, they’re likely not as flavorful as they could be. Fresh spices make a noticeable difference in the final flavor. Check the date on your containers before you start this recipe.
Seasonal Variations: Adapting Your Jerky Year-Round
One of the beautiful things about this recipe is how it adapts to seasonal ingredients and flavor profiles. Here’s how I shift it throughout the year.
Spring Version (Fresh and Bright): Add 1 teaspoon of fresh lemon zest to your seasoning mix right before coating the meat. This adds brightness without acidity that could affect drying. If you want more herbaceousness, add ½ teaspoon of dried dill. Spring jerky feels lighter and more invigorating. Perfect for outdoor activities as weather warms up.
Summer Version (Smoky and Heat-Forward): Increase the smoked paprika to 1.5 teaspoons and add ¾ teaspoon of cayenne for more pronounced heat. Grilling season vibes translate to jerky that tastes like campfire snacking. Include ½ teaspoon of cumin to round out the smokiness.
Fall Version (Warm and Complex): Add ½ teaspoon of ground cumin, ¼ teaspoon of ground cinnamon, and a pinch of ground clove to your spice mix. This creates a jerky that tastes like autumn—warm, slightly sweet from the cinnamon, and deeply savory. It pairs beautifully with crisp apples in your snack mix.
Winter Version (Rich and Deeply Savory): Add ½ teaspoon of ground ginger, ½ teaspoon of black cardamom (if you can find it), and increase the kosher salt by ¼ teaspoon. This variation feels warming and grounding—perfect for winter months when you want comfort in snack form.

Beef Jerky No Sugar Recipe
Ingredients
Method
- Start by preheating your oven to 225°F. Line two large rimmed baking sheets with parchment paper—this prevents sticking and makes cleanup so much easier. I keep my oven thermometer inside to verify the temperature because older ovens often run hot or cold, and accuracy matters here. While the oven reaches temperature, remove your flank steak from the refrigerator and let it sit for about 5 minutes so it's easier to handle but still cold enough to slice cleanly. Vegan modification: If you're using mushrooms, pat them dry with paper towels first—excess moisture prevents them from reaching the proper jerky texture. For plant-based meat, follow the package instructions for thickness before seasoning.
- This is where texture magic happens. Place your partially frozen steak on a cutting board and, using a sharp knife, cut crosswise through the meat—meaning you're slicing perpendicular to the long fibers you see running through it. This breaks up those tough muscle fibers and makes every bite tender to chew. Work toward strips that are roughly 2 inches wide and about ⅛ inch thick. If your slices come out thicker, cut each one lengthwise to reach that ideal thinness. The partial freezing matters enormously here. I learned this years ago when a client with arthritis struggled with knife control, and I realized that slightly frozen meat is so much more manageable for anyone dealing with hand strength or stability issues. Vegan modification: For mushrooms, slice them lengthwise to create long, thin strips that mimic the texture of meat jerky. For plant-based meat products, follow their slicing recommendations, which usually call for thin strips as well.
- Let your meat strips sit at room temperature for about 15 minutes. This allows them to fully thaw and become more pliable. Then arrange them in a single layer on a cutting board, cover loosely with plastic wrap, and use a meat mallet to gently pound them. Work from the center outward with even, light pressure—you're not trying to smash them flat, just create uniform thickness so they dry evenly in the oven. This step prevents thick spots that stay chewy while thin spots become brittle. Uniform thickness means uniform drying, and that's the secret to professional-quality jerky every time. Vegan modification: Mushroom slices are naturally thin enough that you can skip the pounding step. For plant-based meat, check if it needs tenderizing based on the product instructions.
- Place all your prepared meat strips in a large bowl. Add the kosher salt, garlic powder, chili powder, black pepper, smoked paprika, and cayenne. Using your hands, toss everything together thoroughly—I mean really work it so every piece gets coated evenly. This takes about 2 minutes of tossing. Your hands will help you feel whether every strip is covered and ensure the spices stick properly. Vegan modification: Add 1 tablespoon of low-sodium tamari to your seasoning bowl before mixing with mushrooms. This adds salty, savory depth that mimics the umami of meat. Let it sit for 5 minutes so the mushrooms absorb the flavors. Keto note: All these spices are naturally keto-friendly with zero carbs. The ratio of fat to protein in beef jerky is perfect for maintaining ketosis without feeling deprived.
- Spread the seasoned strips across your prepared baking sheets in a single layer, making sure they don't touch each other. They need air circulation on all sides to dry properly. If you're crowding the pan, use a third baking sheet. Space is not your enemy here—it's your ally for perfect texture. This is also the moment to set a timer for the first rotation. In my practice, I teach clients that setting a reminder on their phone prevents that "Did I rotate those?" worry that pulls you away from other tasks.
- Place both sheets in the oven and bake for 3 hours total. Midway through—at about the 1.5-hour mark—rotate the position of the baking sheets. Swap the one on the top rack with the one on the bottom. This ensures even drying because every oven has hot spots. You'll start noticing the aroma after about 45 minutes, and honestly, it's one of the best parts of this process. Vegan modification: Mushroom jerky may finish slightly faster, sometimes in 2.5 to 2.75 hours. Watch for the edges to darken and curl slightly, which signals they're done. Plant-based meat typically follows the same 3-hour timeline as beef. Your finished jerky should look brown and dried but not burnt. The color should be deep mahogany, not charred black. A slight bend in the strip indicates it's done; if it snaps cleanly in half, you've gone a touch too far.
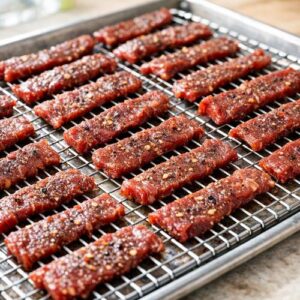
- Remove the beef strips to a cooling rack set on top of a tray or sheet of aluminum foil to catch any drips. Let them cool and continue drying at room temperature for about 30 minutes. This final resting period lets the moisture finish evaporating and the texture set properly. Once cooled, they're ready to eat immediately or store for later. This is where I always tell clients to take a moment and simply enjoy what you've made. There's something grounding about homemade food that store-bought can never quite capture.
FAQs
Can I Make This Recipe Without an Oven?
Yes, but with caveats. A food dehydrator set to 160°F works beautifully and sometimes produces more even results than an oven because the airflow is specifically designed for dehydration. Arrange your seasoned meat strips on the dehydrator trays and dry for 4-6 hours, checking at the 4-hour mark. The lower temperature in a dehydrator means longer time but more controlled drying. You cannot make this in a regular stovetop because you need low, consistent heat with air circulation. An oven is truly the most accessible option for most home cooks.
What’s the Best Way to Adapt This for a Vegan Audience If I’m Making Multiple Versions?
Prepare your workspace with separate cutting boards for vegan and non-vegan versions to prevent cross-contamination if that’s important to your guests. Slice and season your vegan proteins first while the oven preheats, then move to the beef. Use separate baking sheets for each type, even if you’re baking them simultaneously on different racks. Label your finished products clearly, and store them in separate containers. This prevents any accidental mixing and shows respect for dietary choices. From a practical standpoint, it adds maybe 15 minutes total to your process and eliminates confusion.
Can I Use Eye of Round or Sirloin Tip Instead of Flank Steak?
You can, but flank is genuinely the best choice. Eye of round is leaner but tougher, requiring more aggressive slicing against the grain and longer marinating or pounding. Sirloin tip is more tender but has more marbling, which can cause the fat to go rancid faster during storage. Flank steak is the sweet spot—tender enough to slice cleanly, lean enough to store well, and flavorful enough to shine with simple seasoning. If flank isn’t available at your butcher, ask them to recommend the leanest cut they have, and plan for extra pounding time to tenderize it.
How Do I Know When the Jerky Is Done Drying?
This is the most common question I receive, and the answer is tactile, not visual. Pick up a piece and bend it. If it bends cleanly without snapping, it’s done. If it’s still pliable and bends like fresh meat, it needs more time. If it snaps cleanly in half with no bend, you’ve likely overcooked it slightly—it’ll still be delicious, just slightly more brittle. The visual cue is a deep mahogany color with no brown spots (slightly darker is okay, but avoid black). Trust the bend test over the timer, because oven temperatures vary. I always tell clients to start checking at the 2.5-hour mark for peace of mind.
Is This Recipe Okay for Children, or Is It a Choking Hazard?
Yes, it’s appropriate for children who can chew solid foods well. Jerky is actually excellent for developing chewing skills and jaw strength. For toddlers who are still building these skills, tear or cut the jerky into smaller pieces and supervise eating. For children over age four with normal chewing development, jerky is a wonderful protein-rich snack that takes longer to eat than other options, which prevents mindless snacking. Many parents tell me their kids prefer homemade jerky to candy because the flavor is so much more interesting. Monitor your individual child, but generally, it’s a genuinely good snack choice.
Can I Add Liquid Smoke, Worcestershire Sauce, or Other Wet Ingredients?
You can, but it changes the drying timeline. For every tablespoon of liquid you add, increase the drying time by 30 minutes to an hour. Liquid smoke is actually a dry ingredient (it’s smoke condensed), so you can add ½ teaspoon without adjusting time. Worcestershire sauce adds liquid and would require extra drying time. My recommendation is to stick with dry spices for your first batch to master the technique, then experiment with liquids once you’re confident. When adding liquids, apply them evenly to the meat before it goes in the oven, and expect the final jerky to be slightly chewier and darker in color.
More Diet-Friendly Recipes
- Easy Meatloaf – A classic comfort food that adapts beautifully to keto, gluten-free, and dairy-free diets with simple ingredient swaps
- my weeknight pasta – A filling dinner option where you can use zucchini noodles for keto or gluten-free pasta for those avoiding refined carbs
Final Thoughts: Your Dietary Needs Don’t Mean Food Restrictions
When I started my career as a dietitian, I noticed that people with specific dietary needs often felt like they were eating in isolation. Keto clients missed simple snacks. Vegan clients wanted something that felt indulgent and satisfying. People with celiac disease were tired of worrying about hidden ingredients. This jerky recipe came from wanting to create something that everyone could enjoy together—in whatever version worked for their body.
The magic of homemade food is knowing exactly what’s in it. No mysterious preservatives, no accidentally-hidden sugars, no cross-contamination surprises. Just real ingredients dried slowly until they’re perfect. Whether you’re making the traditional beef version, the earthy mushroom adaptation, or the plant-based alternative, you’re choosing to nourish yourself intentionally.
I hope this recipe becomes a staple in your kitchen the way it has in mine. Start with one batch, see which variation calls to you, and then make it again. The second time is always easier because you know what to expect. And if you have questions or want to share how your jerky turns out, remember that I’m here cheering you on.
Take care with love and flavor!