Broiled Flank Steak Recipe
This post contains affiliate links. As an Amazon Associate I earn from qualifying purchases.
If you’ve always wanted to make broiled flank steak but felt intimidated, this is your starting point. I’m going to walk you through every single step—from marinade to perfectly sliced meat—in language that assumes zero prior experience. This cut of beef gets a reputation for being “tough,” but that’s only true if you don’t know the secret: a simple marinade and slicing against the grain. Once you master this technique, you’ll have a weeknight protein that tastes restaurant-quality and comes together in 30 minutes flat. Whether you’re feeding a family of four or meal prepping for the week ahead, broiled flank steak is about to become your new go-to.
I’ve included internal links throughout to complementary recipes like quick pan-fried flank steak and chimichurri sauce so you can build an entire meal around this beautiful piece of meat. Trust me—you’re about to feel so proud of yourself.
How to Make Broiled Flank Steak for the First Time (You’ve Got This)
I remember the first time I made flank steak at home. It was a Wednesday evening in my Norwood kitchen, and I’d just gotten home from a long day at the clinic. My family was hungry, and I was out of my usual chicken-and-rice routine. I grabbed a flank steak from the grocery store because it was on sale, threw together what I thought was a marinade, and honestly? I was terrified I’d ruin it.
But here’s what I learned: flank steak is actually one of the most forgiving cuts to cook once you understand the two fundamental rules—marinate it to break down the muscle fibers, and slice it thin against the grain. That first steak came out tender, flavorful, and my kids asked for seconds. Now, fifteen years later, it’s still a weeknight staple in my home because it’s fast, affordable, and tastes like you spent way more effort than you actually did.
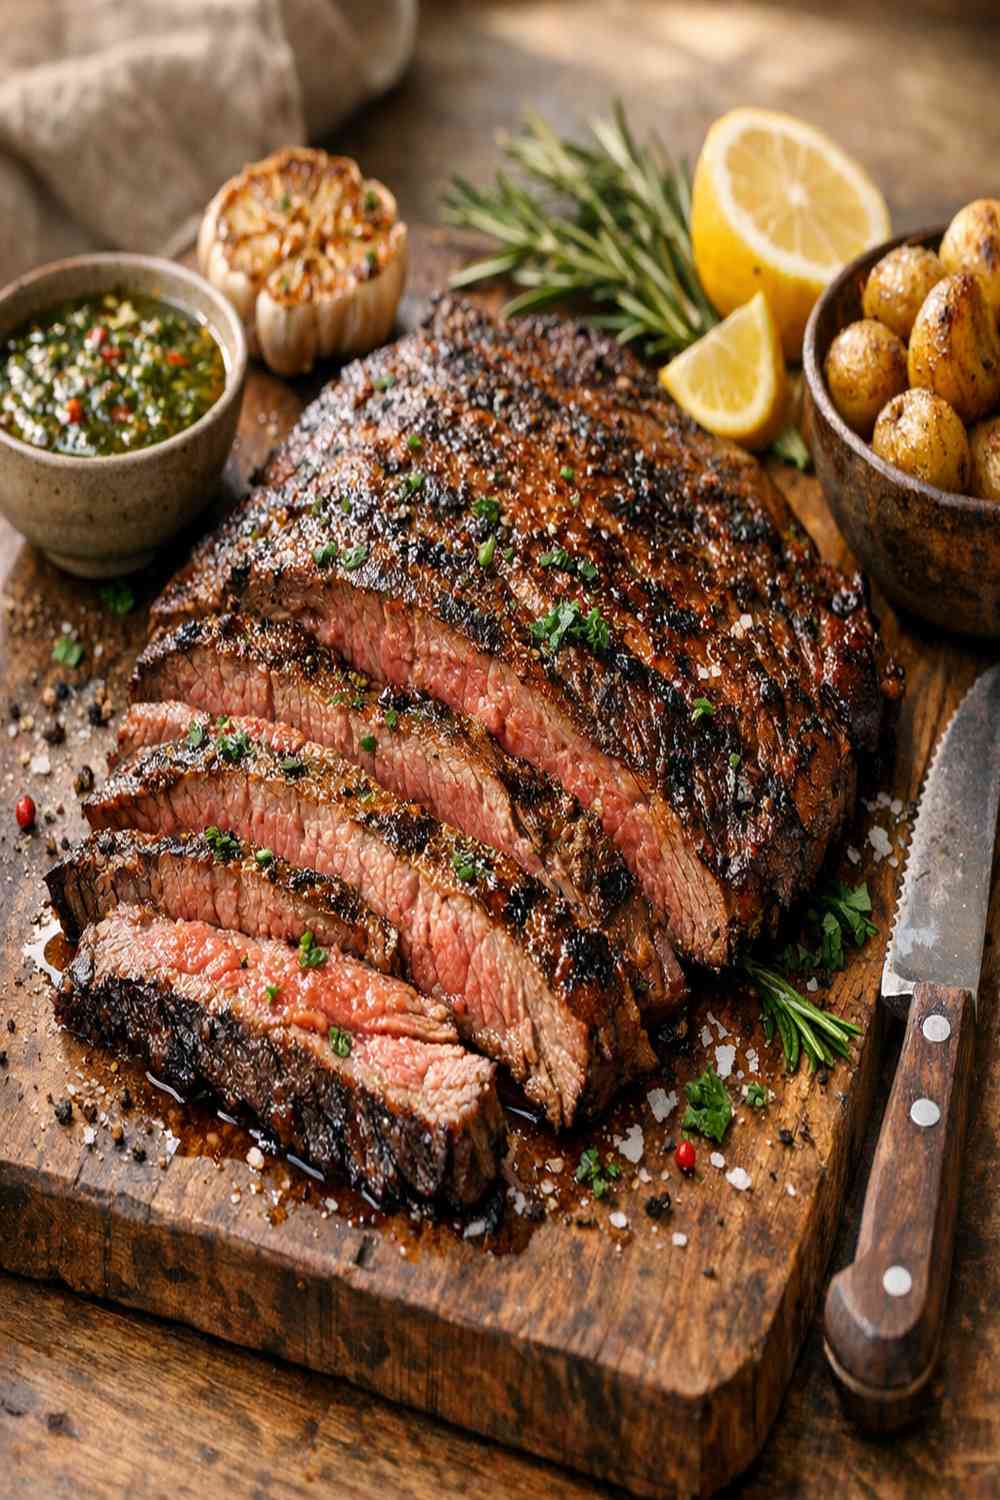
What to Expect Before You Start
Let me set realistic expectations so you walk into this with confidence instead of doubt. This recipe takes about 40 minutes total, but only 10 of those minutes are actual hands-on cooking time. The rest is resting and marinating, which means you can prep a side dish, set the table, or simply breathe while the oven does the work.
Broiling (cooking with high direct heat from above) is actually easier than grilling because you don’t have to worry about hot and cold zones on your grill. Your oven does all the heavy lifting. The steak will brown beautifully, develop a slight char on the outside, and stay tender and juicy inside—if you follow one critical rule: don’t skip the resting period at the end.
- It’s faster than you think – Most home cooks assume steak takes forever. This entire recipe, start to finish, takes about 40 minutes. The actual cooking time is only 10–14 minutes under the broiler. Everything else is waiting, which you can do while folding laundry or prepping your side dish.
- The marinade does the heavy lifting – New cooks often worry that flank steak will be chewy or tough. The secret isn’t fancy cooking technique; it’s a 30-minute soak in a simple mixture of oil, vinegar, and spices that physically tenderize the meat. You’re not doing anything complex here.
- You don’t need a meat thermometer, but it helps – If you have an instant-read thermometer, use it. If you don’t, I’ll teach you how to judge doneness by touch and appearance. Neither method is wrong; one just gives you more confidence faster.
Equipment You’ll Need (And What You Can Skip)
Here’s the beautiful truth: you don’t need fancy equipment to make excellent broiled steak. I’m going to give you a short list of what actually matters, and what you can absolutely skip if you’re on a budget or don’t have it in your kitchen right now.
- A rimmed baking sheet (or any baking pan with raised edges) – This catches any drippings and prevents your oven from smoking. If you don’t have one, use a cast iron skillet or even a deep oven-safe plate. The goal is simply to contain the meat and its juices.
- Aluminum foil or parchment paper – Optional but recommended. Foil makes cleanup effortless, especially when you’re dealing with meat drippings. If you don’t have either, a well-seasoned cast iron skillet works beautifully and needs no lining.
- A gallon-size resealable plastic bag or shallow dish – For marinating. If you don’t have bags, use a shallow bowl or even a large zip-top container. The goal is to coat the steak evenly in marinade, and there are a dozen ways to do that.
- An instant-read meat thermometer (optional but helpful) – This takes the guesswork out of doneness. A good one costs under $15 and lasts for years. If you don’t have one, you can use the touch-test method I’ll explain later.
- A sharp knife for slicing – This matters. A dull knife will shred the meat instead of slicing it cleanly. If your kitchen knife is feeling dull, now is the time to sharpen it or ask someone to do it for you.
The Ingredients – A Beginner’s Shopping Guide
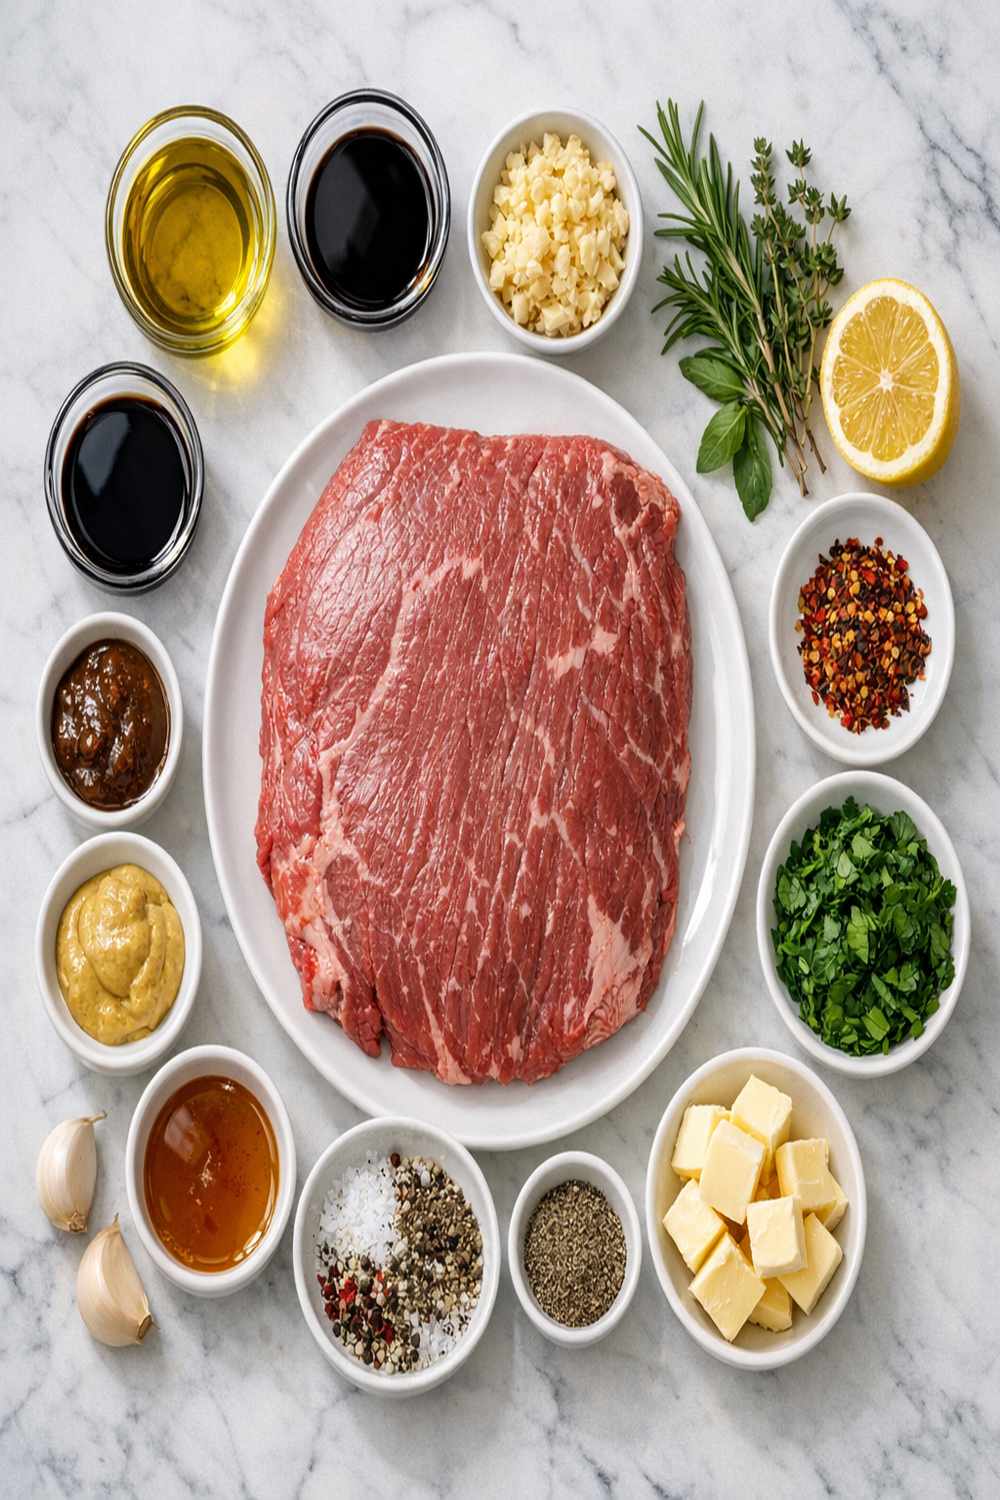
I’ve kept this ingredient list short and intentional. Every single item either builds flavor or tenderizes the steak. There are no random additions or complicated components. All of these ingredients live in most pantries already, and if they don’t, they’re inexpensive staples that will serve you in a hundred other recipes.
When you’re shopping, don’t stress about buying premium versions of these ingredients. Olive oil doesn’t need to be fancy extra virgin (save that for drizzling on finished dishes). Your garlic powder and paprika can be the store brand. The one place where quality actually matters is the flank steak itself—choose a piece that looks bright red, not gray or brown, and feels firm to the touch.
- 1 tablespoon fresh lemon juice (optional but brightens the final dish)
- 2 teaspoons kosher salt (Diamond Crystal or Morton’s—use what you have; the amount is interchangeable)
- ½ teaspoon freshly cracked black pepper (freshly ground tastes noticeably better than pre-ground)
- 2 pounds flank steak (choose a piece that’s bright red and about 1 inch thick)
- 1 teaspoon smoked paprika (adds depth and subtle smokiness without burning)
- 1 teaspoon garlic powder (not fresh garlic—powder dissolves evenly into the marinade)
- 2 tablespoons red wine vinegar (acidic base that tenderizes the meat fibers)
- 4 tablespoons olive oil or avocado oil (neutral flavor, high smoke point for broiling)
Step-by-Step: Your First Broiled Flank Steak
Here we go. I’m going to walk you through this slowly, and I want you to know that every single step is designed to set you up for success. Read through the entire recipe once before you start cooking. That’s not extra work—it’s insurance against stress. Let’s do this together.
Step 1: Make Your Marinade
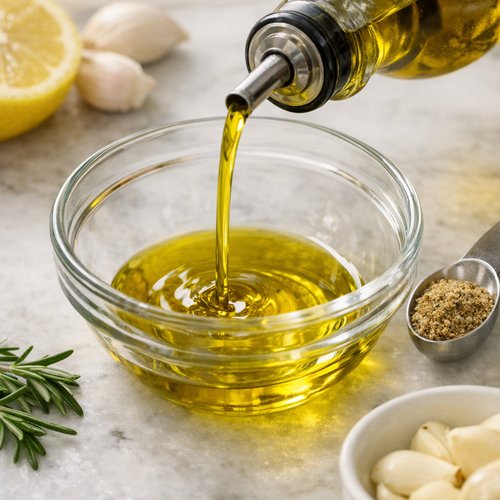
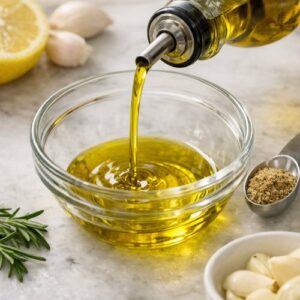
Pour 4 tablespoons of olive oil into a small mixing bowl. Don’t overthink this—it can be any small bowl, even a measuring cup works fine. Add 2 tablespoons of red wine vinegar to the same bowl. Now, I’m going to ask you to do something that separates good home cooks from stressed ones: stir these together slowly.
As you stir, you’ll notice the oil and vinegar don’t fully combine—they separate. That’s completely normal and exactly what you want. The oil coats the meat while the vinegar soaks in and begins breaking down the muscle fibers. Now add 1 teaspoon of garlic powder and 1 teaspoon of smoked paprika to the bowl. Stir everything together until the powder is evenly distributed.
Here’s a professional tip: the vinegar will help the spices dissolve more evenly than oil alone would. You’re looking for a mixture that looks slightly speckled with paprika—if you see little clumps of spice, just keep stirring for another 10 seconds. This entire step takes less than two minutes.
Step 2: Prepare Your Flank Steak
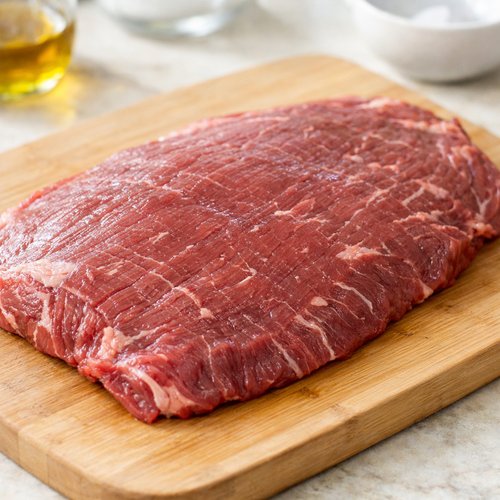
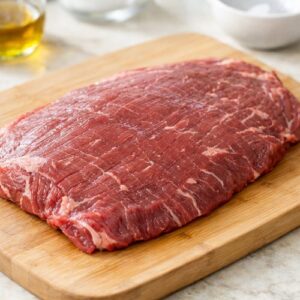
Remove your flank steak from its packaging and place it on a clean cutting board or large plate. Flank steak is a flat, relatively thin cut of beef. Before you do anything else, I want you to look at the meat closely and notice the grain—the lines running across the muscle. These lines tell you which direction the muscle fibers run.
Here’s the secret to tender flank steak: you’re going to slice against the grain later, which means cutting perpendicular to those lines. This breaks up the long muscle fibers into shorter pieces, making each bite tender instead of chewy. For now, just note which direction the grain runs. You’ll thank yourself later when you’re slicing.
Pat the steak dry with a paper towel. Any excess moisture on the surface will interfere with browning under the broiler. A dry surface means better color and texture on the finished steak.
Step 3: Marinate the Steak
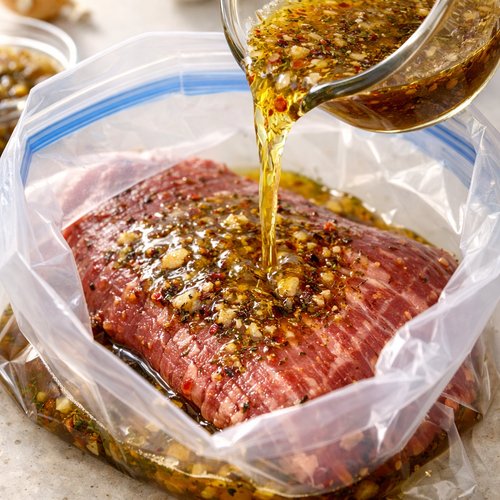
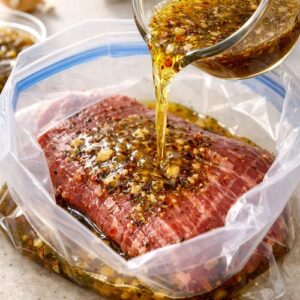
Place your flank steak into a gallon-size resealable plastic bag—it should fit with just a little room to spare. Pour your marinade (the oil and vinegar mixture with the spices) directly over the steak. Here’s where I want you to be hands-on: use your hands to massage the marinade all over both sides of the meat.
This isn’t wasting time—you’re actively helping the flavors penetrate the meat and ensuring every surface gets coated. Rub the mixture into the steak for about 30 seconds to a minute. You’ll notice the spices starting to cling to the meat. This is perfect.
Now seal the bag, pressing out as much air as possible as you zip it closed. Set the bag on your counter (not in the fridge—room temperature is important here) and let it sit for exactly 30 minutes. This is the minimum time needed for the vinegar to begin breaking down the muscle fibers. If you have longer, 45 minutes is ideal, but don’t go longer than an hour or the vinegar will start to make the exterior mushy.
While the steak marinates, you can prep your side dish, set the table, or simply take a breath. This is built-in pause time that makes cooking feel less frantic.
Step 4: Prepare Your Oven and Baking Sheet
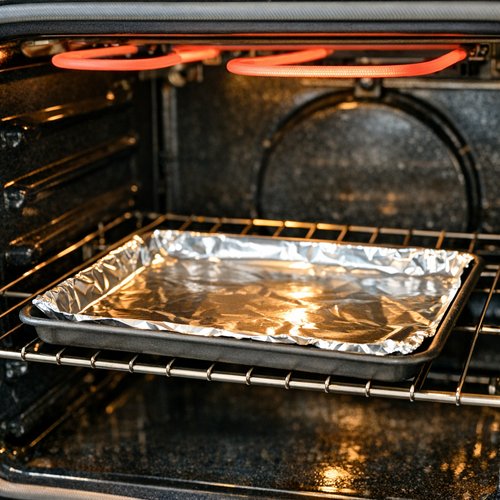
Adjust your oven rack to sit approximately 6 inches directly below your broiler element. This is important—not too close to the heat source (which would char the outside before the inside cooks) and not too far away (which would cook the steak like a regular oven instead of using the intense broiler heat).
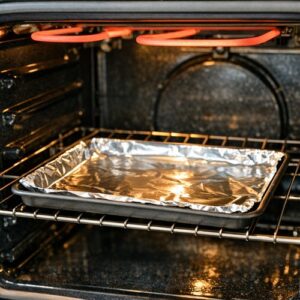
Turn on your broiler to high heat. Most ovens have a broil setting that runs at around 550°F. Give it 5 minutes to preheat. While it’s preheating, line a large rimmed baking sheet with aluminum foil if you have it. This is purely for easy cleanup—the foil catches drippings so you don’t have to scrub your pan later. If you don’t have foil, just use the sheet pan as is, or use a cast iron skillet.
The small amount of extra effort here—preheating properly, lining your pan—makes the entire process feel more professional and less stressful. You’re setting yourself up for success.
Step 5: Season and Place the Steak on the Pan
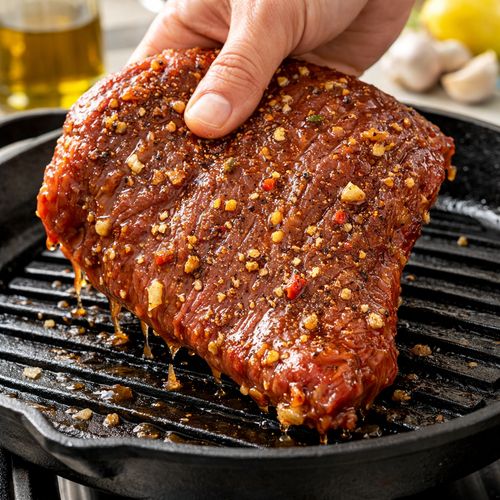
When your 30-minute marinating time is up, remove the steak from the bag. Let the excess marinade drip back into the bag—don’t wipe the steak off. Any marinade clinging to the surface will help build flavor and color. Discard the marinade bag.
Place the steak on your prepared baking sheet. Now sprinkle 2 teaspoons of kosher salt evenly over the top of the steak, then flip it and sprinkle ½ teaspoon of freshly cracked black pepper on the other side. Wait—I said salt on top, then pepper on the flip? Actually, let me clarify: season both sides with both salt and pepper.
Here’s why this matters: salt draws out moisture briefly, then reabsorbs it along with flavor, seasoning the steak from the inside out. If you salt too early (like the night before), the steak can become dry. But if you salt right before cooking, you get the tenderizing and flavoring benefit without the drying effect. This timing is perfect.
Step 6: Broil the First Side
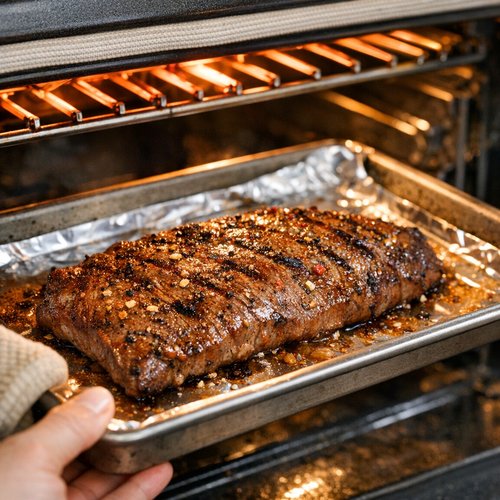
Carefully place your baking sheet with the steak into the preheated broiler. Set a timer for 5 minutes (for medium-rare) or 6 minutes (for medium). Close the broiler door—or leave it slightly ajar if your oven has a separate broiler drawer; follow your oven’s manual if you’re unsure.
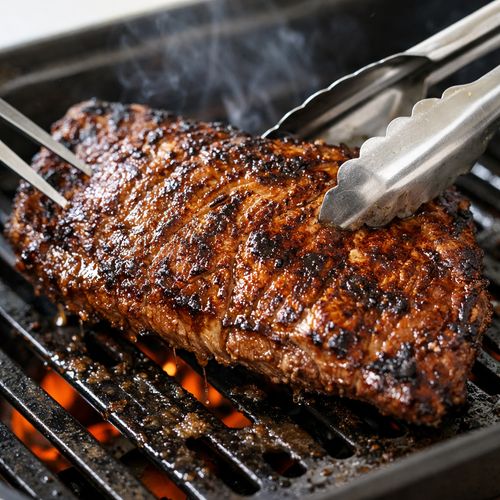
Here’s what’s happening: the intense heat from above is searing the top of the steak, creating a beautiful brown crust while the interior stays tender and juicy. You’re using radiant heat, not direct contact with a hot surface, so the steak cooks evenly.
Do not open the broiler door to peek. I know the urge is strong, but you’ll lose heat and slow down the cooking. Trust the timer. When that timer goes off, pull the pan out carefully—it will be hot—and flip the steak to the other side.
Step 7: Broil the Second Side
Using tongs or two forks, flip the steak to the other side. It should have a beautiful golden-brown to dark brown color on the first side—this is what we want. Now set your timer for another 5–6 minutes on the second side. The second side might cook slightly faster than the first, so start checking at the 5-minute mark if this is your first time.
This is where an instant-read meat thermometer becomes your best friend. Insert the thermometer horizontally into the thickest part of the steak, being careful not to touch bone (there isn’t any, but the habit is good). Here are your target temperatures:
- Medium: 140–145°F – The meat is warm throughout with less pink in the center.
- Well-done: 150°F and above – The meat will be gray throughout and tend toward dryness, especially with a lean cut like flank.
- Medium-rare: 130–135°F – This is my recommendation for flank steak. The meat is tender, juicy, and has a warm red center.
If you don’t have a thermometer, use the touch test: the fleshy area at the base of your thumb (when your hand is relaxed) feels similar to rare steak. Touch the same spot when you press your thumb and index finger together, and it feels like medium-rare. This takes practice, but it works.
Step 8: Rest the Steak (This Is Critical)
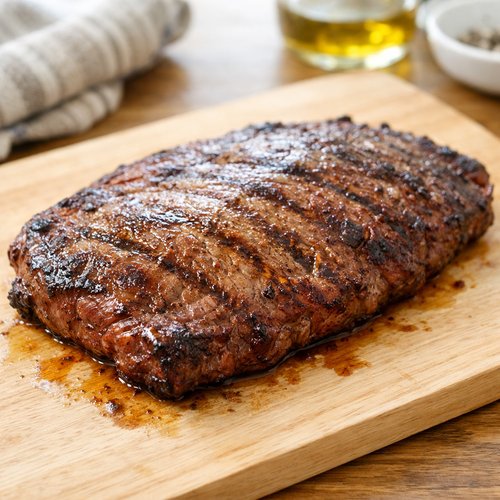
Remove the steak from the broiler and place it on a clean cutting board. This is not the time to slice it. I want you to let it rest for exactly 10 minutes. Set a timer if you need to—resting is not optional, and 10 minutes is the minimum.
Here’s the science: when you cook meat, the heat pushes all the flavorful juices toward the center. If you slice immediately, those juices run all over the cutting board instead of staying in your steak. After resting, the juices redistribute throughout the meat, making every bite juicy and flavorful. This 10 minutes is the difference between a good steak and a great one.
While the steak rests, this is the perfect moment to plate your sides, pour water, or take a breath. You’ve essentially finished the hardest part.
Step 9: Slice Against the Grain
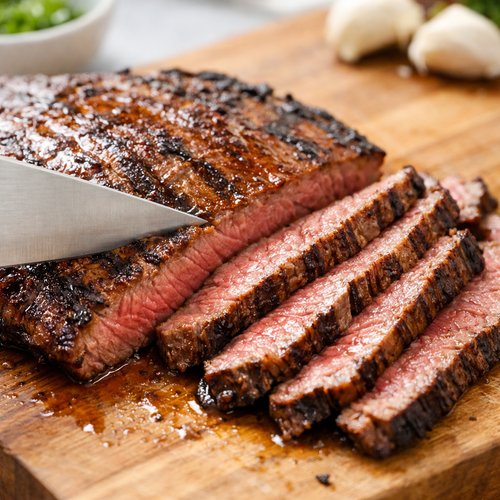
After 10 minutes of resting, place the steak on your cutting board. Remember earlier when I asked you to notice the grain direction? Now is when that matters. Slice the steak thinly and perpendicular to the grain lines—this means cutting across those lines, not parallel to them.
Use a sharp knife and make smooth, confident cuts. You’re looking for slices about ¼ inch thick. Thinner slices cook more evenly and are easier to chew, especially with a cut like flank that has pronounced muscle fibers. If your knife is dragging or shredding instead of slicing cleanly, it’s time to sharpen it.
Arrange the sliced steak on a serving platter or individual plates. Any juices that have pooled on the cutting board should be drizzled over the top—these are liquid gold, flavor-wise.
Step 10: Serve Immediately
Serve the steak while it’s still warm, ideally within 5 minutes of slicing. Flank steak is best enjoyed at this temperature. Pair it with your favorite sides—I’ll give you suggestions below—and enjoy the fact that you just made restaurant-quality steak at home in about 40 minutes.
How to Tell If You Did It Right
Let me give you specific signs that tell you whether each stage of cooking went well. These visual, tactile, and taste cues are how professional cooks know if something is working without overthinking it.
- The marinade coated evenly – After massaging, the steak should look dark and slightly wet, with spice visible on the surface. If parts look dry or unmarinated, massage a little longer. The entire surface should have visible paprika.
- The first side browned beautifully – When you flip the steak after the first 5–6 minutes, the top should be a rich golden brown to dark brown color. It won’t be completely black or charred unless your broiler runs hotter than average. If it’s pale or gray, your oven rack was too far from the heat source.
- The meat feels firm to the touch – Once cooked, gently press the center of the steak with your finger (careful—it’s hot). If it feels soft and squishy, it’s underdone. If it feels very firm and hard, it’s overcooked. Medium-rare should feel like the fleshy part of your palm when you relax your hand—slightly yielding but not soft.
- A meat thermometer reads 130–145°F – This is objective proof that your steak is cooked to your preferred doneness. If you’re using a thermometer, trust it above all other methods.
- Juices pool on the plate – This is a sign of a perfectly rested steak. If the steak looks dry and the cutting board was flooded with juices, you likely didn’t rest it long enough.
- Each slice tears apart easily with a fork – This is the texture test. Flank steak should be tender enough that you don’t need a steak knife. If it’s chewy or tough, either the marinade didn’t work (if you rushed it) or you didn’t slice against the grain.
What Went Wrong? Beginner Fixes
Even experienced cooks have moments where something doesn’t go exactly as planned. Here are the most common issues I see with first-time broiled flank steak, and exactly how to fix them next time.
- The steak came out dry or tough – Most likely cause: you either skipped the resting period, didn’t rest long enough, or sliced with the grain instead of against it. Fix: Next time, set a timer for the full 10-minute rest and don’t skip it, no matter how hungry you are. When slicing, make absolutely sure you’re cutting perpendicular to the grain lines, not parallel.
- The outside was charred and the inside was undercooked – This means your oven rack was too close to the broiler element. The exterior burned before the interior had time to cook. Fix: Next time, position your rack 6 inches below the element, not right under it. Also, if your broiler runs very hot, try medium heat instead of high, or reduce the cooking time by a minute per side.
- The steak was chewy and tough even after resting – Either the marinade wasn’t given enough time (minimum 30 minutes), or you cooked it past medium. Flank steak is a lean cut and becomes tough when overcooked. Fix: Always marinate for at least 30 minutes. Never cook past medium (145°F) unless you enjoy chewy steak. If this happened, the steak is done—there’s no fixing a cooked steak—but now you know for next time.
- You couldn’t tell when it was done without a thermometer – The touch test takes practice. Fix: Invest in an instant-read thermometer. They cost $12–15 and take all the guesswork out of doneness. This is not a luxury item; it’s an investment in cooking confidence.
- One side cooked faster than the other – This is common and usually means your broiler has a hot spot, or your steak wasn’t perfectly flat. Fix: This is normal. If the thinner end is cooking faster, rotate the pan halfway through the second side cooking time so the thicker end gets more heat exposure.
Expert’s Nutritional Insight
As a registered dietitian, I want you to understand why flank steak is such a smart protein choice. This cut is naturally lean compared to ribeye or strip steak, meaning you get protein and iron without excess saturated fat. A 3-ounce serving (about the size of your palm) provides roughly 26 grams of protein and only 8 grams of fat—and most of that fat is unsaturated.
The marinade deserves credit too. Red wine vinegar contains acetic acid, which not only tenderizes the meat but also helps your body absorb iron from the beef more efficiently. The olive oil provides heart-healthy monounsaturated fats and fat-soluble vitamins that help you absorb the steak’s B vitamins. This isn’t complicated nutrition; it’s just whole food working the way it’s supposed to.
Make-Ahead Guide: Meal Prep Your Flank Steak
One of my favorite ways to use this recipe is to cook a double batch and slice it for the week ahead. Here’s how to do it professionally and safely:
- Marinate up to 4 hours ahead – You can marinate your steak in the morning for evening cooking, or the night before. After 30 minutes, the tenderizing is done, but extra time doesn’t hurt (up to about 4 hours). Longer than that risks the exterior becoming mushy from the acid.
- Cook and cool completely before storing – Make your steak, let it rest fully, slice it, then cool to room temperature before storing. Warm steak will create steam in the container, making it soggy.
- Store in an airtight container for up to 4 days – Sliced broiled flank steak keeps beautifully in the fridge for four days. Store it in a shallow container with any pan juices poured over top. The juices keep the meat moist.
- Reheat gently on the stovetop, never the microwave – Heat a skillet over medium heat, add a splash of broth or water, and warm the sliced steak for 2–3 minutes just until warmed through. Microwaving dries it out. You can also eat it cold in salads or sandwiches if you prefer.
- Freeze for up to 3 months – If you want to freeze extra, cool and slice the steak, then layer it with parchment paper in a freezer-safe container. Thaw overnight in the refrigerator before reheating.
Your Next Steps After Mastering This
Once you’ve made broiled flank steak successfully, you’ve actually learned several core cooking skills that transfer everywhere. You understand marinades and how acid tenderizes meat. You’ve mastered high-heat cooking and the importance of resting. You know how to tell doneness by temperature and touch. These skills open doors to so much more.
Next, try grilling steak using the same marinade and slicing technique—the fundamentals are identical, just a different heat source. Or explore pan-seared versions of this same cut, which teaches you stovetop heat control.
Once you’re confident with beef, these same principles apply to pork, chicken, and even firm fish. The marinade technique works on everything. You’re not just learning one recipe; you’re learning a cooking framework.
Can I Store Broiled Flank Steak?
Yes, and it stores beautifully. Here’s exactly what to do:
- Refrigerator: up to 4 days – Store sliced steak in an airtight container with any pan juices. The juices keep the meat tender and flavorful. If you stored the steak whole (unsliced), it keeps for up to 5 days.
- Freezer: up to 3 months – Cool the steak completely, slice it, then layer with parchment paper in a freezer-safe container. Thaw overnight in the refrigerator before reheating.
- Leftovers for salads and sandwiches – Cold sliced flank steak is delicious on salads, in grain bowls, or on sandwiches. You don’t have to reheat it if you don’t want to.
- Reheating method – Never use the microwave; it dries out the meat. Instead, heat a skillet over medium heat, add a splash of water or broth, and warm the steak for 2–3 minutes until just warmed through.
Nutrition Information
Per serving (approximately 3 ounces of cooked steak, accounting for cooking loss):
- Calories: 180
- Protein: 26 grams – This is excellent for muscle maintenance and satiety.
- Fat: 8 grams – Mostly unsaturated fat from the marinade and the beef’s natural composition.
- Carbohydrates: 0 grams
- Saturated Fat: 3 grams
- Cholesterol: 65 milligrams
- Sodium: 480 milligrams (from the salt in the recipe)
- Iron: 2.1 milligrams per serving – About 12% of the daily recommended value. Beef is one of the best sources of heme iron, which your body absorbs very efficiently.
These values are based on USDA nutrient data for lean beef and represent the steak alone, not including any sides. This makes broiled flank steak an excellent protein choice for anyone watching calories or trying to eat more lean protein.
What Can I Serve With Broiled Flank Steak?
The beauty of broiled flank steak is how well it pairs with almost any side dish. Here are my favorite combinations, along with a couple of recipes to get you started:
- Roasted vegetables – The steak’s savory depth pairs beautifully with caramelized veggies. Try Asian-style Brussels sprouts for a side with attitude, or microwave asparagus for something quick. Both cook while your steak rests.
- Chimichurri sauce – If you want to elevate this dish, make fresh chimichurri sauce. The bright, herbaceous flavors complement beef beautifully, and it takes 5 minutes to blend together.
- Grain-based sides – Serve alongside rice pilaf, couscous, or roasted potatoes. The steak’s juices soak into these sides, making them more flavorful.
- Simple salad – A crisp green salad with vinaigrette is the perfect light counterpart to rich beef. The acidity cuts through the fat beautifully.
- Bread or rolls – Warm crusty bread is never wrong alongside steak. Use it to soak up any pan juices on your plate.

Broiled Flank Steak Recipe
Ingredients
Method
- Pour 4 tablespoons of olive oil into a small mixing bowl. Don't overthink this—it can be any small bowl, even a measuring cup works fine. Add 2 tablespoons of red wine vinegar to the same bowl. Now, I'm going to ask you to do something that separates good home cooks from stressed ones: stir these together slowly. As you stir, you'll notice the oil and vinegar don't fully combine—they separate. That's completely normal and exactly what you want. The oil coats the meat while the vinegar soaks in and begins breaking down the muscle fibers. Now add 1 teaspoon of garlic powder and 1 teaspoon of smoked paprika to the bowl. Stir everything together until the powder is evenly distributed. Here's a professional tip: the vinegar will help the spices dissolve more evenly than oil alone would. You're looking for a mixture that looks slightly speckled with paprika—if you see little clumps of spice, just keep stirring for another 10 seconds. This entire step takes less than two minutes.
- Remove your flank steak from its packaging and place it on a clean cutting board or large plate. Flank steak is a flat, relatively thin cut of beef. Before you do anything else, I want you to look at the meat closely and notice the grain—the lines running across the muscle. These lines tell you which direction the muscle fibers run. Here's the secret to tender flank steak: you're going to slice against the grain later, which means cutting perpendicular to those lines. This breaks up the long muscle fibers into shorter pieces, making each bite tender instead of chewy. For now, just note which direction the grain runs. You'll thank yourself later when you're slicing. Pat the steak dry with a paper towel. Any excess moisture on the surface will interfere with browning under the broiler. A dry surface means better color and texture on the finished steak.
- Place your flank steak into a gallon-size resealable plastic bag—it should fit with just a little room to spare. Pour your marinade (the oil and vinegar mixture with the spices) directly over the steak. Here's where I want you to be hands-on: use your hands to massage the marinade all over both sides of the meat. This isn't wasting time—you're actively helping the flavors penetrate the meat and ensuring every surface gets coated. Rub the mixture into the steak for about 30 seconds to a minute. You'll notice the spices starting to cling to the meat. This is perfect. Now seal the bag, pressing out as much air as possible as you zip it closed. Set the bag on your counter (not in the fridge—room temperature is important here) and let it sit for exactly 30 minutes. This is the minimum time needed for the vinegar to begin breaking down the muscle fibers. If you have longer, 45 minutes is ideal, but don't go longer than an hour or the vinegar will start to make the exterior mushy. While the steak marinates, you can prep your side dish, set the table, or simply take a breath. This is built-in pause time that makes cooking feel less frantic.
- Adjust your oven rack to sit approximately 6 inches directly below your broiler element. This is important—not too close to the heat source (which would char the outside before the inside cooks) and not too far away (which would cook the steak like a regular oven instead of using the intense broiler heat). Turn on your broiler to high heat. Most ovens have a broil setting that runs at around 550°F. Give it 5 minutes to preheat. While it's preheating, line a large rimmed baking sheet with aluminum foil if you have it. This is purely for easy cleanup—the foil catches drippings so you don't have to scrub your pan later. If you don't have foil, just use the sheet pan as is, or use a cast iron skillet. The small amount of extra effort here—preheating properly, lining your pan—makes the entire process feel more professional and less stressful. You're setting yourself up for success.
- When your 30-minute marinating time is up, remove the steak from the bag. Let the excess marinade drip back into the bag—don't wipe the steak off. Any marinade clinging to the surface will help build flavor and color. Discard the marinade bag. Place the steak on your prepared baking sheet. Now sprinkle 2 teaspoons of kosher salt evenly over the top of the steak, then flip it and sprinkle ½ teaspoon of freshly cracked black pepper on the other side. Wait—I said salt on top, then pepper on the flip? Actually, let me clarify: season both sides with both salt and pepper. Here's why this matters: salt draws out moisture briefly, then reabsorbs it along with flavor, seasoning the steak from the inside out. If you salt too early (like the night before), the steak can become dry. But if you salt right before cooking, you get the tenderizing and flavoring benefit without the drying effect. This timing is perfect.
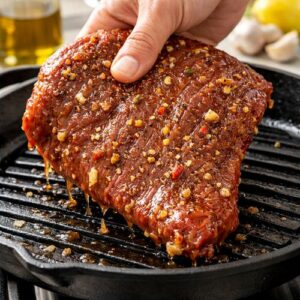
- Carefully place your baking sheet with the steak into the preheated broiler. Set a timer for 5 minutes (for medium-rare) or 6 minutes (for medium). Close the broiler door—or leave it slightly ajar if your oven has a separate broiler drawer; follow your oven's manual if you're unsure. Here's what's happening: the intense heat from above is searing the top of the steak, creating a beautiful brown crust while the interior stays tender and juicy. You're using radiant heat, not direct contact with a hot surface, so the steak cooks evenly. Do not open the broiler door to peek. I know the urge is strong, but you'll lose heat and slow down the cooking. Trust the timer. When that timer goes off, pull the pan out carefully—it will be hot—and flip the steak to the other side.
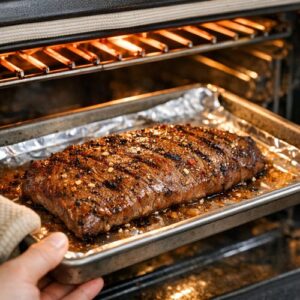
- Using tongs or two forks, flip the steak to the other side. It should have a beautiful golden-brown to dark brown color on the first side—this is what we want. Now set your timer for another 5–6 minutes on the second side. The second side might cook slightly faster than the first, so start checking at the 5-minute mark if this is your first time. This is where an instant-read meat thermometer becomes your best friend. Insert the thermometer horizontally into the thickest part of the steak, being careful not to touch bone (there isn't any, but the habit is good). Here are your target temperatures: Medium: 140–145°F – The meat is warm throughout with less pink in the center.Well-done: 150°F and above – The meat will be gray throughout and tend toward dryness, especially with a lean cut like flank.Medium-rare: 130–135°F – This is my recommendation for flank steak. The meat is tender, juicy, and has a warm red center. If you don't have a thermometer, use the touch test: the fleshy area at the base of your thumb (when your hand is relaxed) feels similar to rare steak. Touch the same spot when you press your thumb and index finger together, and it feels like medium-rare. This takes practice, but it works.
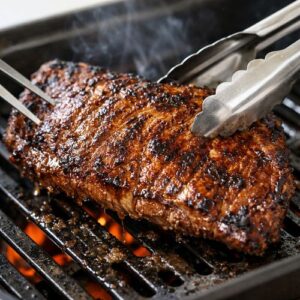
- Remove the steak from the broiler and place it on a clean cutting board. This is not the time to slice it. I want you to let it rest for exactly 10 minutes. Set a timer if you need to—resting is not optional, and 10 minutes is the minimum. Here's the science: when you cook meat, the heat pushes all the flavorful juices toward the center. If you slice immediately, those juices run all over the cutting board instead of staying in your steak. After resting, the juices redistribute throughout the meat, making every bite juicy and flavorful. This 10 minutes is the difference between a good steak and a great one. While the steak rests, this is the perfect moment to plate your sides, pour water, or take a breath. You've essentially finished the hardest part.
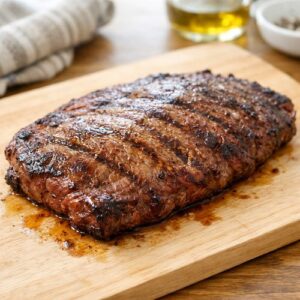
- After 10 minutes of resting, place the steak on your cutting board. Remember earlier when I asked you to notice the grain direction? Now is when that matters. Slice the steak thinly and perpendicular to the grain lines—this means cutting across those lines, not parallel to them. Use a sharp knife and make smooth, confident cuts. You're looking for slices about ¼ inch thick. Thinner slices cook more evenly and are easier to chew, especially with a cut like flank that has pronounced muscle fibers. If your knife is dragging or shredding instead of slicing cleanly, it's time to sharpen it. Arrange the sliced steak on a serving platter or individual plates. Any juices that have pooled on the cutting board should be drizzled over the top—these are liquid gold, flavor-wise.
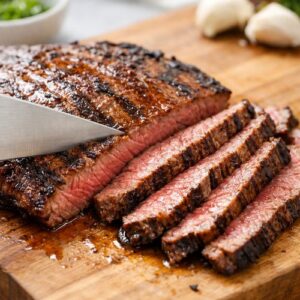
- Serve the steak while it's still warm, ideally within 5 minutes of slicing. Flank steak is best enjoyed at this temperature. Pair it with your favorite sides—I'll give you suggestions below—and enjoy the fact that you just made restaurant-quality steak at home in about 40 minutes.
Notes
FAQs
Can I make this recipe without marinating it first?
Technically yes, but I wouldn’t recommend it for your first attempt. The marinade is what makes flank steak tender. Without it, you’ll have a chewier, less flavorful result. If you’re truly in a time crunch, at minimum salt the steak 40 minutes ahead of cooking (salt itself is a tenderizer), and broil it carefully to avoid overcooking. But honestly, the 30-minute marinate makes such a difference in tenderness that I’d encourage you to plan for it.
What if I don’t have red wine vinegar?
You can substitute with apple cider vinegar, white vinegar, or even lemon juice. The goal is acidity to tenderize the meat. Stick with 2 tablespoons of any of these options. Balsamic vinegar works too, though it’s sweeter and will change the flavor profile slightly. Avoid rice vinegar or distilled vinegar if possible—they’re milder and won’t tenderize as effectively.
Can I cook this on the grill instead