Baked Shrimp Recipe
This post contains affiliate links. As an Amazon Associate I earn from qualifying purchases.
Getting kids to eat baked shrimp feels impossible—until you try this approach. I’ve watched countless parents struggle with getting their families excited about seafood, worrying it’s too “fancy” or intimidating for picky eaters. But here’s what I’ve learned as a registered dietitian working with overwhelmed home cooks: shrimp doesn’t have to be complicated. When you keep it simple, involve your kids in the cooking, and let them customize their plate, something magical happens. This recipe proves that restaurant-quality meals can happen on a Tuesday night in your own kitchen, stress-free and in under 30 minutes. Like the magic of our family mealtimes growing up—where connection and storytelling were always on the menu—this dish brings everyone to the table with excitement. And unlike more involved seafood recipes like baked cod with lemon and capers, shrimp comes together so quickly that even busy weeknight schedules feel manageable.
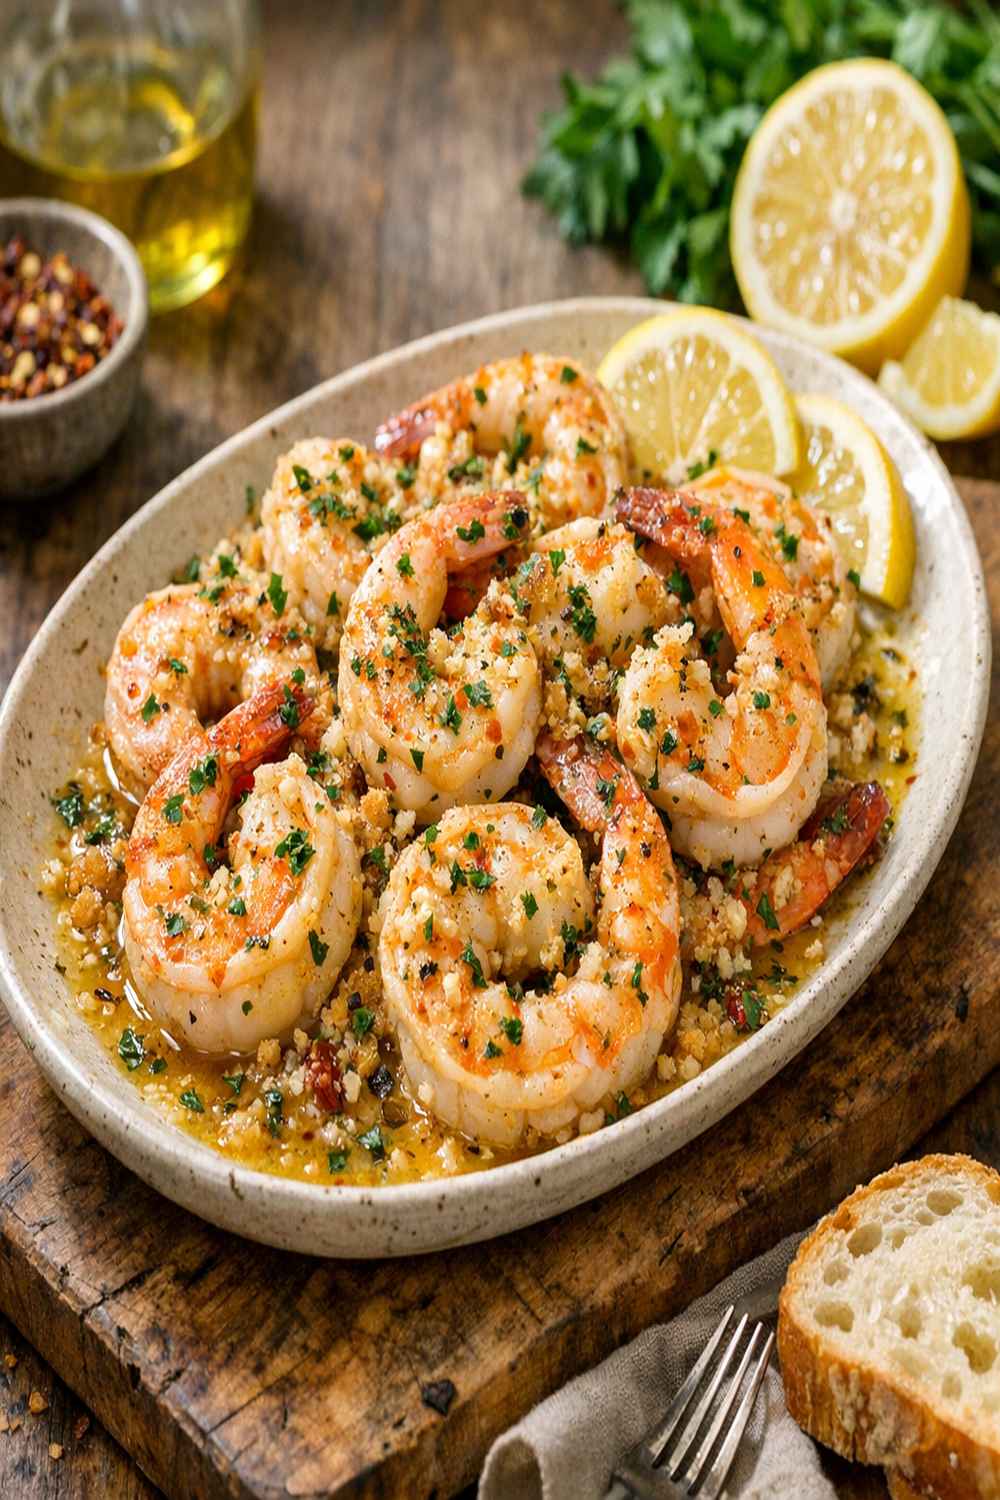
Garlic Butter Baked Shrimp the Whole Family Will Actually Eat (Picky Eaters Included)
I’ll never forget the Tuesday night my niece—who lived on chicken nuggets and refused anything from the ocean—took one bite of these golden, garlicky shrimp and asked for seconds. Her mom nearly dropped her fork. I realized in that moment that kids don’t reject seafood because they dislike it; they reject it because they haven’t been given permission to love it. When shrimp arrives at the table looking beautiful, smelling incredible, and tasting buttery rather than fishy, everything changes. That night, my niece felt like she’d discovered a secret menu item. She’d helped toss the shrimp in butter just ten minutes before, and suddenly she was invested in her own meal. That’s the power of this recipe.
Why Kids Love This Version
This isn’t your typical seafood recipe loaded with unfamiliar flavors or complicated sauces. I’ve designed this specifically for families with varying taste preferences, keeping the focus on what children actually respond to: familiar flavors, interactive cooking, and control over their own plate.
- Familiar flavor profile – Garlic and butter are tastes kids already know and trust, making the shrimp feel less “scary” and more approachable. There’s no competing acidity or complex spices to overwhelm young palates.
- Perfect texture for learning eaters – Unlike chicken or beef that requires extensive chewing, shrimp cooks to a tender, easy-to-eat consistency that builds confidence. Kids can manage the texture without frustration, which means they’re more likely to try it again.
- Fast cooking means fast gratification – Eight minutes in the oven feels like magic to children. They can actually see the transformation happen, which builds excitement and reduces the “I’m starving” complaints during dinner prep.
- Customization reduces power struggles – When kids feel they have choices—whether that’s the amount of seasoning, which side dishes to include, or how they want to serve it—they’re significantly more likely to eat what’s on their plate without negotiation.
How to Get Kids Involved in Making This
One of my core beliefs as a dietitian is that children who help prepare meals are far more likely to eat them. Involvement creates ownership, and ownership creates adventurous eaters. Here’s how to assign age-appropriate tasks for this recipe:
- Ages 3-5: Spreading and sprinkling – After you’ve arranged the shrimp, let little hands sprinkle the garlic powder, salt, and Parmesan cheese. They love the sensory experience of textures falling from their fingers, and it’s a safe, supervised way to feel like a real cook. Stand directly beside them to ensure nothing goes in their mouth, but celebrate their contribution loudly.
- Ages 6-9: Measuring and mixing – School-age kids can handle the responsibility of measuring out ingredients into a small bowl and using a fork or whisk to combine them. Let them pour the melted butter (cooled slightly first, please!) over the shrimp and toss everything together in the baking sheet. This is where they learn cause and effect—they see how ingredients combine to create something delicious.
- Ages 10+: The entire process with supervision – Older kids can handle most steps independently, with you observing for safety. Let them preheat the oven, arrange the shrimp, measure and combine seasonings, and even set the timer. This builds real cooking confidence and gives them a genuine skill they can use for the rest of their lives.
The Ingredients – Hidden Nutrition, Visible Deliciousness
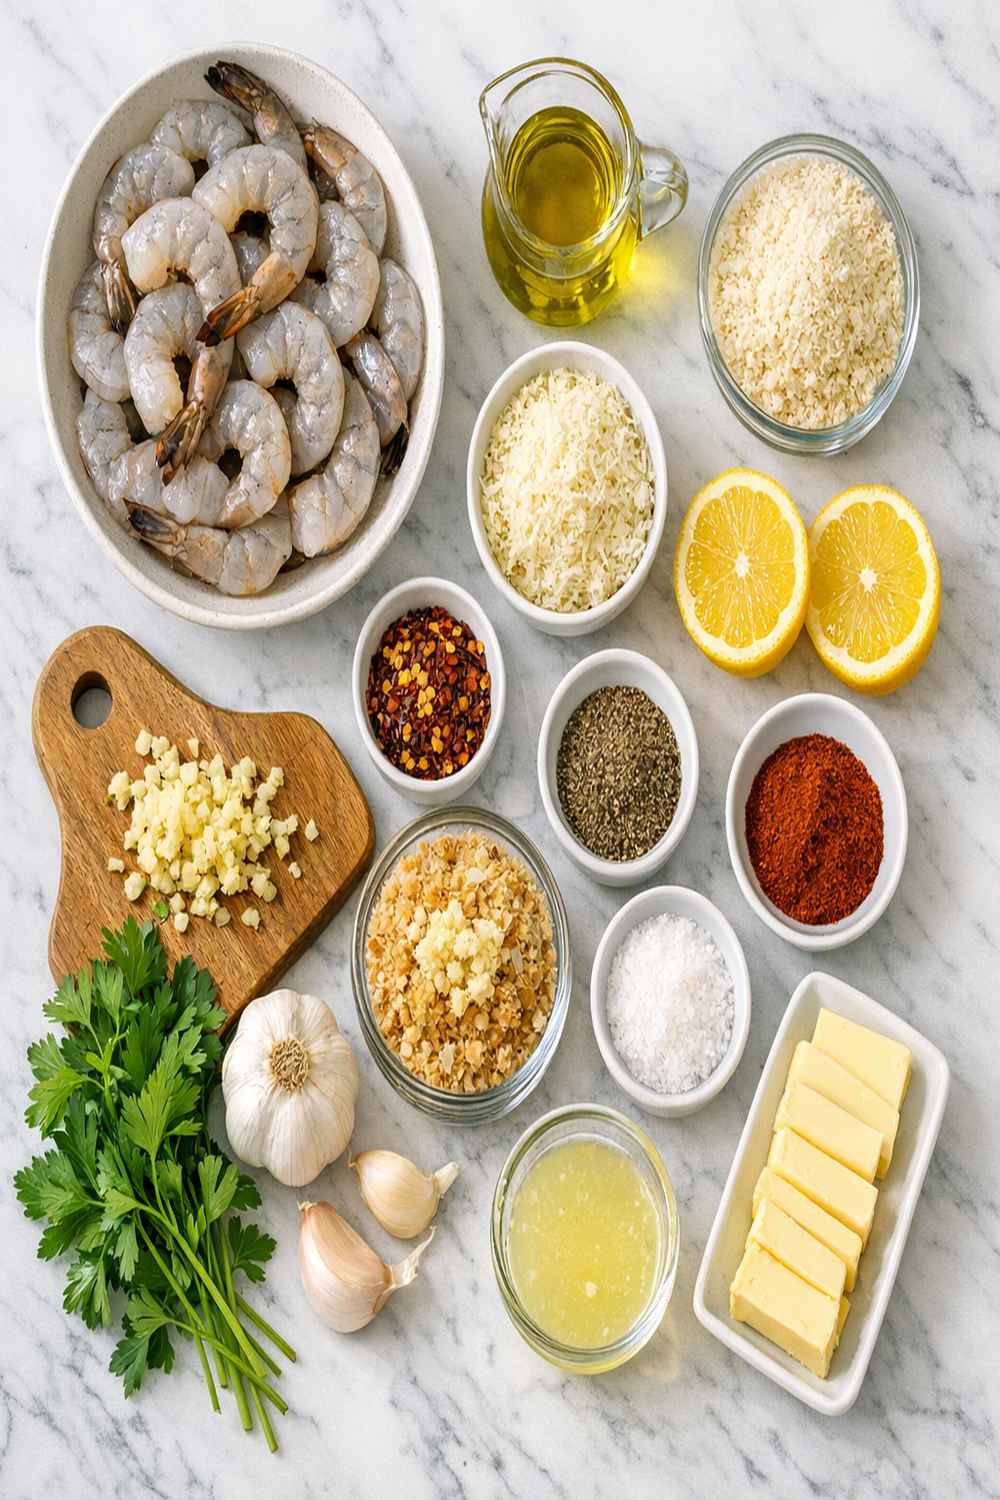
Every ingredient in this recipe pulls double duty: delivering incredible flavor while sneaking in serious nutrition. Shrimp is one of my favorite proteins to recommend for families because it’s packed with selenium for immune health, B vitamins for energy and focus, and omega-3 fatty acids that support brain development in children. The butter and garlic create that restaurant-quality taste that makes kids feel special while eating something genuinely good for them.
- 1½ pounds large raw shrimp (peeled and deveined, which saves you 10 minutes of prep time and makes cooking with kids safer)
- 4 cloves fresh garlic (minced finely, or use ¾ teaspoon garlic powder if you’re short on time)
- ¼ cup butter (melted, or use extra-virgin olive oil if you prefer a lighter finish)
- ½ teaspoon red pepper flakes (adjust based on your family’s spice tolerance—use ¼ teaspoon for milder preferences)
- 1 teaspoon kosher salt (Diamond Crystal brand dissolves more evenly than table salt)
- 1 tablespoon fresh lemon juice (brings brightness and balances the richness beautifully)
- ¼ cup grated Parmesan cheese (freshly grated from a block creates better browning than pre-shredded)
- ¼ teaspoon ground black pepper (freshly cracked tastes brighter, but pre-ground works perfectly)
- ½ teaspoon Italian seasoning (optional, but adds depth without heat)
Makes approximately 4-5 servings (8-10 shrimp per person)
How to Make Garlic Butter Baked Shrimp for the Whole Family
I love framing this cooking time as a family activity rather than just another meal to get on the table. When you approach it with that mindset, dinner prep becomes quality time—storytelling happens, inside jokes are born, and suddenly your kids are more interested in what’s cooking than what’s on their screens. Let’s walk through this together.
Step 1: Prepare Your Workspace and Preheat
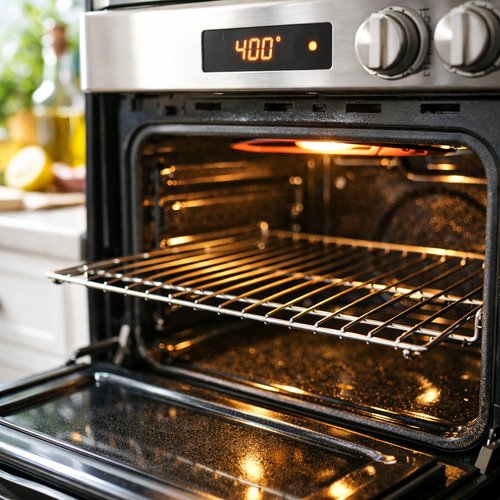
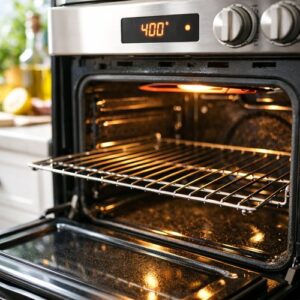
Start by positioning your oven rack to the middle position and preheating your oven to 400°F. This typically takes 8-10 minutes, so begin here while you gather everything else. Never leave the oven unattended once it’s on, and make sure children understand that the oven and baking sheets get extremely hot. I always use this time to get little ones to wash their hands, get a stool or step ladder positioned if they’re helping, and clear the counter space where you’ll be working. Having everything ready before you start cooking—what chefs call mise en place—makes the entire process feel calm and organized, not rushed.
Step 2: Arrange Shrimp on Your Baking Sheet
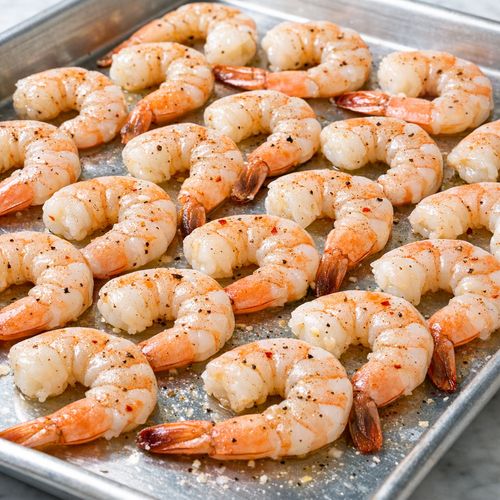
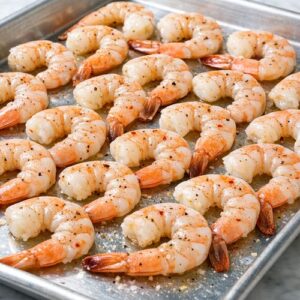
Take a large rimmed baking sheet (I prefer aluminum rather than dark nonstick, which can cause the bottom to brown too quickly) and arrange your shrimp in a single layer. They should be touching but not overlapping, which allows heat to reach every side evenly. If you’re cooking with younger kids, let them help arrange the shrimp—it’s a great opportunity for counting, pattern-making, and fine motor skill practice. Remind children that while raw shrimp is perfectly safe to touch, hands should be washed thoroughly before touching their face or other food.
Step 3: Combine Your Seasonings
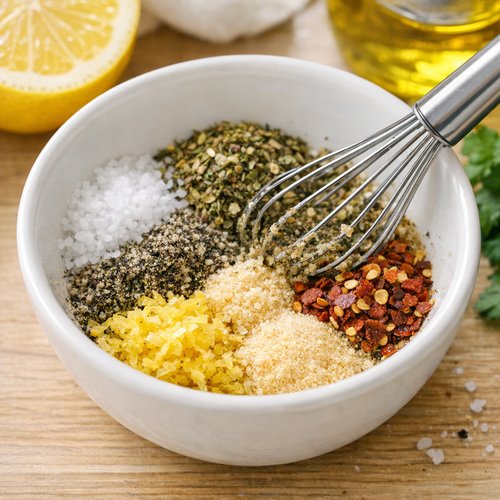
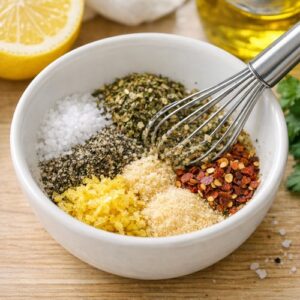
In a small bowl, whisk together your kosher salt, black pepper, red pepper flakes, garlic powder (or minced fresh garlic), Italian seasoning, and lemon juice. This step is perfect for school-age helpers—they can measure each ingredient while you supervise, then use a fork or small whisk to combine everything. You’re creating a flavor base that will coat every piece of shrimp evenly, so don’t skip this step even if it feels like an extra dish.
Step 4: Add Butter and Toss Everything Together
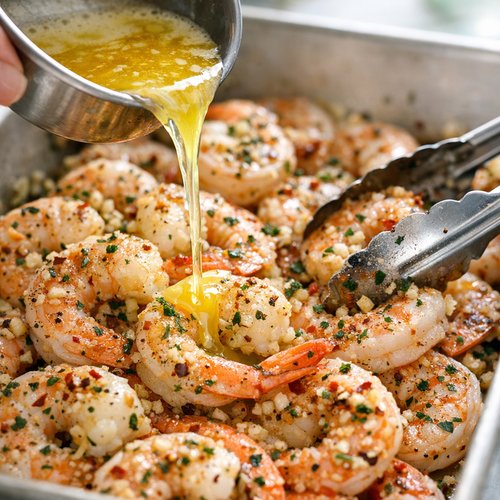
Pour your melted butter over the arranged shrimp, then sprinkle your seasoning mixture evenly across the top. Using a pair of tongs or two forks (or even clean hands, if your family is comfortable), gently toss the shrimp so every piece gets coated with butter and seasonings. This is the moment where kids who helped prepare ingredients suddenly see magic happen—their ingredients have transformed into something that smells absolutely incredible. Take a moment to let them smell it. Build anticipation. Make this feel special.
Step 5: Bake Until Pink and Opaque
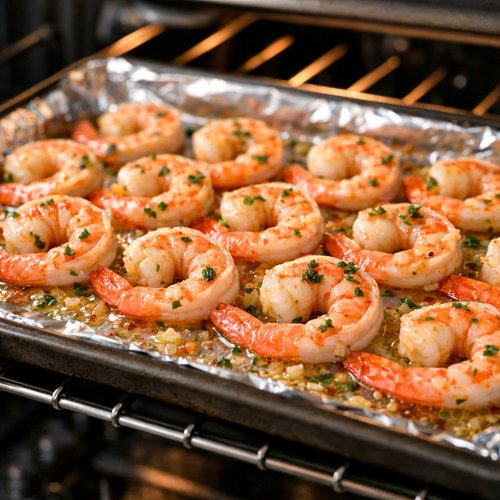
Transfer your baking sheet to the preheated oven and set a timer for 8 minutes. This is a strict timeframe—overcooked shrimp becomes tough and rubbery, which is a legitimate reason for kids (and adults) to reject seafood. After 8 minutes, the shrimp should be bright pink and opaque throughout with no gray or translucent sections remaining. If you’re planning to broil for extra Parmesan browning (which I recommend for added texture), line your sheet with aluminum foil instead of parchment paper, as parchment can smoke under the broiler.
Step 6: Optional Broil for Golden Cheese
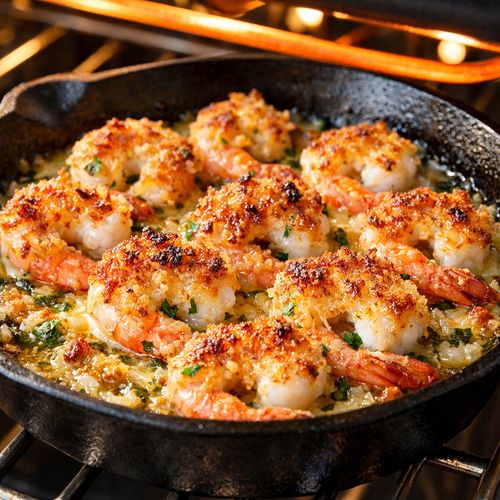
If you want deeply golden, crispy Parmesan (which adds incredible texture), turn your oven to broil and place the shrimp about 4 inches from the heating element for 1-2 minutes. Watch it closely—this happens fast. Do not leave the oven unattended during broiling. The shrimp is already fully cooked, so you’re just crisping the cheese topping. Kids love this step because they can see the transformation happen through the oven window.
Step 7: Finish and Serve
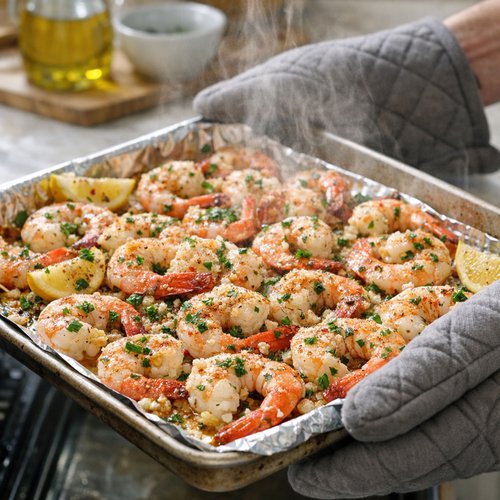
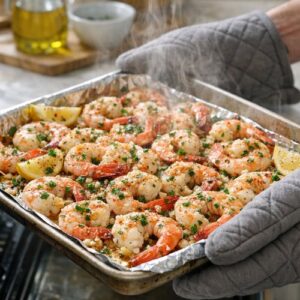
Carefully remove your baking sheet from the oven using oven mitts—remind anyone helping that the sheet, the shrimp, and even the steam coming from it are dangerously hot. Transfer the shrimp to a serving platter and spoon all those buttery pan juices over the top. Those golden, garlicky drippings are liquid gold for flavor, so don’t waste them. Serve immediately while everything is warm, and watch your family’s faces light up.
Customization Station: Let Everyone Build Their Own
This is where my philosophy about involving kids in food really shines. Rather than serving everyone an identical plate and battling over “just try it,” I set up a customization station where each person can build their own meal. This gives picky eaters control, reduces power struggles dramatically, and makes the meal feel interactive and fun rather than mandatory.
- Seasoning choices – Serve extra lemon wedges, additional red pepper flakes, and extra grated Parmesan in small bowls so each person can adjust to their preference. Some kids want it milder; some want more punch. Let them decide.
- Topping options – Fresh parsley, crispy breadcrumbs, toasted panko, or even crushed crackers can be sprinkled on top. Kids who feel like they’re building their own meal are exponentially more likely to eat it.
- Serving style choices – Some kids prefer shrimp on a bed of rice, others want it with roasted vegetables, and some want it served over pasta. Having options available means everyone feels like their preference matters.
Scaling for Different Family Sizes
This recipe is beautifully flexible depending on how many people you’re feeding. Here’s how I scale it:
For a family of 2: Use ¾ pound shrimp, 2 tablespoons butter, 2 cloves garlic, ½ teaspoon salt, ⅛ teaspoon black pepper, ¼ teaspoon red pepper flakes, and 2 tablespoons Parmesan. Bake on a smaller sheet for the same 8 minutes.
For a family of 4: Use the full recipe as written—1½ pounds shrimp works perfectly for four people with generous portions plus potential leftovers.
For a family of 6: Double the recipe, using 3 pounds shrimp and 2 large baking sheets arranged side by side in the oven. Cooking time remains 8 minutes, but check both sheets to ensure even cooking.
For a family of 8 or more: Triple the original recipe and use three large baking sheets, rotating them if necessary. Your oven might only fit two sheets at a time, in which case you’ll want to stagger cooking—bake the first two sheets for 8 minutes while keeping the third refrigerated, then bake the final batch while serving the first round warm.
Can I Store Baked Shrimp?
Yes, though I’ll be honest—shrimp is best enjoyed immediately while it’s warm and has that perfect tender texture. That said, real life means leftovers happen, and I want you to know how to handle them safely.
Refrigerator storage: Place cooled shrimp in an airtight container and refrigerate for up to 3 days. The texture will be slightly less tender but still delicious, especially if you’re planning to use it in other dishes.
Lunchbox transformation: Cold shrimp makes an excellent protein addition to school lunches. Pack it in a separate container from other foods to keep flavors distinct, and include a small container of ranch dip or cocktail sauce for dipping. Kids often find cold shrimp more fun to eat than warm—it feels like a special treat rather than “leftover dinner.”
Freezer storage: While technically you can freeze cooked shrimp, the texture changes significantly upon thawing. If you must freeze, place cooled shrimp in a freezer-safe container and use within 1 month. Thaw overnight in the refrigerator and plan to use it in composed dishes like pasta, grain bowls, or salads rather than serving it plain.
Reheating: If you want to reheat shrimp, do it gently at 300°F for just 5-8 minutes until warmed through. Never use the microwave, which accelerates toughening. A low oven preserves texture much better.
Nutrition Information
According to USDA data, one serving of this recipe (approximately 8-10 shrimp, roughly 3 ounces) contains approximately 180 calories, 25 grams of protein, 8 grams of fat, and minimal carbohydrates. Here’s why I get excited about these numbers as a dietitian working with families:
Protein for growth and satiety: Shrimp is a lean, complete protein containing all nine essential amino acids your growing children need. For school-age kids, this translates to muscle development, stronger immune function, and sustained energy through their afternoon activities. That high protein content also means kids stay full longer, reducing the “I’m hungry again” battle thirty minutes after dinner.
Selenium for immune health: Just one serving of shrimp delivers nearly 50% of the daily recommended selenium for children. This mineral is crucial for thyroid function and protecting cells from oxidative stress—exactly what developing bodies need during cold and flu season.
B vitamins for energy and focus: Shrimp contains B12 and other B vitamins that support energy production and cognitive function. If you’re looking for a protein that’ll actually help your kids focus on homework rather than making them sluggish, this is it.
Omega-3 fatty acids for brain development: The healthy fats in shrimp support neurological development, which is particularly important during childhood and adolescence. These same fats support healthy skin and reduce inflammation.
What to Serve Alongside for a Complete Family Meal
Shrimp is a protein-forward dish, so I typically pair it with vegetables and a starch to create a balanced plate. The goal is feeding the whole family—not just giving them protein on a plate. Here are my go-to combinations:
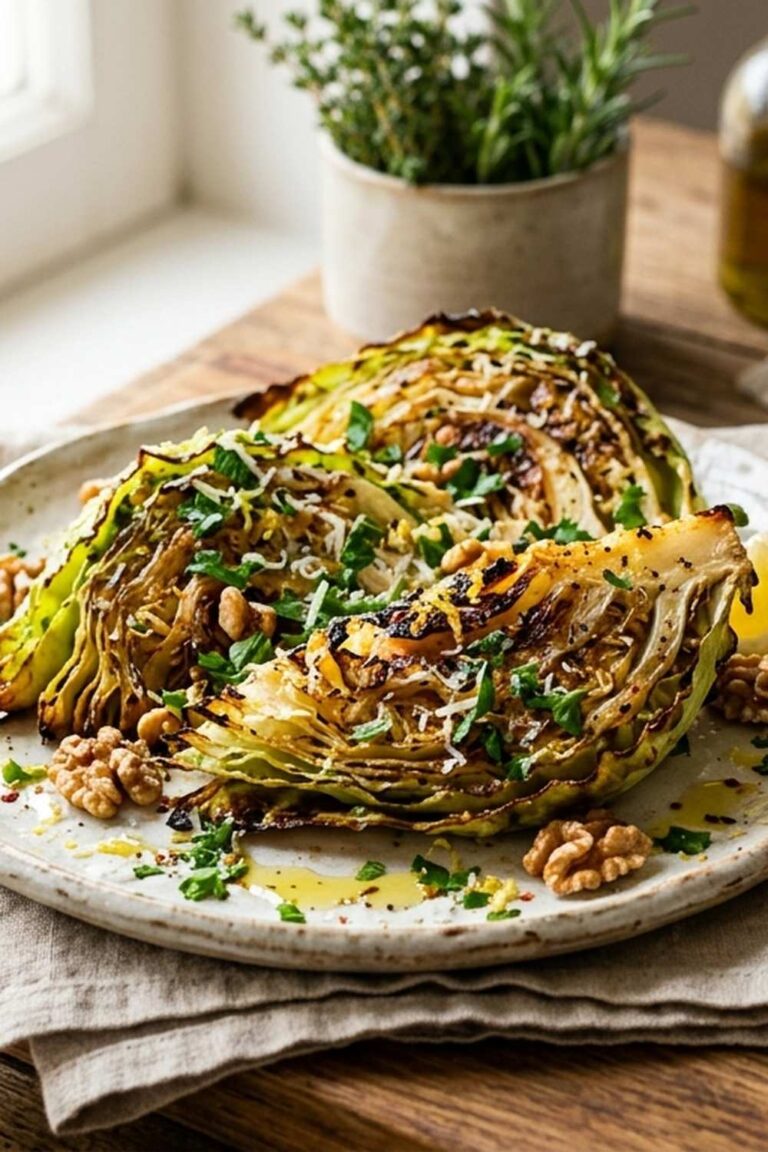
- Roasted asparagus or baked cabbage – Roasted vegetables develop sweetness and caramelization that make them appealing to kids who typically reject cooked veggies. Asparagus is particularly fun because kids love the shape and the interactive nature of picking them up with their hands.
- Lemon rice pilaf or buttered couscous – A simple grain soaks up those beautiful buttery pan juices and provides substance to round out the meal. I keep minute rice on hand for busy nights, and honestly, it works beautifully with shrimp.
- Garlic bread or toasted pita – This isn’t fancy, but it’s practical. Bread helps kids who are still learning to appreciate seafood feel fuller and more satisfied. Some of my best childhood memories involve dunking bread into pan sauces.
- Mixed greens with a light vinaigrette – For families with older kids or parents who want a lighter meal option, a simple salad balances the richness of the buttery shrimp beautifully. Keep the dressing mild so it doesn’t overpower young palates.
Expert’s Nutritional Tip: Why Cooking Temperature Matters for Shrimp
From my clinical background, I always emphasize that shrimp at 400°F cooks through completely in exactly 8 minutes—but here’s what many home cooks don’t realize: this rapid cooking preserves more B vitamins and heat-sensitive nutrients than slower cooking methods. When shrimp sits in a pan or overcooks at high temperature, some of those precious B vitamins degrade. The quick oven method I’m sharing actually delivers better nutrition to your family’s plates. This is one reason I choose this cooking method above pan-searing or poaching.
Make-Ahead Guide: Meal Prep for Busy Families
As someone who works with overwhelmed parents, I understand that sometimes you need dinner prepped before you even step into the kitchen at 5 PM. Here’s my make-ahead strategy:
Up to 24 hours ahead: Buy your shrimp and store it in the coldest part of your refrigerator. Prepare your seasoning mixture in a small container and refrigerate it. This saves you 5 minutes of actual cooking time on dinner night.
2 hours before dinner: Arrange your shrimp on the baking sheet and cover loosely with plastic wrap. Store in the refrigerator. Just before cooking, remove it, add butter and seasonings, and bake as directed. Cold shrimp might need 9-10 minutes instead of 8, so watch carefully.
Morning of: Measure out all your seasonings into one small bowl, cover, and refrigerate. This is the absolute minimum prep that still saves you sanity during the dinner rush.
Common Mistakes to Avoid
I’ve made all of these mistakes myself, and I’ve watched countless families repeat them. Here’s what to watch out for:
Overcooking the shrimp: This is the number-one reason people think they dislike shrimp. Overcooked shrimp becomes tough, rubbery, and unpleasant. Set your timer for 8 minutes and check at exactly that point. The shrimp should be opaque but still tender. If you see any translucent gray areas, give it 1 more minute. But 9 minutes is often too long.
Using frozen shrimp without thawing: Many grocery store shrimp arrives frozen, which is fine. But you must thaw it completely before cooking. The best method is overnight in the refrigerator, but if you’re short on time, place sealed shrimp in a bowl of cold water for 30-45 minutes. Cooking frozen shrimp adds 3-4 extra minutes to your cooking time and creates uneven doneness.
Skipping the deveining step: Pre-peeled, pre-deveined shrimp costs more upfront but saves enormous time and hassle. For a family dinner, this investment is worth it. The vein (which is actually the digestive tract) isn’t harmful, but removing it improves appearance and texture. Since your goal is making dinner stress-free, buy the pre-deveined option.
Not tossing thoroughly with butter and seasonings: This step takes 30 extra seconds but ensures even seasoning distribution. Shrimp that’s unevenly seasoned gives picky eaters an excuse to declare the whole dish inedible. Spend the extra half minute tossing everything together.
Seasonal Variations: Adapting Throughout the Year
One of my favorite things about simple recipes is how easily they adapt to seasonal ingredients and cravings. Here’s how I change this dish throughout the year:
Spring version: Add fresh lemon zest to your seasoning mix and finish with fresh chopped dill or tarragon. Serve alongside fresh asparagus or tender spring peas. Spring feels light and bright, and this version reflects that.
Summer variation: Keep the recipe exactly as written but serve it alongside grilled corn, fresh tomato salad, or a cooling yogurt cucumber sauce. Summer is about abundance and brightness, so lean into fresh herbs and cold side dishes.
Fall adaptation: Add smoked paprika (½ teaspoon) to your seasoning mix and reduce the red pepper flakes to ¼ teaspoon for a warmer, more grounding flavor. Serve alongside roasted root vegetables or creamy polenta. The earthiness balances the richness beautifully as weather turns cooler.
Winter option: Add ¼ teaspoon cayenne pepper and fresh thyme to your mix. Serve over creamy cauliflower rice or alongside roasted Brussels sprouts with bacon. Winter is when families crave richness and comfort, and this version delivers exactly that.

Baked Shrimp Recipe
Ingredients
Method
- Start by positioning your oven rack to the middle position and preheating your oven to 400°F. This typically takes 8-10 minutes, so begin here while you gather everything else. Never leave the oven unattended once it's on, and make sure children understand that the oven and baking sheets get extremely hot. I always use this time to get little ones to wash their hands, get a stool or step ladder positioned if they're helping, and clear the counter space where you'll be working. Having everything ready before you start cooking—what chefs call mise en place—makes the entire process feel calm and organized, not rushed.
- Take a large rimmed baking sheet (I prefer aluminum rather than dark nonstick, which can cause the bottom to brown too quickly) and arrange your shrimp in a single layer. They should be touching but not overlapping, which allows heat to reach every side evenly. If you're cooking with younger kids, let them help arrange the shrimp—it's a great opportunity for counting, pattern-making, and fine motor skill practice. Remind children that while raw shrimp is perfectly safe to touch, hands should be washed thoroughly before touching their face or other food.
- In a small bowl, whisk together your kosher salt, black pepper, red pepper flakes, garlic powder (or minced fresh garlic), Italian seasoning, and lemon juice. This step is perfect for school-age helpers—they can measure each ingredient while you supervise, then use a fork or small whisk to combine everything. You're creating a flavor base that will coat every piece of shrimp evenly, so don't skip this step even if it feels like an extra dish.
- Pour your melted butter over the arranged shrimp, then sprinkle your seasoning mixture evenly across the top. Using a pair of tongs or two forks (or even clean hands, if your family is comfortable), gently toss the shrimp so every piece gets coated with butter and seasonings. This is the moment where kids who helped prepare ingredients suddenly see magic happen—their ingredients have transformed into something that smells absolutely incredible. Take a moment to let them smell it. Build anticipation. Make this feel special.
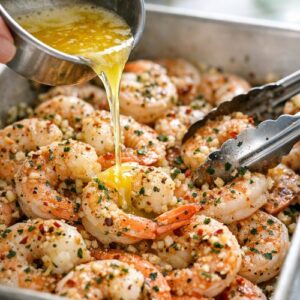
- Transfer your baking sheet to the preheated oven and set a timer for 8 minutes. This is a strict timeframe—overcooked shrimp becomes tough and rubbery, which is a legitimate reason for kids (and adults) to reject seafood. After 8 minutes, the shrimp should be bright pink and opaque throughout with no gray or translucent sections remaining. If you're planning to broil for extra Parmesan browning (which I recommend for added texture), line your sheet with aluminum foil instead of parchment paper, as parchment can smoke under the broiler.
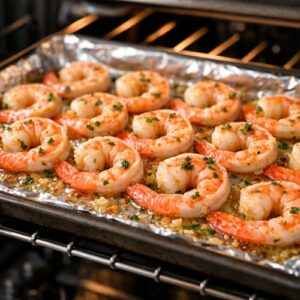
- If you want deeply golden, crispy Parmesan (which adds incredible texture), turn your oven to broil and place the shrimp about 4 inches from the heating element for 1-2 minutes. Watch it closely—this happens fast. Do not leave the oven unattended during broiling. The shrimp is already fully cooked, so you're just crisping the cheese topping. Kids love this step because they can see the transformation happen through the oven window.

- Carefully remove your baking sheet from the oven using oven mitts—remind anyone helping that the sheet, the shrimp, and even the steam coming from it are dangerously hot. Transfer the shrimp to a serving platter and spoon all those buttery pan juices over the top. Those golden, garlicky drippings are liquid gold for flavor, so don't waste them. Serve immediately while everything is warm, and watch your family's faces light up.
FAQs
My child is terrified of seafood. How do I get them to even try this?
Start by involving them in cooking—seriously. Kids who participate in preparation are exponentially more likely to taste the final product. Let them help arrange the shrimp, measure the garlic, and sprinkle the Parmesan. During cooking, have them smell it (the aroma is literally half the appeal). Then, at dinner, don’t force it. Simply place one shrimp on their plate and say something like, “I made this special. I’d love for you to try it, but you get to decide.” Give it three or four exposures before deciding your child genuinely doesn’t like it—food preferences develop gradually, especially for kids with sensory sensitivities around texture.
Can I use frozen shrimp instead of fresh?
Absolutely. Most shrimp sold in grocery stores is actually frozen-thawed, so “fresh” and “frozen” are often the same product at different price points. If you’re buying truly frozen shrimp, thaw it completely in the refrigerator overnight or in a bowl of cold water for 30-45 minutes. Pat it dry with paper towels before cooking—excess moisture can steam rather than sear the shrimp, affecting texture.
My family loves spice. How much red pepper flakes should I use?
Start with the ½ teaspoon and work up from there. Every family’s spice tolerance is different. I’d suggest offering the basic version, then adding more red pepper flakes in a separate small batch for adventurous eaters. This way, everyone gets the version they enjoy without power struggles. Kids watching adults genuinely enjoy spiced food are often more curious to try it themselves.
What if my oven runs hot and my shrimp cooks faster?
Oven temperatures vary more than people realize. If you notice your shrimp is done at 7 minutes, adjust your timing next time accordingly. Use a reliable oven thermometer if you suspect your oven is running hot—they’re inexpensive and tremendously helpful. And remember: checking at 7 minutes is fine. You’re looking for opaque, pink shrimp, not a specific time on the clock.
Can I make this in a skillet on the stovetop instead of the oven?
You can, though you’ll lose the even cooking and the beautiful presentation of the baked version. If you prefer stovetop cooking, melt your butter in a large skillet over medium-high heat, add your shrimp and seasonings, and cook for 3-4 minutes per side until opaque. Stir frequently to ensure even cooking. The results are good, but the oven method gives you better texture and allows you to focus on other parts of dinner while cooking.
More Family-Friendly Recipes
- Baked Center Cut Pork Chop Recipe – Another 30-minute protein that families love, with similar hands-on cooking appeal.
- Asparagus Prosciutto Recipe – A vegetable side that feels special enough to excite picky eaters.
- Baked Pear Recipe – A simple dessert that kids can help prepare and feel proud about serving.
- Asian Brussels Sprouts Recipe – A roasted vegetable side that pairs beautifully with seafood and converts vegetable skeptics.
This garlic butter baked shrimp recipe represents everything I believe about family cooking: it’s simple enough for busy weeknights, impressive enough to make your family feel celebrated, and flexible enough to grow with your family’s tastes over time. More importantly, it’s an opportunity. An opportunity to involve your kids, to build food memories together, to prove that restaurant-quality meals don’t require restaurant-level complexity or stress.
When your child takes their first bite of something they helped create—when they taste the garlic and butter and Parmesan they measured themselves—they’re not just eating dinner. They’re learning that they can do hard things, that trying new foods is an adventure, that family meals are worth their time and attention. That’s what happened at my table that night with my niece, and that’s what I hope happens at yours.
The real magic of cooking for family isn’t in fancy techniques or complicated ingredients. It’s in the intentionality of feeding people you love, in the stories told while you’re waiting for the oven timer to ding, in watching someone’s face light up when they taste something delicious that they helped create. This recipe gives you all of that in 30 minutes or less.
Take care with love and flavor!