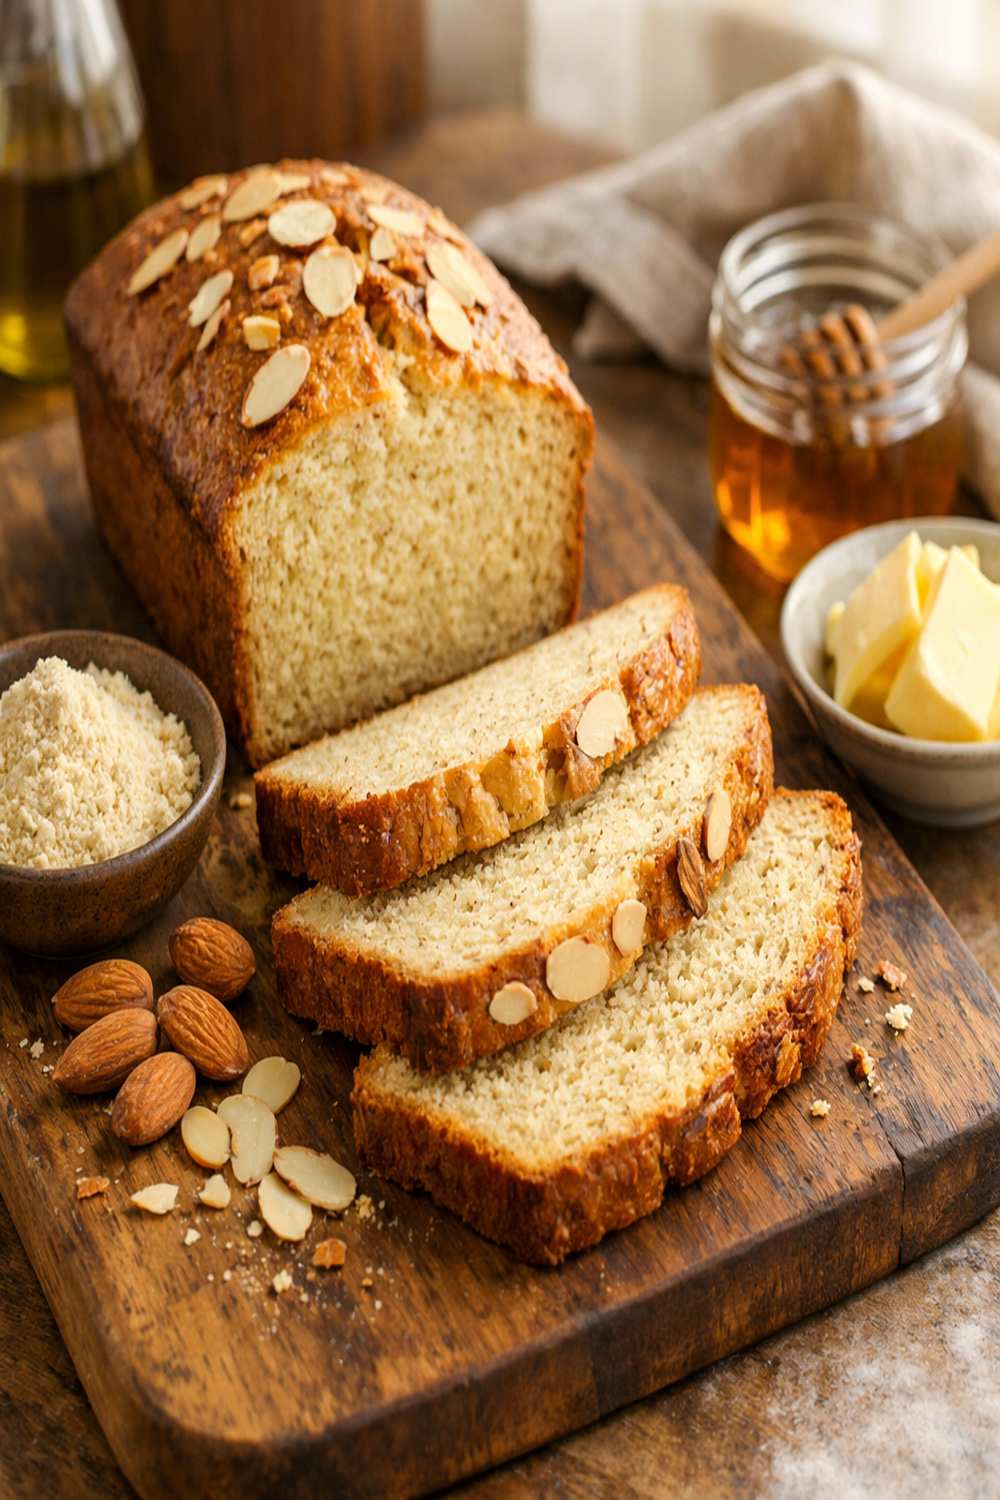
Almond Flour Gluten Free Bread Recipe
This post contains affiliate links. As an Amazon Associate I earn from qualifying purchases.
I remember standing in my kitchen at 6 a.m., watching my daughter pour a bowl of cereal for breakfast—again. She’d been diagnosed with celiac disease two years prior, and I was tired of the dense, crumbly gluten-free breads that promised so much but delivered disappointment. That morning, I decided to create something better: a bread with real substance, real flavor, and real nutrition. This almond flour gluten-free bread became our family’s new ritual. Now I pair it with bacon and eggs for breakfast or serve it alongside a simple salad at dinner. It’s become the foundation of countless conversations around our table—the same way my own childhood mealtimes shaped my passion for food.
A Game-Changing Discovery for Gluten-Free Living
When I first started working as a registered dietitian, I noticed something troubling in my clients’ pantries: rows of expensive gluten-free bread options that tasted like cardboard and left them feeling unsatisfied. Most conventional gluten-free breads rely heavily on starches and gums, creating a texture that’s either gummy or grainy—never quite right.
This recipe changed everything for me and my clients. It harnesses the power of almond flour combined with psyllium husk—two ingredients that work together to create structure, moisture, and that coveted chew that makes bread actually feel like bread. The result is a loaf that’s tender inside with a proper crust, packed with protein and healthy fats, and ready in under an hour and a half.
What is Almond Flour Gluten-Free Bread?
This isn’t just another almond flour cake masquerading as bread. Almond flour gluten-free bread is a carefully balanced combination of ground almonds, psyllium husk powder, and eggs—the holy trinity of gluten-free baking. The psyllium husk acts as a binding agent and creates structure that mimics the elasticity gluten provides, while the almond flour contributes protein, healthy monounsaturated fats, and a subtly nutty flavor.
Traditional bread relies on gluten’s network to trap gas bubbles and create texture. In this recipe, the eggs provide lift and richness, the psyllium husk provides binding and moisture retention, and the almond flour provides substance. It’s a completely different approach than trying to recreate wheat bread in a gluten-free kitchen—and that’s precisely why it works so beautifully.
This bread originated from the low-carb and paleo communities, where people were seeking alternatives that aligned with their dietary choices. What started as a niche option has become a staple for anyone managing celiac disease, non-celiac gluten sensitivity, or simply choosing to reduce refined grains in their diet.
Why You’ll Love This Almond Flour Gluten-Free Bread Recipe
- Ready in under 90 minutes – Mix, bake, and have fresh bread on your table faster than traditional yeast breads require to rise alone.
- Simple ingredient list you likely have on hand – No specialty flours, no mysterious additives, just whole food staples.
- Packed with protein and healthy fats – One slice delivers about 6 grams of protein and heart-healthy omega-3s from the almond flour.
- Naturally gluten-free – Safe for celiac disease and non-celiac gluten sensitivity without any questionable substitutes.
- Proper bread texture that actually slices – Unlike many gluten-free options, this bread holds together beautifully and won’t crumble when you spread butter on it.
- Budget-friendly compared to specialty bakery options – A loaf costs about 40% less than purchasing equivalent gluten-free bread from a specialty bakery.
- Freezer-friendly for meal prep – Slice and freeze individual portions to toast throughout the week.
The Ingredients
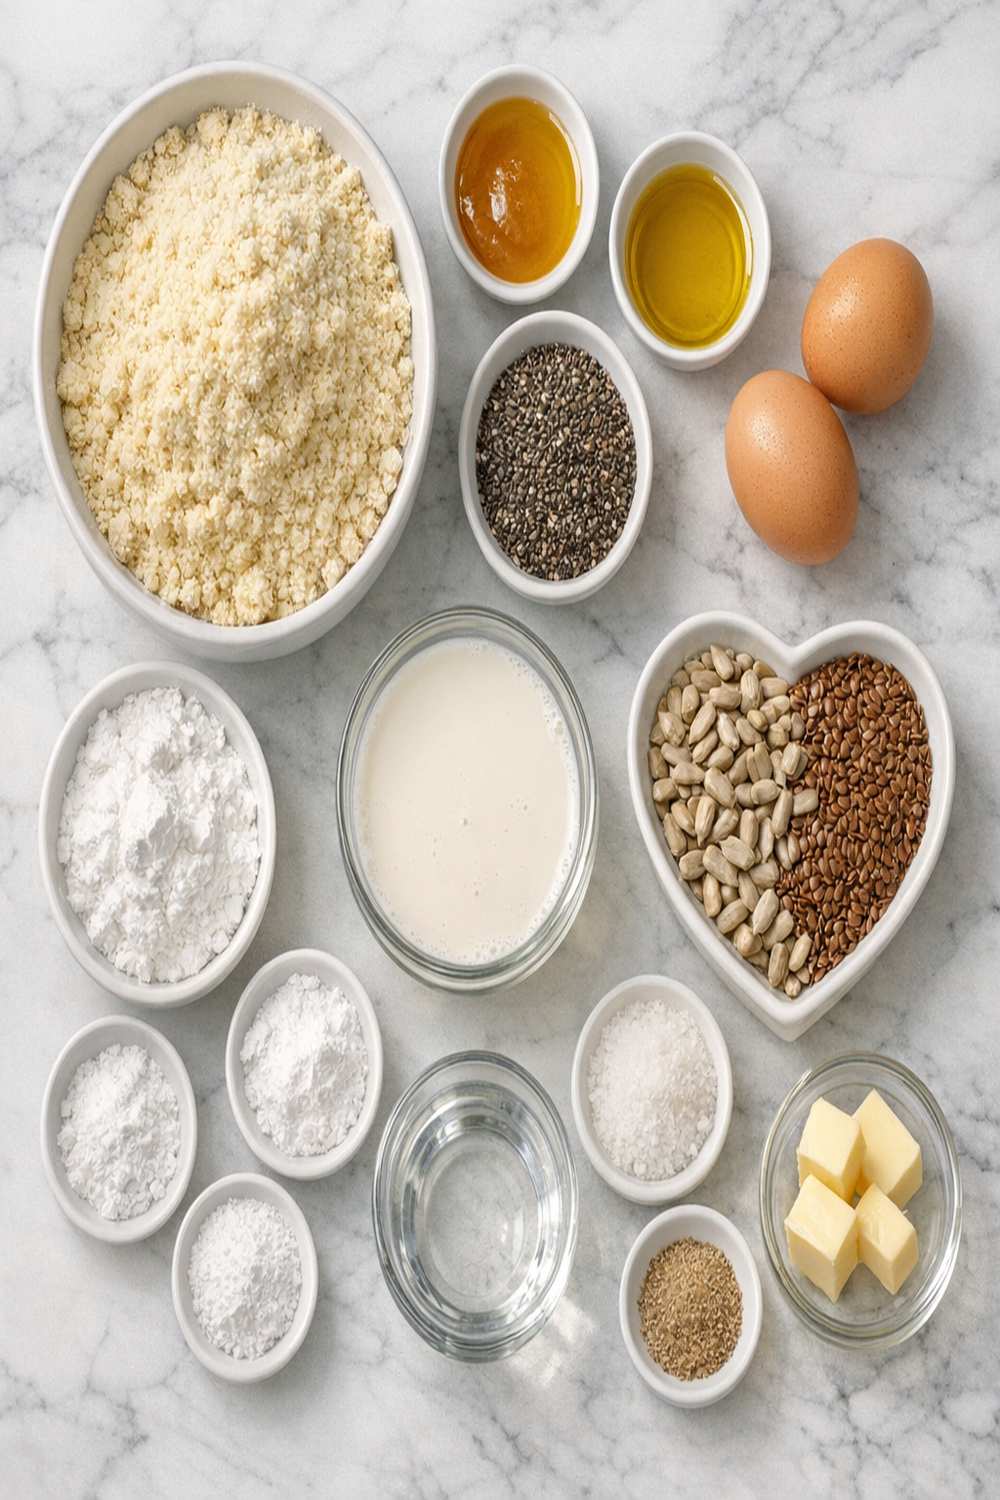
I’ve chosen each ingredient in this recipe specifically for its function and availability. You’ll find everything at your regular grocery store, and most likely, several items are already in your pantry. The magic happens when these simple ingredients work together—it’s a perfect example of how understanding nutrition science creates better home cooking.
- ¼ cup coconut oil (solid measured, then melted for better mixing)
- 2 cups blanched almond flour (finely ground, not almond meal or almond butter)
- ¼ cup psyllium husk powder (not psyllium seed husks—the powder blends seamlessly)
- 1 teaspoon baking powder (aluminum-free if you’re sensitive)
- 4 large eggs (room temperature—this creates better volume and a lighter crumb)
- ½ teaspoon fine sea salt (enhances all flavors naturally)
- 2 tablespoons honey or maple syrup (optional, adds subtle sweetness and aids browning)
- ½ cup warm water (helps activate the psyllium husk’s binding properties)
Makes one 9-inch loaf (approximately 12 slices)
How to Make Almond Flour Gluten-Free Bread?
I’m going to walk you through this step-by-step, and I promise it’s simpler than it might seem. The entire active preparation time is about 15 minutes—the oven does the real work. Pay special attention to the doneness cues, as this is different from wheat bread baking.
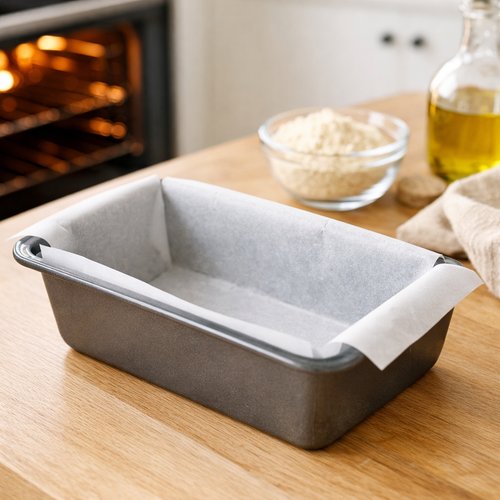
Step 1: Preheat Your Oven and Prepare the Pan
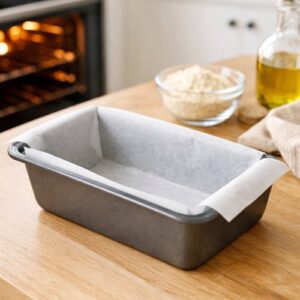
Set your oven to 350 degrees Fahrenheit and allow it to fully preheat—this takes about 10 minutes. While it’s heating, line a 9-inch loaf pan with parchment paper, allowing the paper to extend slightly above the edges so you can easily lift the bread out once it’s cool. This prevents sticking and makes removal effortless, especially with this tender crumb structure.
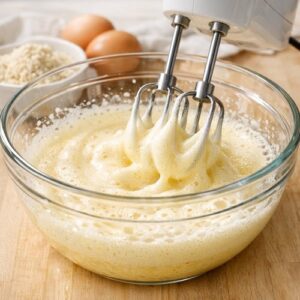
Step 2: Beat the Eggs Until They Reach Peak Volume
Crack your four room-temperature eggs into a large mixing bowl. Using an electric hand mixer on high speed, beat the eggs continuously for about 4-5 minutes. You’ll watch them transform from pale yellow to almost white, nearly doubling in volume. This step is non-negotiable—the air you’re incorporating becomes the primary leavening agent in this bread, creating lift and a lighter crumb structure. Stop when the mixture looks thick, foamy, and ribbon-like when you lift the beaters.

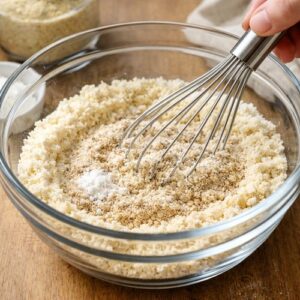
Step 3: Combine All Dry Ingredients Separately
In a second large bowl, whisk together the blanched almond flour, psyllium husk powder, baking powder, and fine sea salt. Whisking rather than simply stirring breaks up any lumps and distributes the leavening agent evenly throughout the flour mixture. This ensures consistent rise across the entire loaf rather than creating tunnels or dense pockets.

Step 4: Fold Dry Ingredients Into the Beaten Eggs
Pour the dry ingredient mixture into the beaten eggs gradually, folding gently with a spatula rather than stirring vigorously. This preserves the air you’ve worked so hard to incorporate. Use about 10-12 gentle folding motions until you see no streaks of dry flour remaining. The mixture will be thick and batter-like at this point.

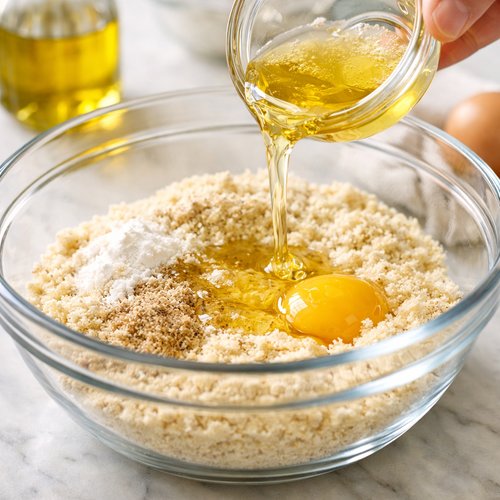
Step 5: Add the Fat and Binding Liquid
Measure out your coconut oil while it’s still solid, then gently melt it over low heat or in the microwave for about 30 seconds. Pour the warm melted coconut oil into the batter, folding gently until combined. Then add the warm water—this temperature helps activate the psyllium husk’s binding and thickening properties. Fold until everything is just incorporated. The batter will be thicker than cake batter but still spreadable, with a texture somewhere between pancake batter and cookie dough.
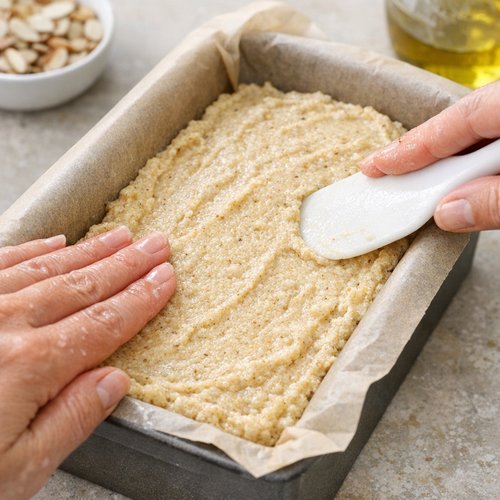
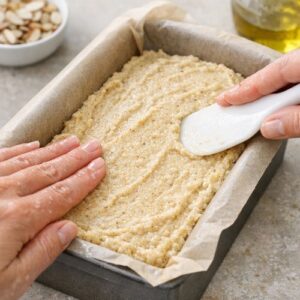
Step 6: Transfer to the Pan and Shape the Top
Pour the batter into your prepared loaf pan and use a spatula or your damp hands to spread it evenly, pressing gently to remove air pockets and creating a rounded top. The top should be relatively smooth and even. This creates an even bake and that beautiful bread-like appearance when it emerges from the oven.
Step 7: Bake Until a Proper Crust Forms
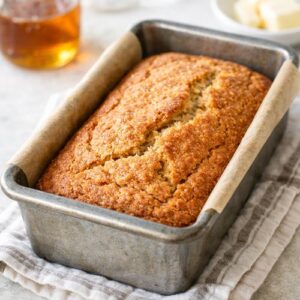
Place the loaf in your preheated 350-degree oven for 55 to 70 minutes. Here’s the critical part: a toothpick inserted into the center will come out clean around the 55-minute mark, but this is when many bakers remove it and end up with a bread that collapses or becomes dense within hours. Instead, watch for the top to develop a deep golden-brown, hard crust—similar to the crackling crust on artisan bread. The top should feel firm and slightly hollow when tapped lightly. This crust sealing is what allows the interior to maintain its tender crumb structure as it cools and sets.
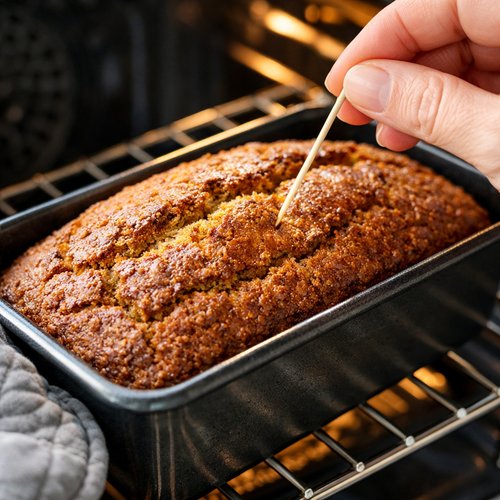
Step 8: Cool Completely Before Slicing
Remove the bread from the oven and allow it to rest in the pan for at least 15 minutes. This cooling period allows the internal structure to set properly. Then turn it out onto a wire rack and let it cool completely—about 45 minutes to an hour—before slicing. Slicing too early results in a gummy, compressed texture. I know it’s tempting to cut into warm bread, but this patience step is what creates that perfect slice.

Tips and Tricks
- Room Temperature Eggs Are Non-Negotiable – Cold eggs won’t incorporate air effectively, resulting in a denser, flatter loaf. Remove eggs from the refrigerator 30 minutes before baking, or place them in a bowl of warm water for 5 minutes.
- Don’t Skip the Psyllium Husk Powder – This is the ingredient that makes the difference between a dense almond flour cake and actual bread. Psyllium husk absorbs liquid and creates the binding structure that mimics gluten. Psyllium seed husks (the whole husks) won’t work as effectively—you need the powder for this recipe.
- Measure the Almond Flour Correctly – Blanched almond flour should be spooned into your measuring cup and leveled with a knife, never packed down. Packing adds weight and creates a denser bread. One cup of properly measured blanched almond flour weighs about 112 grams if you prefer a kitchen scale.
- The Top Crust Matters More Than You Think – This bread’s success depends on that hard, crusty top forming completely. If your oven runs hot, cover the top loosely with foil after 40 minutes to prevent over-browning while the interior continues cooking.
- Use a Loaf Pan, Not a Round Cake Pan – The shape matters for proper heat distribution and that traditional bread form. A 9-inch loaf pan is standard and creates the perfect bake time.
- Invest in a Good Parchment Paper – This prevents sticking and makes removal effortless. I prefer unbleached parchment paper for sustainability, but either works well.
- Understand Your Oven’s Personality – Ovens vary by 25 degrees or more. If your bread browns too quickly, your oven might run hot; adjust the temperature down to 340 degrees. If it’s not browning by 60 minutes, you might have a cooler oven.
Expert’s Nutritional Insight: Why This Bread Works for Your Body
As a registered dietitian, I’m excited about what this bread delivers nutritionally. Most conventional gluten-free breads spike blood sugar rapidly due to their starch-heavy composition. This recipe, by contrast, provides a glycemic index score in the low range—roughly 27 compared to wheat bread’s 75. The protein-to-carbohydrate ratio is exceptional: one slice contains about 6 grams of protein and only 3 grams of net carbohydrates (total carbs minus fiber).
The fat content (about 9 grams per slice) isn’t something to fear—it’s primarily monounsaturated fat from almonds, the same heart-healthy fat celebrated in the Mediterranean diet. This fat, combined with the fiber from psyllium husk, creates satiety that lasts hours. Many of my clients report feeling fuller longer compared to traditional bread, which means they naturally eat smaller portions and experience more stable energy throughout the day.
Additionally, the psyllium husk provides prebiotic fiber that feeds beneficial gut bacteria. This isn’t just about digestion—emerging research shows gut health impacts immune function, mood regulation, and overall metabolic health. So this bread isn’t just gluten-free; it’s genuinely nourishing in ways that matter.
Make-Ahead and Meal Prep Guide
Fresh Storage: Keep the completely cooled loaf at room temperature in an airtight container for up to 3 days. The bread actually improves slightly on day 2 as the flavors meld.
Freezing the Whole Loaf: Wrap the completely cooled, unsliced loaf tightly in plastic wrap, then place it in a freezer bag. It keeps perfectly for up to 3 months. Thaw at room temperature for about 2 hours, or slice while frozen and toast directly from frozen.
Freezing Individual Slices (My Favorite Method): Once the bread is completely cool, slice it into individual portions. Lay slices on a baking sheet and freeze for 2 hours until solid, then transfer to a freezer bag. This method is brilliant for busy weeks—simply grab a slice and toast it to warm it through and restore some of that fresh-baked texture. Individual slices take about 3-4 minutes in the toaster.
Reviving Day-Old Bread: While this bread stays moist for days, I love refreshing it slightly by wrapping it loosely in a damp paper towel and microwaving for 15 seconds. This creates a texture remarkably close to fresh-baked.
Meal Prep Strategy for the Week: I recommend baking this bread on Sunday evening. By Monday morning, it’s cooled and ready to slice. Freeze slices in portions for each day of the week, and you’ll have fresh-tasting bread for breakfast all week without any additional effort.
Common Mistakes to Avoid
- Removing the Bread Too Early – The single most common mistake is pulling the bread from the oven when the toothpick comes out clean, around 55 minutes. At this point, the inside is actually still setting. The bread needs that full 65-70 minute bake time and that hard, crusty top to maintain its structure as it cools. Removing early results in a dense, gummy crumb within hours.
- Using Almond Meal Instead of Blanched Almond Flour – Almond meal includes the brown skin and creates a darker, denser, slightly bitter bread. Blanched almond flour (almonds with skins removed) creates the light crumb we’re after. They’re not interchangeable in this recipe.
- Overmixing the Batter – Once you’ve folded in the dry ingredients, stop. Continue folding gently until just combined. Aggressive mixing deflates the air you’ve incorporated and creates a dense bread. Fold, don’t stir.
- Using Cold Eggs – This is the second most common mistake. Cold eggs won’t incorporate air properly, resulting in a denser, flatter final product. Always use room-temperature eggs for this recipe.
Seasonal Variations
Spring and Summer Version: Add 2 tablespoons of fresh lemon zest to the dry ingredients and replace the water with fresh lemon juice mixed with a bit of water. This brightens the bread beautifully and pairs wonderfully with lighter spring salads.
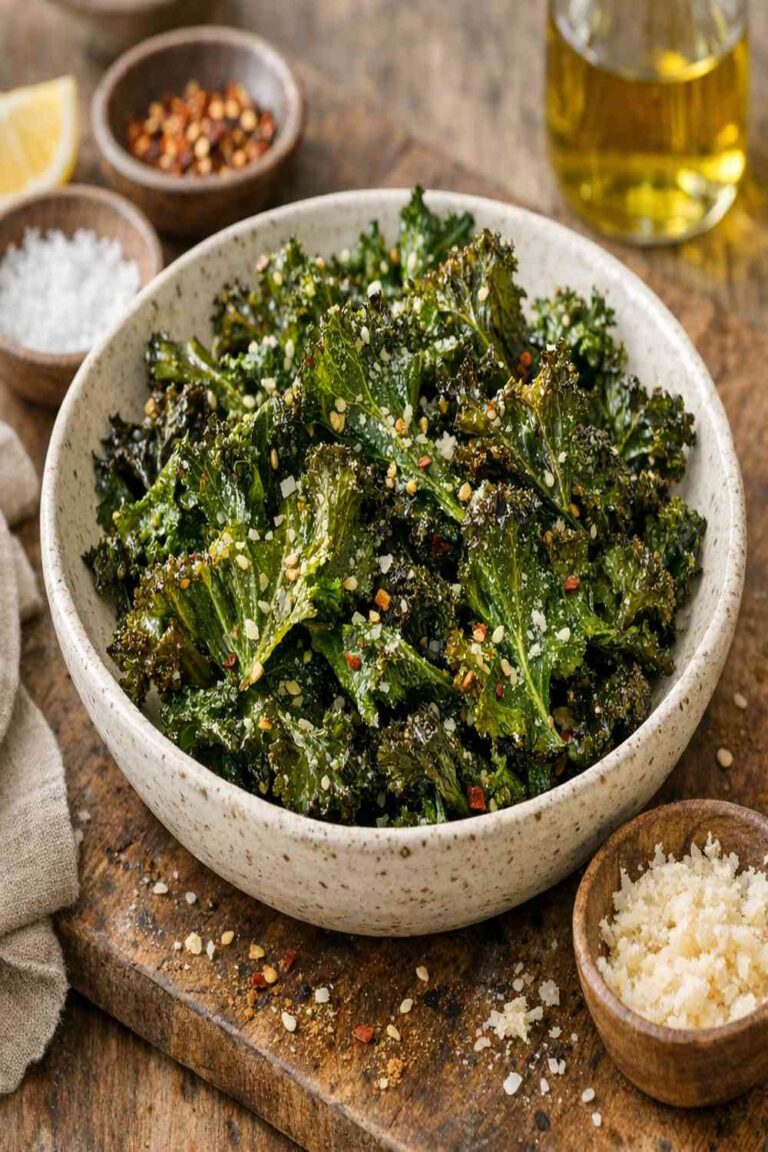
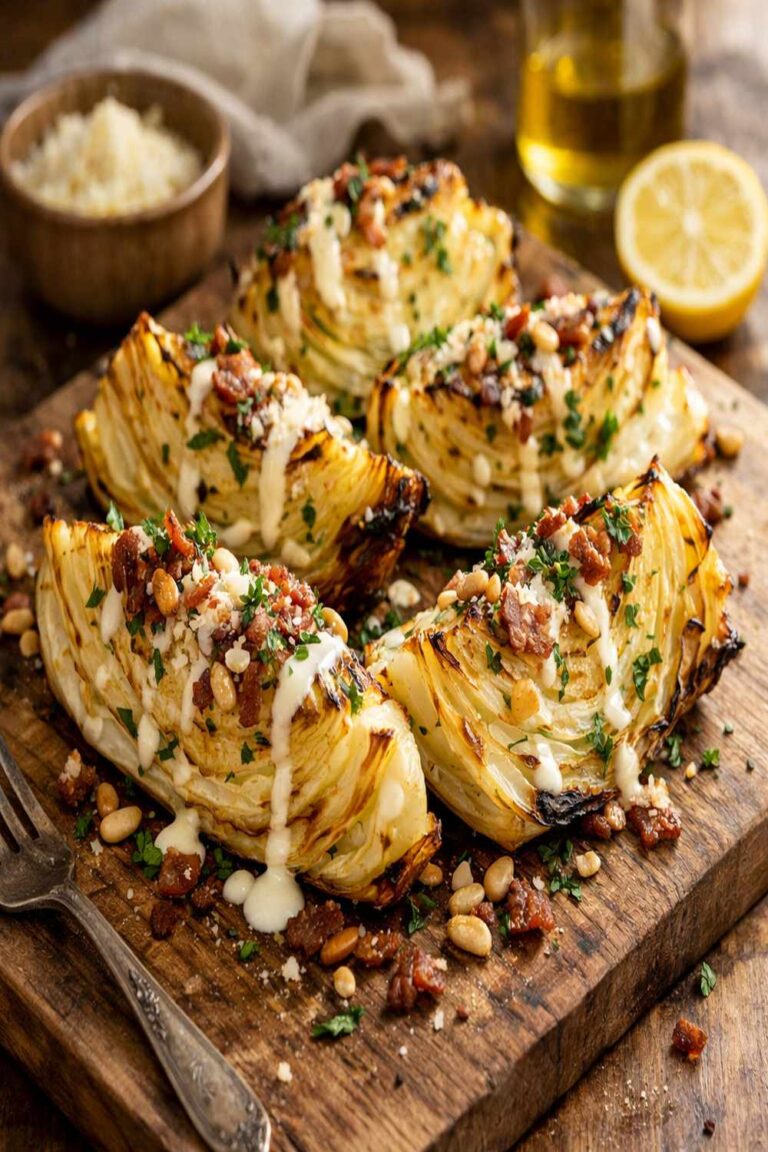
Fall and Winter Version: Add 1 teaspoon of pumpkin pie spice (or a combination of cinnamon, nutmeg, and ginger) to the dry ingredients and use ½ cup of brewed chamomile tea instead of plain water. This creates a naturally spiced bread that’s perfect for cooler months and pairs beautifully with roasted vegetables like baked cabbage.
Everything Bagel Version: Reserve 1 tablespoon of the batter for the top, shape the loaf, then sprinkle with everything bagel seasoning before baking. This creates a savory option perfect for breakfast or alongside baked cod with lemon and capers.
Herbed Version for Dinner: Add 1 teaspoon of dried Italian herbs and ½ teaspoon of garlic powder to the dry ingredients. This creates a savory bread that’s perfect alongside dinner. Pair it with baked pork chops for a complete meal.
Storage and Shelf Life
I love that this bread keeps beautifully, which means less food waste and more convenience for your busy week. Store the completely cooled loaf in an airtight container at room temperature for up to 3 days. The bread actually develops a slightly more cohesive texture on days 2-3, as the moisture redistributes throughout the crumb.
For longer storage, wrap the entire cooled loaf in plastic wrap, then place it in a freezer bag with as much air removed as possible. It keeps perfectly for up to 3 months in the freezer. I also love slicing the bread before freezing and storing individual slices in a freezer-safe container separated by parchment paper. This way you can pull out one or two slices at a time, toast them directly from frozen, and have fresh bread whenever you want.
Once thawed, enjoy the bread within 2-3 days at room temperature. Don’t re-freeze thawed bread, as this affects texture. If you notice any mold development (extremely rare with proper storage), discard the entire loaf immediately.
Nutrition Information
Based on USDA data for blanched almond flour and whole eggs, one slice of this bread (approximately 1/12 of the loaf) contains: approximately 180 calories, 6 grams of protein, 15 grams of healthy fat, 3 grams of net carbohydrates, 2 grams of dietary fiber, and 95 milligrams of omega-3 fatty acids. The complete nutritional profile includes essential minerals like magnesium and vitamin E from the almonds, selenium from the eggs, and prebiotic fiber from the psyllium husk.
This bread’s macronutrient profile makes it appropriate for various dietary approaches: gluten-free, paleo, keto (using net carbs), and low-glycemic diets. The protein-to-calorie ratio is excellent, and the fat content provides satiety and supports nutrient absorption.
What Can I Serve With Almond Flour Gluten-Free Bread?
This bread’s versatility is one of my favorite things about it. The subtle almond flavor pairs beautifully with both sweet and savory applications, making it work for any meal. Here are my favorite ways to enjoy it:
- Classic Breakfast Serving – Toast a slice and top it with almond butter, a touch of honey, and fresh berries. The bread’s nutty flavor complements the richness of nut butters perfectly. For a protein-packed start, serve alongside bacon and eggs and fresh fruit.
- Savory Lunch Option – This bread becomes sandwich-worthy when topped with quality deli turkey, avocado, leafy greens, and mustard. Unlike many gluten-free breads that crumble under toppings, this one holds up beautifully to moisture and maintains its structure through lunch.
- Bread and Cheese Course – Slice it slightly thicker, toast it lightly, and top with soft cheeses and quality cured meats. The subtle almond notes make it an elegant addition to a charcuterie board.
- Dinner Bread Basket – Slice it slightly thicker, warm it gently, and serve alongside roasted vegetables and grilled proteins. The bread’s substance and nutrition make it satisfying without being heavy.
- Bread for Dipping – Toast slices and serve with good olive oil mixed with herbs for dipping, or alongside soups and stews.
- Breakfast Bread Pudding – Cube day-old bread, soak it in a custard mixture with eggs and cinnamon, and bake for a protein-rich breakfast treat.
Substitutes and Modifications
- Ghee Instead of Coconut Oil – If you prefer a more savory bread or have a coconut sensitivity, substitute equal amounts of ghee (clarified butter) for the coconut oil. This creates a richer, slightly more buttery flavor without changing the texture.
- Macadamia Flour for Almond Flour – While pricier, macadamia flour creates an even more luxurious crumb. Use the same amount (2 cups) as you would almond flour. The flavor becomes more delicate and the texture slightly more tender.
- Flax or Chia Seeds to Replace Some Psyllium Husk – If you can’t find psyllium husk powder (though it’s becoming more common), you can replace half of it with ground flax seeds or finely ground chia seeds, though the binding will be slightly less effective. Stick with at least 2 tablespoons of psyllium husk powder for proper structure.
- Avocado Oil Instead of Coconut Oil – For a neutral-flavored bread, use the same amount of avocado oil, which has a higher smoke point and nearly flavorless profile.
- Allulose or Monk Fruit Sweetener – If you prefer more sweetness without the glycemic impact, replace the honey with 1.5 tablespoons of allulose or monk fruit powder. Both measure similarly to sugar but have minimal impact on blood glucose.
Almond Flour Gluten Free Bread Recipe
Ingredients
Method
- Set your oven to 350 degrees Fahrenheit and allow it to fully preheat—this takes about 10 minutes. While it's heating, line a 9-inch loaf pan with parchment paper, allowing the paper to extend slightly above the edges so you can easily lift the bread out once it's cool. This prevents sticking and makes removal effortless, especially with this tender crumb structure.
- Crack your four room-temperature eggs into a large mixing bowl. Using an electric hand mixer on high speed, beat the eggs continuously for about 4-5 minutes. You'll watch them transform from pale yellow to almost white, nearly doubling in volume. This step is non-negotiable—the air you're incorporating becomes the primary leavening agent in this bread, creating lift and a lighter crumb structure. Stop when the mixture looks thick, foamy, and ribbon-like when you lift the beaters.
- In a second large bowl, whisk together the blanched almond flour, psyllium husk powder, baking powder, and fine sea salt. Whisking rather than simply stirring breaks up any lumps and distributes the leavening agent evenly throughout the flour mixture. This ensures consistent rise across the entire loaf rather than creating tunnels or dense pockets.
- Pour the dry ingredient mixture into the beaten eggs gradually, folding gently with a spatula rather than stirring vigorously. This preserves the air you've worked so hard to incorporate. Use about 10-12 gentle folding motions until you see no streaks of dry flour remaining. The mixture will be thick and batter-like at this point.

- Measure out your coconut oil while it's still solid, then gently melt it over low heat or in the microwave for about 30 seconds. Pour the warm melted coconut oil into the batter, folding gently until combined. Then add the warm water—this temperature helps activate the psyllium husk's binding and thickening properties. Fold until everything is just incorporated. The batter will be thicker than cake batter but still spreadable, with a texture somewhere between pancake batter and cookie dough.

- Pour the batter into your prepared loaf pan and use a spatula or your damp hands to spread it evenly, pressing gently to remove air pockets and creating a rounded top. The top should be relatively smooth and even. This creates an even bake and that beautiful bread-like appearance when it emerges from the oven.
- Place the loaf in your preheated 350-degree oven for 55 to 70 minutes. Here's the critical part: a toothpick inserted into the center will come out clean around the 55-minute mark, but this is when many bakers remove it and end up with a bread that collapses or becomes dense within hours. Instead, watch for the top to develop a deep golden-brown, hard crust—similar to the crackling crust on artisan bread. The top should feel firm and slightly hollow when tapped lightly. This crust sealing is what allows the interior to maintain its tender crumb structure as it cools and sets.

- Remove the bread from the oven and allow it to rest in the pan for at least 15 minutes. This cooling period allows the internal structure to set properly. Then turn it out onto a wire rack and let it cool completely—about 45 minutes to an hour—before slicing. Slicing too early results in a gummy, compressed texture. I know it's tempting to cut into warm bread, but this patience step is what creates that perfect slice.
Notes
FAQs
Why is my bread dense instead of having an airy crumb?
Dense bread typically indicates one of three issues: either the eggs weren’t beaten to peak volume (they must nearly double in size), the batter was overmixed after incorporating the dry ingredients (which deflates the air), or the bread was removed from the oven too early. Ensure your eggs are at room temperature and beaten for a full 4-5 minutes until thick and pale. Fold the dry ingredients gently until just combined—stop as soon as you see no more dry flour. Finally, bake for the full time until the top develops a hard crust, not just until a toothpick comes out clean.
Can I make this bread without psyllium husk powder?
Psyllium husk powder is truly the ingredient that transforms this from an almond flour cake into actual bread, so I don’t recommend omitting it entirely. However, if you absolutely cannot find it, you can replace it with 3 tablespoons of ground flaxseed plus 2 tablespoons of tapioca starch (for structure). The result will be slightly denser and less bread-like, but still quite good. Psyllium husk is becoming increasingly common in regular grocery stores, usually in the fiber or dietary supplement aisle.
How do I know when the bread is truly done?
This is the most important question because timing determines success. Around 55 minutes, a toothpick will come out clean, but this is premature. The true sign of doneness is when the top develops a dark golden-brown, hard crust similar to artisan bread. Tap the top lightly—it should feel firm and sound slightly hollow. The internal temperature should reach approximately 205-210 degrees Fahrenheit on an instant-read thermometer if you have one. When in doubt, bake longer rather than shorter; an extra 10 minutes of baking won’t hurt, but removing it too early results in a collapsed, gummy interior.
Why did my bread collapse after baking?
Collapsing bread indicates the interior hadn’t fully set when removed from the oven. This happens when the bread is pulled out too early or when the oven temperature is running cool. Always bake until the top is rock-hard and deeply golden. Additionally, ensure you’re cooling the bread completely in the pan before removing it—removing it too early to a cooling rack can cause deflation. Allow at least 15 minutes in the pan, then cool completely on a wire rack before slicing.
Is this bread suitable for someone with a tree nut allergy?
Unfortunately, no—this recipe is built around almond flour, which is a tree nut product. If you have a tree nut allergy, this recipe isn’t safe for you. However, sunflower seed flour can partially replace almond flour in a gluten-free bread recipe, though the texture and flavor will be different. I’d recommend consulting with a registered dietitian or allergist before attempting modifications, as the structural properties might be compromised.
More Recipes You’ll Love
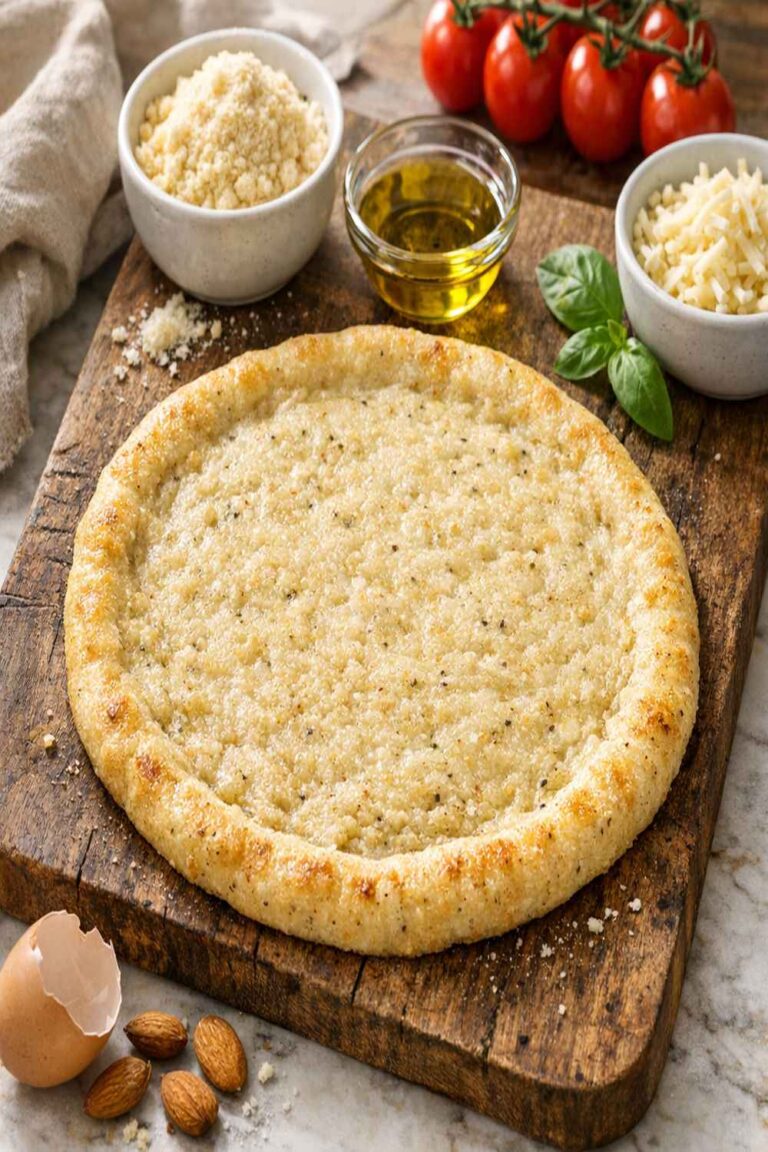
- Almond Pizza Crust Recipe – Create a delicious, gluten-free pizza base using similar principles with crispy edges and a tender interior.
- Baked Pear Recipe – A simple, elegant dessert that pairs beautifully with warm slices of this bread for afternoon tea.
- Baked Latke Recipe – Expand your gluten-free repertoire with this crispy, naturally gluten-free side dish perfect alongside dinner.
Creating this bread transformed not just my family’s breakfast table, but my entire approach to gluten-free cooking. I stopped viewing it as restriction and started seeing it as an opportunity to build more nourishing, satisfying meals. That shift matters—it’s the difference between tolerating a diet and actually enjoying it.
This bread has become a foundation for countless mornings in our house. Warm slices with butter and jam, toasted for avocado and eggs, tucked into lunch boxes, served alongside family dinners—it’s become woven into our daily life in the way my own childhood mealtimes shaped my love for food.
I hope this recipe becomes part of your family’s story too, creating moments of connection and nourishment around your own table. Because that’s what this is really about—not just gluten-free bread, but the conversations, the comfort, and the care that comes from feeding the people you love well.
Take care with love and flavor!