Baked Scallop Recipe
This post contains affiliate links. As an Amazon Associate I earn from qualifying purchases.
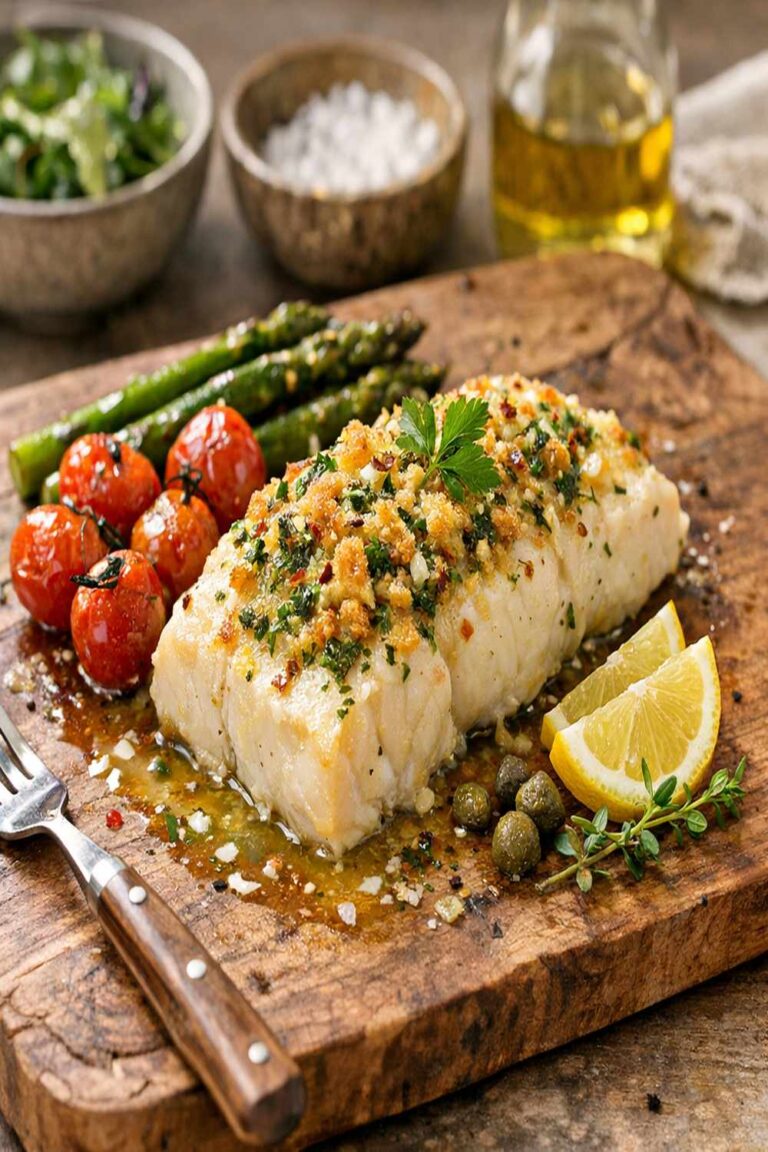
I’m going to be honest with you—when I first discovered how to properly meal prep seafood, it changed everything. No more standing in front of the fridge on Wednesday night wondering what to cook. No more expensive takeout because I “didn’t have time.” This baked scallop recipe is my secret weapon for taking back control of my week, and I’m sharing it with you because every busy home cook deserves meals that feel special but don’t require an hour in the kitchen. Make this once on Sunday and eat well all week. Whether you’re new to seafood or a seasoned cook looking to streamline your routine, this straightforward approach works. Like my other go-to seafood recipes such as baked cod with lemon and capers, scallops hold up beautifully across multiple days when stored properly.
Baked Scallop Recipe Meal Prep: Cook Once, Eat All Week
I grew up watching my mom transform Sunday afternoons into a ritual. She’d gather ingredients, put on her favorite music, and fill our kitchen with aromas that promised the whole week ahead. But here’s what I didn’t realize until I became a registered dietitian: she was doing something far more valuable than just cooking. She was building structure, reducing stress, and creating pockets of time during the week to actually connect with my dad and siblings over meals that were already waiting. When I moved to my first apartment in Norwood, I tried to replicate those family dinners alone. I failed miserably—until I learned the difference between cooking from scratch every night and cooking smart once.
That’s when I discovered that baking scallops in bulk changed everything. These delicate proteins respond beautifully to the oven, they stay moist throughout the week, and they transform into completely different meals depending on what you pair them with. This isn’t just a recipe; it’s your permission slip to stop feeling overwhelmed.
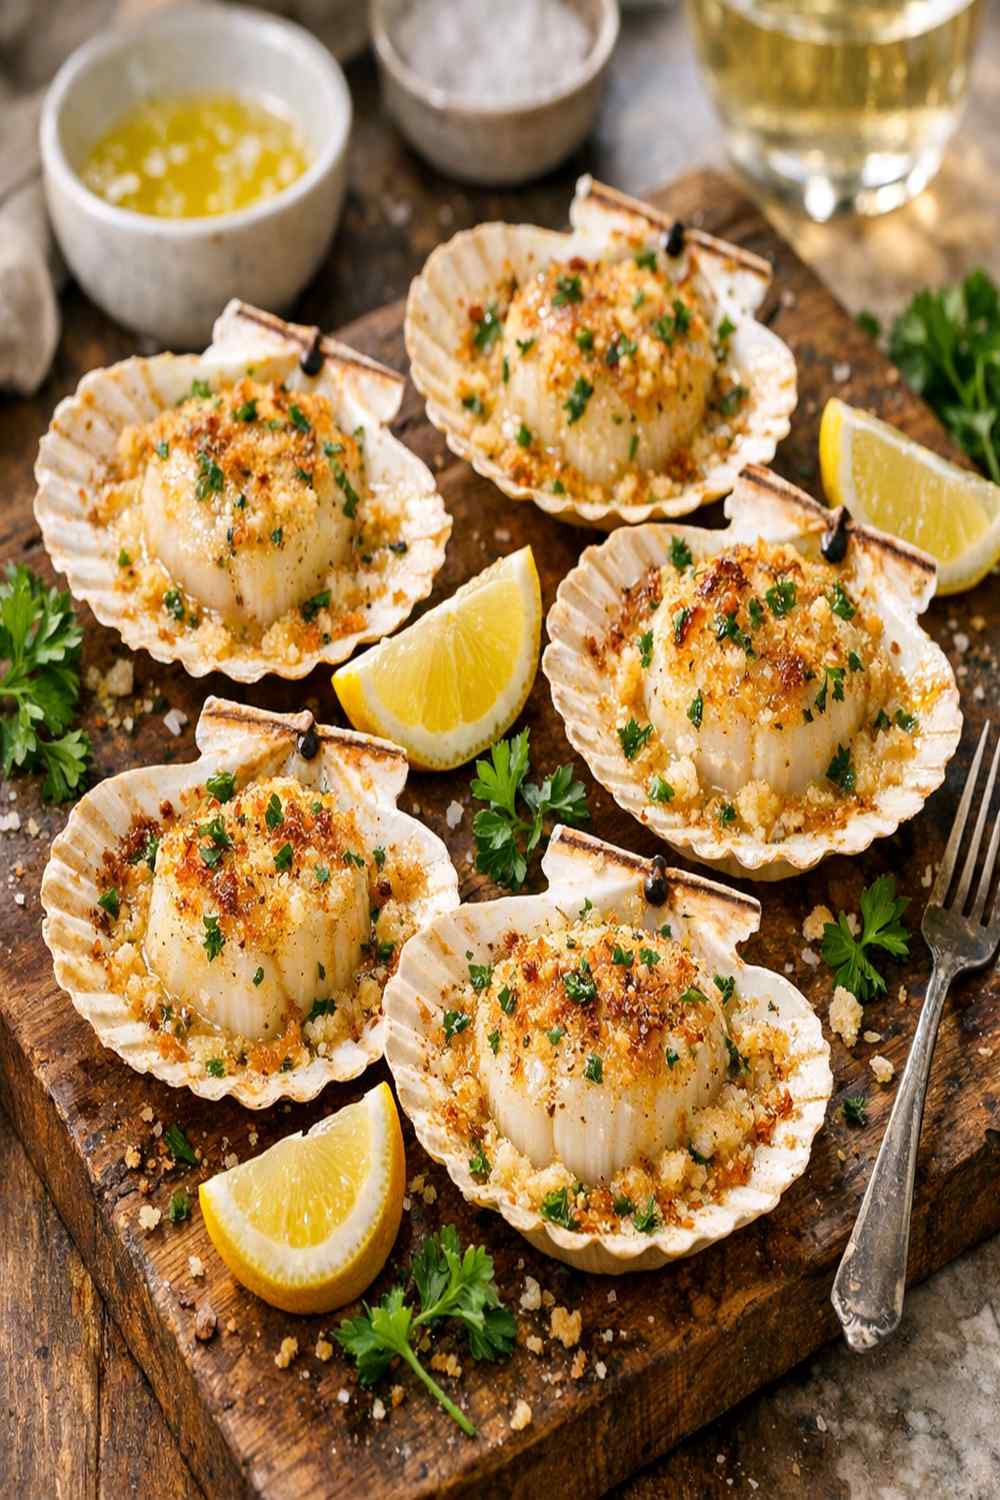
Why This Recipe Is Perfect for Meal Prep
- Saves 75 minutes across your week — Bake once for 12 minutes, then reheat in seconds for 4–5 different meals instead of cooking fresh seafood each time
- Holds up beautifully for 4 days — Unlike fried seafood that becomes soggy, these baked scallops stay tender and flavorful because the moisture is locked in during the initial bake
- Works across breakfast, lunch, and dinner — Pair with grains Monday, vegetables Wednesday, pasta Friday—completely different meals from one batch
- Costs less than takeout — Quality scallops bulk-baked cost about $3–4 per serving versus $18–22 at a restaurant
- Requires zero fancy equipment — One baking dish, one oven, ingredients already in your pantry—no specialty tools needed
Your Weekly Meal Plan With This Recipe
Here’s exactly how I use one batch of baked scallops across my week. This isn’t rigid—adjust based on what’s happening in your life—but it shows you the versatility packed into 30 minutes of cooking on Sunday.
- Monday Dinner: Scallops Over Buttered Pasta — Reheat scallops gently in a skillet with a touch of olive oil, toss with hot pasta, squeeze fresh lemon, finish with fresh parsley. Feels restaurant-quality but took 8 minutes total.
- Tuesday Lunch: Scallop Power Bowl — Serve room temperature over quinoa or rice with roasted vegetables, fresh greens, and a simple vinaigrette. No reheating needed—perfect for office lunches or meal containers.
- Wednesday Dinner: Creamy Scallop Rice — Warm scallops in a skillet, add a splash of heavy cream with garlic and thyme, serve over rice. The flavors deepen and marry beautifully by mid-week.
- Thursday Lunch: Scallop Grain Salad — Toss cold scallops with farro, roasted vegetables, herbs, and vinaigrette for a completely different texture and flavor profile than Tuesday’s bowl.
- Friday Dinner: Scallops With Roasted Vegetables — Quick reheat in the oven alongside seasonal vegetables and a simple green salad—feels like you cooked fresh but you’ve been set up for success all week.
The Ingredients—Scaled for a Full Week
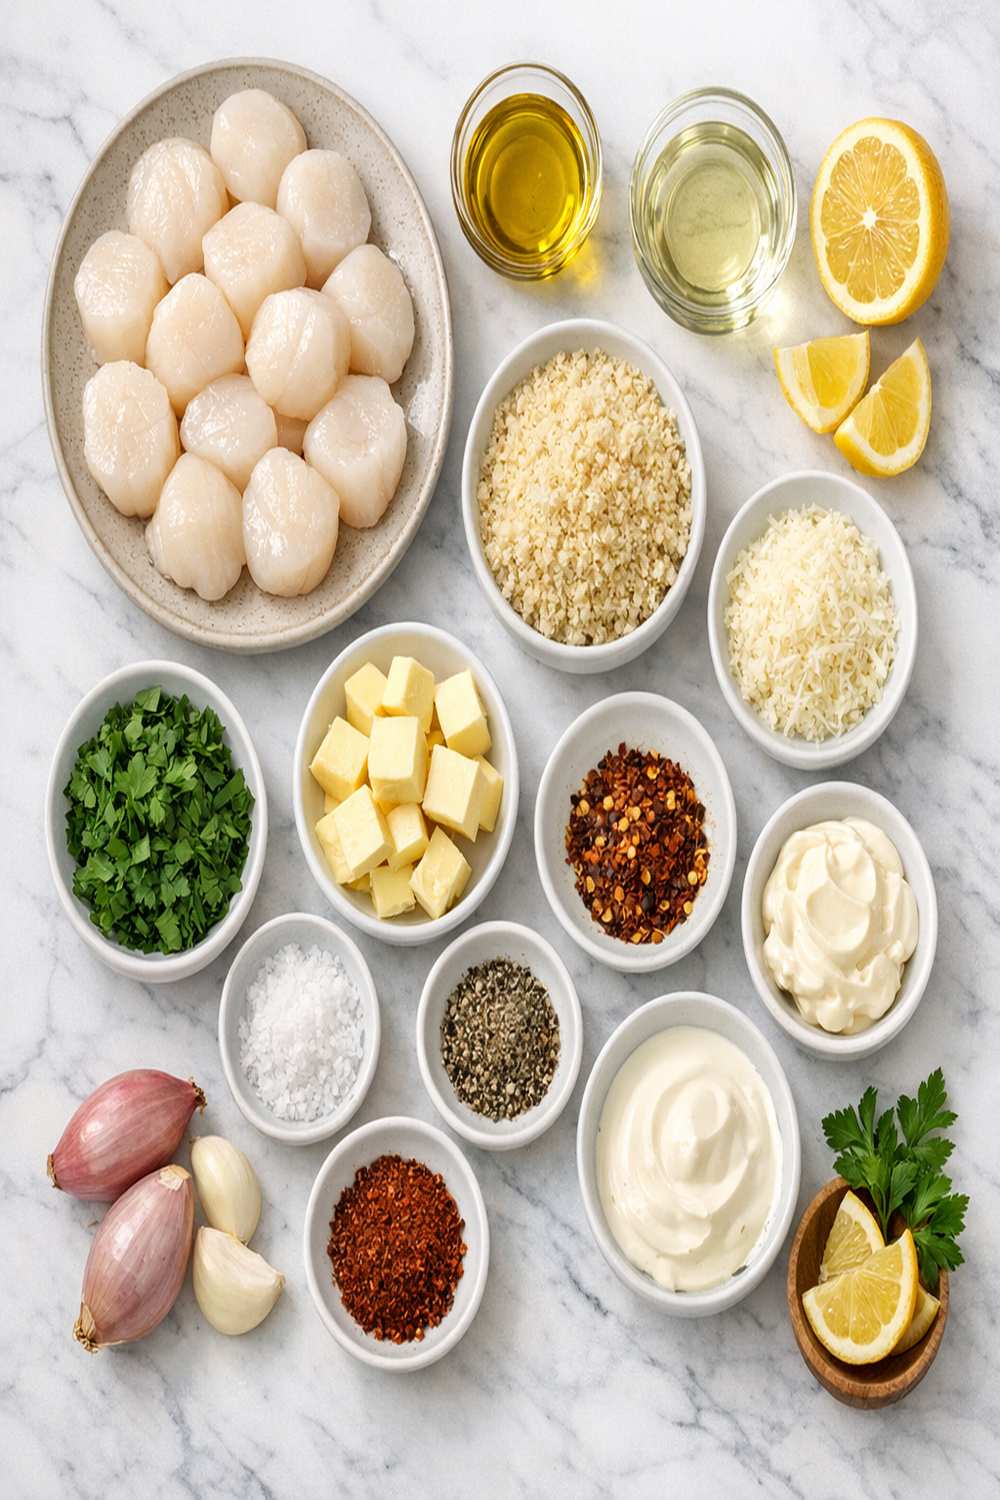
This recipe scales beautifully for meal prep. I’ve adjusted quantities to give you 5–6 servings with comfortable leftovers. All of these are pantry staples I keep on rotation, and they store predictably throughout the week.
- 8 tablespoons unsalted butter (melted; use real butter, not margarine, for that clean buttery flavor that actually improves with reheating)
- 2 tablespoons fresh lemon juice (added right before serving throughout the week to brighten flavors)
- 2 pounds large sea scallops (pat completely dry before cooking—moisture is the enemy of a golden crust; larger scallops actually hold up better across the week than smaller ones)
- ¾ cup panko bread crumbs (the larger crumbs stay crispier throughout the week than regular breadcrumbs)
- 1 tablespoon fresh thyme leaves (optional but transforms leftover portions into something that feels completely fresh)
- 6 garlic cloves (pressed or minced very finely; fresh garlic is essential here—jarred loses its punch by Wednesday)
- ¼ teaspoon black pepper (freshly cracked makes a difference in the final flavor profile)
- 1 cup shredded Parmesan cheese for topping (reserve this separately for the final layer before baking)
- 6 tablespoons grated Parmesan cheese (freshly grated from the block, not pre-shredded; the anti-caking agents interfere with browning)
- 1 teaspoon sea salt (adjust based on your scallops; they sometimes have natural salinity)
The Meal Prep Process: How to Make Baked Scallop Recipe in Bulk
This is where efficiency meets flavor. I’ve designed this process so you move through it smoothly, with minimal downtime. Everything is organized so you’re not hunting for ingredients mid-step. Treat this like a system, not just a recipe.
Step 1: Preheat and Prep Your Workspace
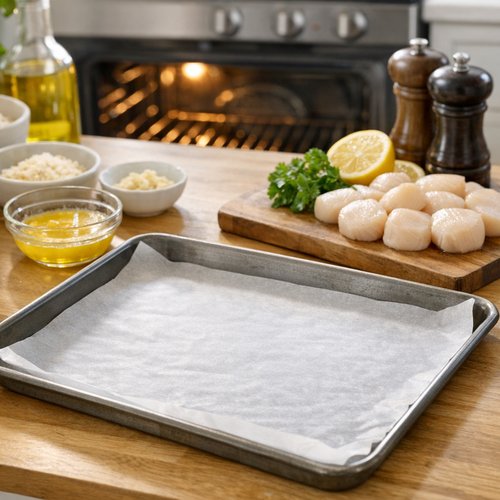
Turn your oven to 425°F and let it fully preheat—this takes about 10 minutes and gives you time to organize everything else. While it’s warming, line a large baking sheet or shallow baking dish with parchment paper. This saves cleanup and prevents sticking. Lay out your three small bowls in a line on your counter: one for the butter mixture, one for the breadcrumb coating, and one for the raw scallops. This assembly-line setup cuts your actual cooking time in half because you’re not searching for ingredients mid-step.
Step 2: Create Your Butter Foundation
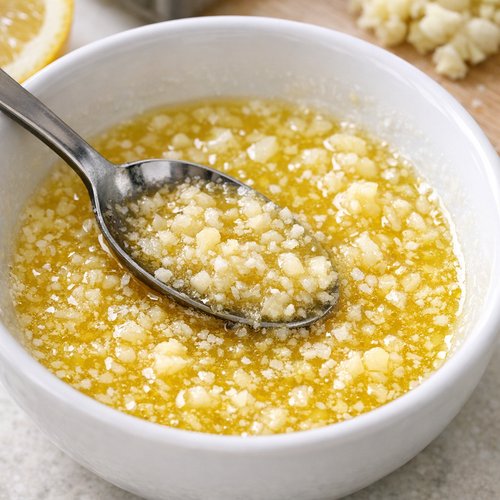
In the first bowl, combine your melted butter with all 6 pressed garlic cloves and sea salt. Stir well to distribute the garlic evenly—you want every scallop to get garlic flavor, not just a few lucky ones. Set this aside. The warm butter will keep the garlic from settling, which is why we mix it now rather than later. If you’re making a larger batch (8+ pounds), double this step but keep butter amounts proportional.
Step 3: Mix Your Coating Station
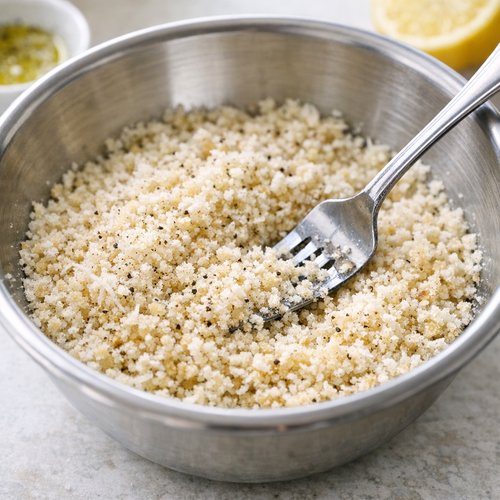
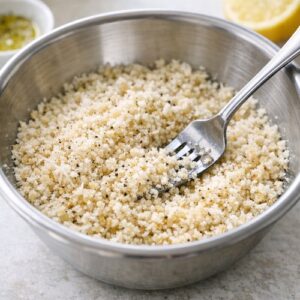
In the second bowl, combine panko breadcrumbs with grated Parmesan cheese and black pepper. Mix thoroughly with a fork to break up any clumps and distribute the cheese evenly. This dry mixture won’t stick together—it’s meant to stay loose so it coats each scallop evenly. Having this ready before you start coating means zero lag time.
Step 4: Prepare Your Scallops
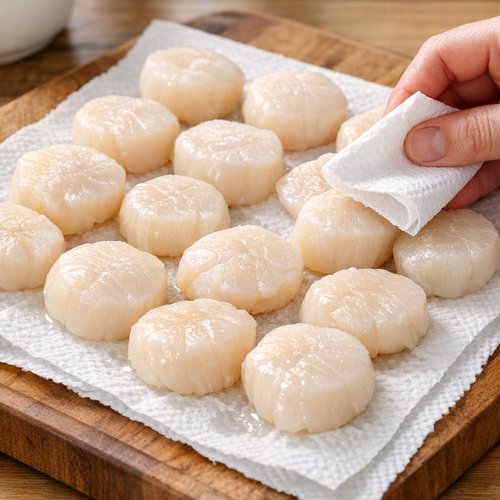
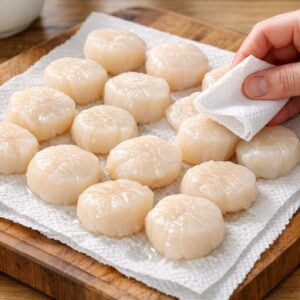
Remove scallops from packaging and place on a cutting board lined with paper towels. This is the most critical step—dab each scallop thoroughly on all sides with fresh paper towels. Any surface moisture prevents browning and creates steam instead of crust. This step alone makes the difference between restaurant-quality and soggy. Don’t skip it, and don’t reuse the same paper towel repeatedly. Fresh towels cost pennies and make a massive difference.
Step 5: Coat and Arrange
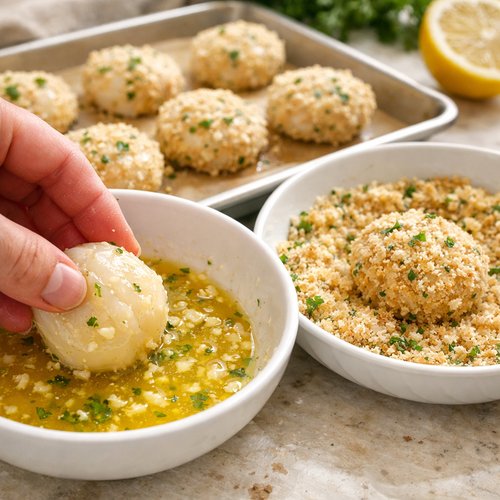
Working in batches of 6–8 scallops at a time, dip each one into your butter mixture, coating both sides completely. Then immediately roll it in the breadcrumb mixture, pressing gently so the coating adheres. The key here is gentle pressure—you want the coating to stick, not compress the scallop itself. Arrange coated scallops on your prepared baking sheet in a single layer with about an inch of space between each one. This allows heat to circulate and cook them evenly.
Step 6: The Final Finish and Bake
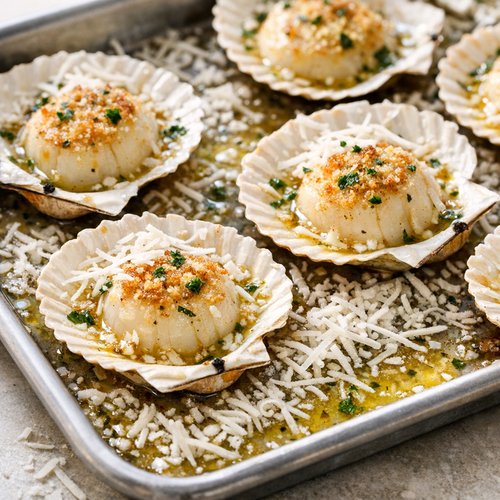
Once all scallops are arranged, drizzle any remaining butter mixture around (not on top of) the scallops. Sprinkle the reserved shredded Parmesan generously over each scallop—this creates a golden, melted top layer. Bake at 425°F for 12–14 minutes, depending on scallop size. Larger scallops need the full 14 minutes; smaller ones are done at 12. They’re ready when they’re just opaque inside and the topping is golden brown. Overcooking makes them rubbery, so set a timer and check at 12 minutes.
Step 7: Cool and Store
Remove from oven and let cool for 5 minutes on the pan. This allows the coating to set and makes them easier to transfer without falling apart. Once slightly cooled, transfer to your meal prep containers in single layers separated by parchment paper to prevent sticking. Cool completely to room temperature before sealing containers and refrigerating. This prevents condensation that can make them soggy.
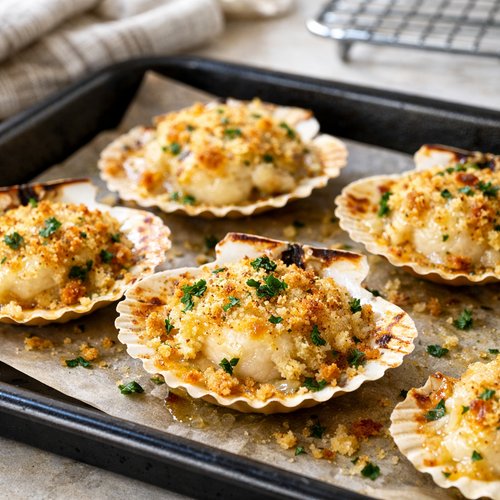
Storage and Organization System
- Glass Meal Prep Containers With Separate Compartments — Use glass, not plastic, for seafood storage. Glass doesn’t retain odors, allows you to see what’s inside without opening, and reheats better. Separate compartments let you add fresh components daily (see pairing section below), so the scallops stay the star without absorbing flavors from sides.
- Portioning Strategy: 5–6 Ounces Per Container — This is roughly 4–5 large scallops per serving and represents a balanced protein portion according to USDA dietary guidelines. Portion immediately after cooling, while they’re still firm, for easiest separation.
- Label With Date and Reheating Instructions — Use a waterproof label or masking tape with a date and “Reheat 2–3 minutes stovetop or 1–2 minutes microwave.” This takes literally 20 seconds and eliminates the “Is this still good?” question that stops people from eating their meals.
- Arrange in Your Fridge Front and Center — Store at eye level where you’ll actually reach for them. Meal prep only works if you see it first. Bury it in the back and you’ll order pizza instead.
How to Reheat Without Losing Quality
This is where most people fail at meal prep. They cook beautifully, then destroy their food with careless reheating. I have three methods depending on your situation and how much time you have.
Stovetop Reheating (Best Method for Maximum Texture): Heat a nonstick skillet over medium heat with just a whisper of olive oil—about ½ teaspoon. Place scallops in the pan for 2–3 minutes total, flipping once halfway through. This gentle heat maintains the tender interior while the exterior stays slightly crispy. The oil adds a finishing richness that makes them taste freshly cooked. This takes 5 minutes total including prep.
Microwave Reheating (Fastest, When You’re Truly Rushing): Place one portion of scallops on a microwave-safe plate, cover with a damp paper towel (this prevents them from drying out), and microwave at 50% power for 1–2 minutes depending on portion size. The lower power setting is crucial—full power creates rubbery texture. Check at 60 seconds to avoid overdoing it. Add fresh lemon juice immediately after removing from microwave to brighten flavors.
Oven Reheating (Best for Larger Portions): Preheat your oven to 325°F. Place scallops on a baking sheet, tent loosely with foil, and warm for 6–8 minutes. This is slower than other methods but perfect if you’re reheating 3+ servings or want to warm sides simultaneously. The foil prevents any top browning while heat penetrates gently.
Never use boiling water or high heat—this forces moisture out and creates that rubbery texture that turns people away from seafood entirely.
Can I Freeze Baked Scallop Recipe?
Yes, and this is where meal prep transforms into actual meal planning across your month. I freeze scallops in two different ways depending on when I want to eat them.
Short-term freezing (up to 2 weeks): Arrange cooled baked scallops in a single layer on a baking sheet, freeze uncovered for 2 hours until solid, then transfer to a freezer bag with as much air removed as possible. This “flash-freezing” method prevents them from sticking together and makes it easy to grab just what you need. Thaw in the refrigerator overnight before reheating using any of the methods above.
Long-term freezing (2–3 months): Layer scallops in an airtight container with parchment paper between layers, then wrap the entire container in plastic wrap and then foil. Multiple layers of wrapping protect against freezer burn. These hold their quality for a full three months, though I recommend eating within two months for best flavor.
Important: Freeze scallops as soon as they cool to room temperature, not the next day. The sooner you freeze, the better the texture when thawed. Never refreeze thawed scallops.
Nutrition Information
Per serving (approximately 5 ounces or 4–5 large scallops):
- Calories: 185
- Protein: 22 grams
- Fat: 10 grams (including 4 grams saturated)
- Carbohydrates: 4 grams
- Fiber: 0 grams
- Sodium: 380 milligrams
According to USDA dietary guidelines, scallops are one of the leanest protein sources available, with exceptional bioavailability—meaning your body absorbs and utilizes nearly all the protein. They’re also rich in selenium (supporting thyroid function), B12 (crucial for vegetarians and vegans who supplement with seafood), and choline (supporting brain health). One batch of this recipe provides 110 grams of high-quality protein across five servings, which means you’re covering roughly 40–50% of your daily protein needs with each meal. When you meal prep this weekly, you’re essentially guaranteeing yourself balanced nutrition for 5 meals without having to think about it. That’s the real power of this approach—it removes decision fatigue and replaces it with built-in nutrition.
Expert’s Nutritional Tip: Leverage the Natural Selenium
As a registered dietitian, one thing I notice people overlook is that scallops are one of the highest selenium-containing foods available—just four large scallops provide over 60% of your daily selenium needs. Selenium supports thyroid function and acts as a powerful antioxidant. When you meal prep scallops weekly, you’re strategically building micronutrient density into your meals without any extra effort. Pair them with vegetables high in vitamin C (like the bell peppers or broccoli in your sides) and you increase iron absorption from both the scallops and vegetables by up to 300%. This is how real nutrition works—it’s not about individual foods in isolation, but about intentional combinations. Meal prepping forces you to think about whole meals, which naturally creates better nutrition.
What to Pair With Baked Scallop Recipe Throughout the Week
Here’s where meal prep prevents boredom. The scallops are your constant, but the pairings transform them completely across the week. I use different sides to keep things interesting and hit different nutritional targets throughout the week.
- Monday: Buttered Pasta With Fresh Herbs — Toss warm scallops with hot pasta, a touch of olive oil, fresh lemon juice, and chopped parsley. Feels indulgent but stays light. Pair with a simple green salad.
- Tuesday: Quinoa Bowl With Roasted Root Vegetables — Serve room-temperature scallops over quinoa with roasted carrots, beets, and a lemon vinaigrette. This is where you build in your complex carbohydrates and sustained energy for the afternoon.
- Wednesday: Creamy Risotto Base — Warm scallops in a risotto made with arborio rice, white wine, garlic, and parmesan. The risotto cooking liquid creates richness without heavy cream. This is comfort food that doesn’t feel heavy.
- Thursday: Simple Rice and Steamed Vegetables — Go back to basics with warm scallops over jasmine rice with steamed broccoli or asparagus and a drizzle of sesame oil. Let the scallops shine rather than competing with complicated sides.
- Friday: Pasta Primavera Style — Toss warm scallops with whole grain pasta, whatever fresh vegetables are at their peak that week (like baked cabbage or roasted zucchini), garlic oil, and fresh basil. Lighter than Monday’s version but equally satisfying.
Common Mistakes to Avoid
I’ve made every single one of these, and I want to save you the disappointment:
Mistake 1: Skipping the Paper Towel Step — This is where 80% of mediocre scallop dishes come from. People skip drying because it feels like an extra step, then wonder why their scallops steam instead of bake. Those paper towels are non-negotiable. Wet scallops = rubbery texture. Dry scallops = tender, golden-crusted perfection.
Mistake 2: Using Pre-Shredded Cheese — I understand the convenience argument, but pre-shredded Parmesan contains anti-caking agents that prevent proper melting and browning. The extra 90 seconds to grate fresh cheese changes the final texture completely. This is one of those small technical details that separate good homemade food from restaurant-quality food.
Mistake 3: Crowding the Pan — Scallops release moisture. If they’re touching or too close together, you trap steam and they poach instead of bake. Space them an inch apart minimum. Yes, you might need two pans. That’s fine. Two pans with perfect scallops beats one overcrowded pan with okay ones.
Mistake 4: Reheating at Too High a Temperature — This is the biggest meal prep sabotage. People take perfectly cooked scallops and nuke them at full microwave power or reheat at 400°F, then wonder why everything tastes rubbery. Lower, slower heat (stovetop at medium or microwave at 50% power) preserves texture. Patience in the reheating phase is as important as technique in the initial cooking.
Make-Ahead Guide: Your Complete Meal Prep Schedule
Here’s exactly how I organize my week around this recipe to eliminate decision fatigue:
Sunday Prep (Total Time: 35 minutes): 2:00 PM—Preheat oven and prepare workspace. 2:10 PM—Mix butter and coating stations. 2:15 PM—Pat scallops dry. 2:20 PM—Coat all scallops and arrange on pan. 2:25 PM—Bake. 2:40 PM—Cool for 5 minutes on pan. 2:45 PM—Cool completely to room temperature (about 10 minutes). 2:55 PM—Portion into containers and refrigerate. You’re done before 3:00 PM with five complete meals ready for the week.
Daily Eating (Total Time: 5 minutes max): Remove container from fridge 2 minutes before you want to eat. Choose your reheating method based on time available (stovetop is ideal, microwave is fastest). Add fresh components: squeeze lemon, tear fresh herbs, drizzle olive oil, add your chosen side. Eat immediately.
Wednesday Check-in: By midweek, check that containers are still tightly sealed and no odors have transferred. If scallops look or smell off, discard (though they should be fine through day 5 with proper storage). If they’re still perfect, you’ve validated your system and can confidently scale it.
Seasonal Variations: Keep This Recipe Fresh Year-Round
The same scallop foundation works beautifully across all seasons when you adjust your sides and finishing touches. This prevents meal prep from feeling monotonous.
Spring Variation: Add fresh dill and lemon zest to your butter mixture. Pair scallops with asparagus, peas, and new potatoes. The bright, fresh flavors match seasonal produce. Finish with a squeeze of fresh lemon and fresh mint.
Summer Variation: Incorporate fresh basil into your coating (mix into the breadcrumbs). Pair with tomato-based pasta, fresh corn, and cucumber salads. Serve many portions at room temperature for easier summer eating without heating your kitchen.
Fall Variation: Add smoked paprika and thyme to your breadcrumb coating for deeper, earthier flavors. Pair with roasted root vegetables, farro, and hearty greens. The flavors deepen as they sit, making mid-week portions actually taste better.
Winter Variation: Emphasize the garlic and add black pepper to your coating. Pair with creamy risotto, roasted Brussels sprouts, and braised greens. Heavier sides feel satisfying during cold months without making the scallops heavy.

Baked Scallop Recipe
Ingredients
Method
- Turn your oven to 425°F and let it fully preheat—this takes about 10 minutes and gives you time to organize everything else. While it's warming, line a large baking sheet or shallow baking dish with parchment paper. This saves cleanup and prevents sticking. Lay out your three small bowls in a line on your counter: one for the butter mixture, one for the breadcrumb coating, and one for the raw scallops. This assembly-line setup cuts your actual cooking time in half because you're not searching for ingredients mid-step.
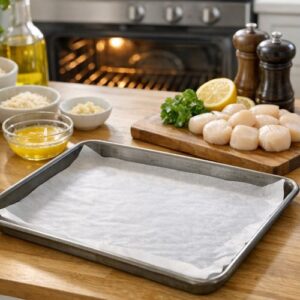
- In the first bowl, combine your melted butter with all 6 pressed garlic cloves and sea salt. Stir well to distribute the garlic evenly—you want every scallop to get garlic flavor, not just a few lucky ones. Set this aside. The warm butter will keep the garlic from settling, which is why we mix it now rather than later. If you're making a larger batch (8+ pounds), double this step but keep butter amounts proportional.

- In the second bowl, combine panko breadcrumbs with grated Parmesan cheese and black pepper. Mix thoroughly with a fork to break up any clumps and distribute the cheese evenly. This dry mixture won't stick together—it's meant to stay loose so it coats each scallop evenly. Having this ready before you start coating means zero lag time.
- Remove scallops from packaging and place on a cutting board lined with paper towels. This is the most critical step—dab each scallop thoroughly on all sides with fresh paper towels. Any surface moisture prevents browning and creates steam instead of crust. This step alone makes the difference between restaurant-quality and soggy. Don't skip it, and don't reuse the same paper towel repeatedly. Fresh towels cost pennies and make a massive difference.
- Working in batches of 6–8 scallops at a time, dip each one into your butter mixture, coating both sides completely. Then immediately roll it in the breadcrumb mixture, pressing gently so the coating adheres. The key here is gentle pressure—you want the coating to stick, not compress the scallop itself. Arrange coated scallops on your prepared baking sheet in a single layer with about an inch of space between each one. This allows heat to circulate and cook them evenly.

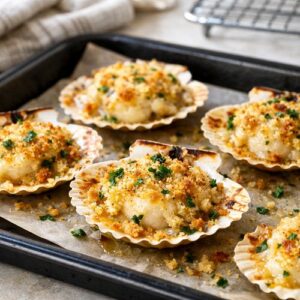
- Once all scallops are arranged, drizzle any remaining butter mixture around (not on top of) the scallops. Sprinkle the reserved shredded Parmesan generously over each scallop—this creates a golden, melted top layer. Bake at 425°F for 12–14 minutes, depending on scallop size. Larger scallops need the full 14 minutes; smaller ones are done at 12. They're ready when they're just opaque inside and the topping is golden brown. Overcooking makes them rubbery, so set a timer and check at 12 minutes.
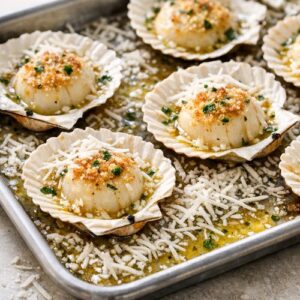
- Remove from oven and let cool for 5 minutes on the pan. This allows the coating to set and makes them easier to transfer without falling apart. Once slightly cooled, transfer to your meal prep containers in single layers separated by parchment paper to prevent sticking. Cool completely to room temperature before sealing containers and refrigerating. This prevents condensation that can make them soggy.
FAQs
How Far in Advance Can I Prep the Scallops Before Baking?
I recommend baking the same day you buy scallops, ideally within 4 hours of purchase. If you need to buy them the night before, keep them in the coldest part of your refrigerator on a bed of ice, covered loosely with paper towels. The coating (butter and breadcrumb mixture) can be made up to 3 days in advance and stored in separate containers. This gives you flexibility: you can coat and bake fresh scallops on a weeknight if Sunday didn’t work out, using pre-made coating mixture.
Can I Use Frozen Scallops for Meal Prep?
Absolutely, but with one critical step: thaw them completely in the refrigerator overnight, then pat them extra-dry before coating. Frozen scallops often have more retained moisture, so the drying step becomes even more important. Quality matters here—buy frozen scallops labeled “dry” not “wet” (they’ve been treated differently in processing). The rest of the recipe works identically.
What’s the Difference Between Sea Scallops and Bay Scallops?
Sea scallops are larger (4–5 per pound) and hold up better for meal prep because their size makes them less likely to dry out during reheating. Bay scallops are smaller (20+ per pound) and cook faster but can become chewy after a few days in the refrigerator. For meal prep specifically, I recommend sea scallops. They’re also more cost-effective per portion.
Can I Make This Recipe Without the Breadcrumb Coating?
Yes—simply omit the coating step and bake scallops with just the butter-garlic mixture and a topping of Parmesan cheese. They’ll cook faster (10 minutes instead of 12–14) and have a more delicate texture. However, the breadcrumb coating actually helps them retain moisture during reheating across the week, which is why I include it for meal prep. Without the coating, eat within 3 days rather than 5.
What If My Scallops Release a Lot of Liquid During Cooking?
This is completely normal and doesn’t indicate a problem—scallops are 80% water. If excess liquid accumulates, carefully tilt the pan and spoon it off after about 8 minutes of baking. This liquid (called “scallop liquor”) is pure umami and you can save it for seafood stocks, but in your pan it creates steam. Draining it helps the topping stay crispy. Don’t worry about scallops drying out—they’re already cooked in butter, which prevents dehydration.
How Do I Know If My Scallops Are Done Without Overcooking Them?
The most reliable method is looking at the center. Cut into one scallop (not the prettiest one) and check that it’s just barely opaque throughout with no translucent raw center. It should be slightly springy when pressed, not firm like a cooked chicken breast. Overcooked scallops turn rubbery—they’re done when they just barely look cooked, which feels undercooked if you’re used to other proteins. Trust me on this and you’ll understand immediately.
More Meal Prep Recipes You’ll Love
- Baked Center Cut Pork Chop Recipe — Similar baking technique with a heartier protein for those preferring land-based meals
- Shrimp and Grits — Another seafood meal prep option that works beautifully across multiple days
- One Pot Clam Bake Recipe — Complete seafood meal prep in one vessel if you want variety from scallops
- Baked Pear Recipe — Sweet finish to round out your week with simple baked fruit
You’ve got this. One batch of scallops on Sunday, five different meals throughout the week, genuine nutrition built into your routine without overthinking it. This is how you take back control of your week—not through willpower or restriction, but through smart, delicious cooking done once instead of daily. Your Wednesday self will thank you when you open your fridge and see perfectly ready scallops waiting. Your Friday self will be amazed at how much money you saved and how much less stressed you feel. Your body will thank you with sustained energy, better sleep, and the nourishment that comes from real food cooked with intention. That’s not just meal prep. That’s taking care of yourself with love and flavor.