Baked Cabbage Wedge Recipe
This post contains affiliate links. As an Amazon Associate I earn from qualifying purchases.
You’ve probably tried the stovetop sauté version that leaves your kitchen smelling like boiled greens for three days. Maybe you’ve attempted steaming, only to end up with mushy, sad cabbage that tastes like nothing. Here’s what I’ve learned after years of working with home cooks who want real vegetables on their table: the oven method changes everything. This baked cabbage approach creates something magical that neither pan-frying nor steaming can match—golden, caramelized edges with a fork-tender interior and actual flavor.
Baked Cabbage Wedge Recipe: Which Method Actually Works Best?
I’ve tested every cabbage cooking method you can imagine. As a registered dietitian, I’m trained to understand not just the nutrition behind vegetables, but how to make people actually want to eat them. That’s the real challenge, isn’t it? When I started working with families in Norwood, I realized most people abandoned vegetables because the technique made them taste terrible, not because the vegetable itself was the problem.
I spent months comparing roasting, boiling, steaming, sautéing, and slow-cooking cabbage wedges. I kept detailed notes on texture, flavor development, moisture content, and—honestly—how much my kitchen smelled like cabbage afterward. The oven method won by a landslide.
The Methods Compared: An Honest Breakdown
Let me walk you through what actually happens with each approach, because understanding the “why” helps you make the best choice for your kitchen and your schedule.
- Stovetop Pan-Searing – You get some browning if you’re patient, but managing moisture and heat consistency is tricky. The bottom burns while the top steams. Cleanup involves grease splatters on your backsplash. Best for: experienced cooks with 20 minutes and a ventilation hood that actually works.
- Steaming or Boiling – These methods preserve nutrition (in water form, mostly), but destroy flavor and texture. Your cabbage becomes soft, waterlogged, and tastes like… well, like boiled cabbage. The smell lingers. Best for: making vegetable stock, not dinner.
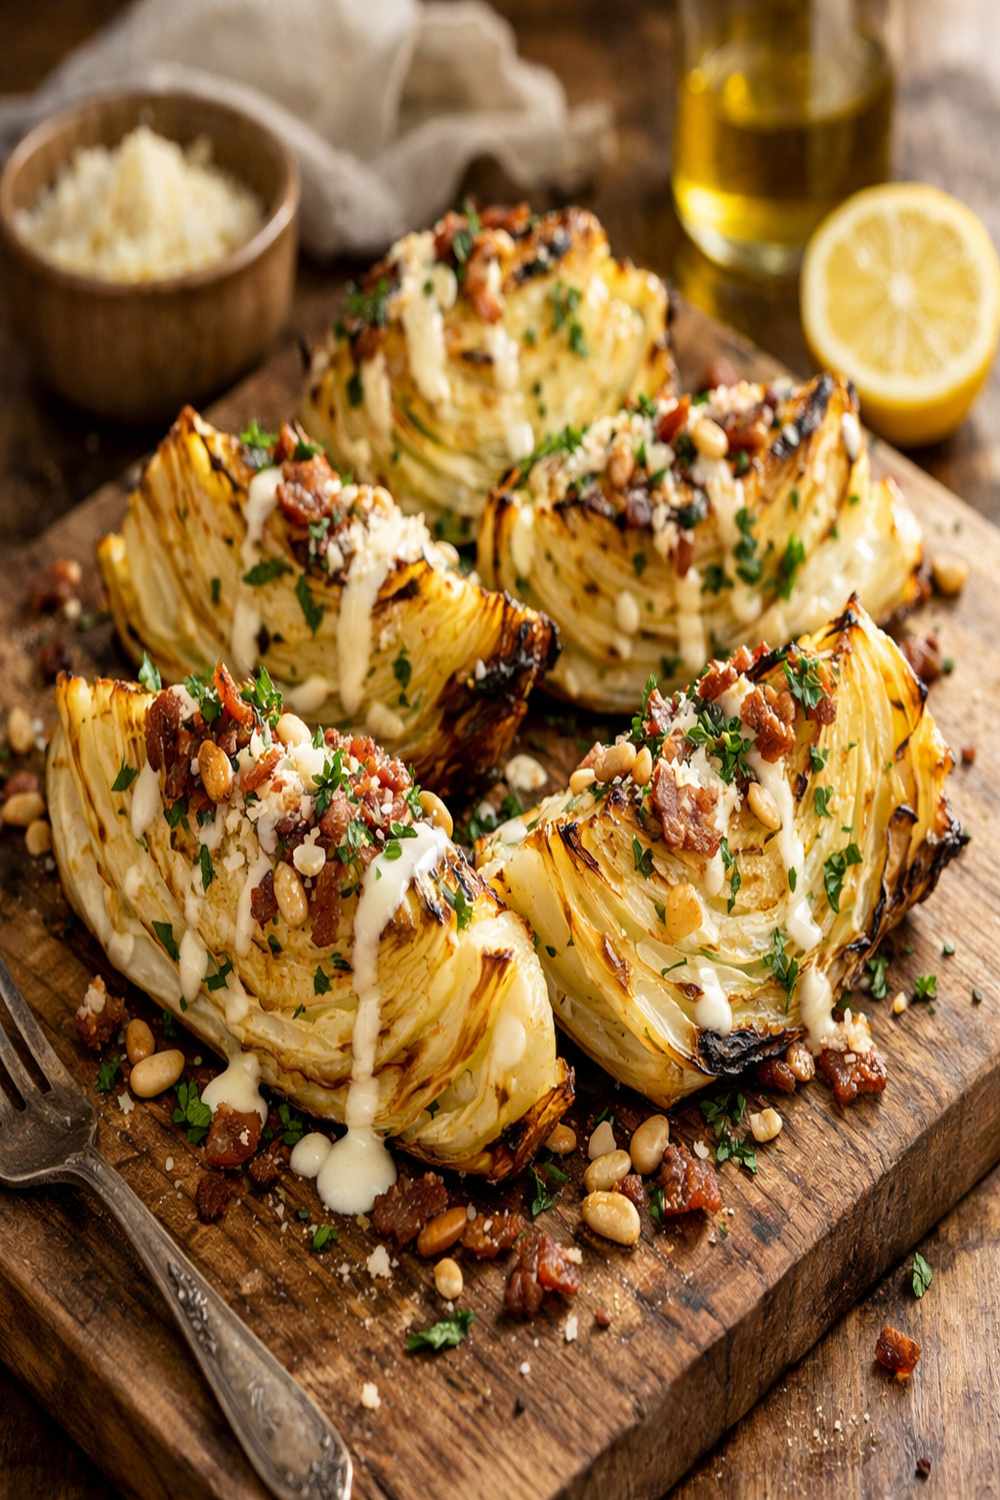
- Oven Roasting (This Recipe) – Heat surrounds the wedges from all angles, creating even caramelization and concentrating natural sweetness. The edges crisp beautifully while the interior stays tender. Your kitchen smells like toasted garlic and caramelized vegetables. One sheet pan. Done in 30 minutes. Best for: everyone, especially people who think they don’t like cabbage.
Why This Version Beats the Rest
The magic happens because of the dry heat environment the oven creates. Unlike stovetop cooking where moisture gets trapped and creates steam, the oven’s consistent temperature allows the natural sugars in cabbage to caramelize. You’re not boiling or wilting—you’re coaxing out sweetness that most people never knew existed in a humble cabbage.
The texture is what converts skeptics. You’ll get crispy, browned edges with a slight char that adds complexity, while the interior becomes so tender a fork slides through effortlessly. There’s actual bite and flavor, not mushy sadness. The seasoning isn’t competing with boiled-water blandness; it’s enhancing something that already tastes good.
From a practical standpoint, you’re looking at 25-30 minutes total, mostly hands-off. You prep for 5 minutes, spray with oil, season, and let the oven do the work while you set the table or help with homework. One sheet pan means one thing to wash. No splatter cleanup. No lingering smell that requires opening windows in January.
The Ingredients
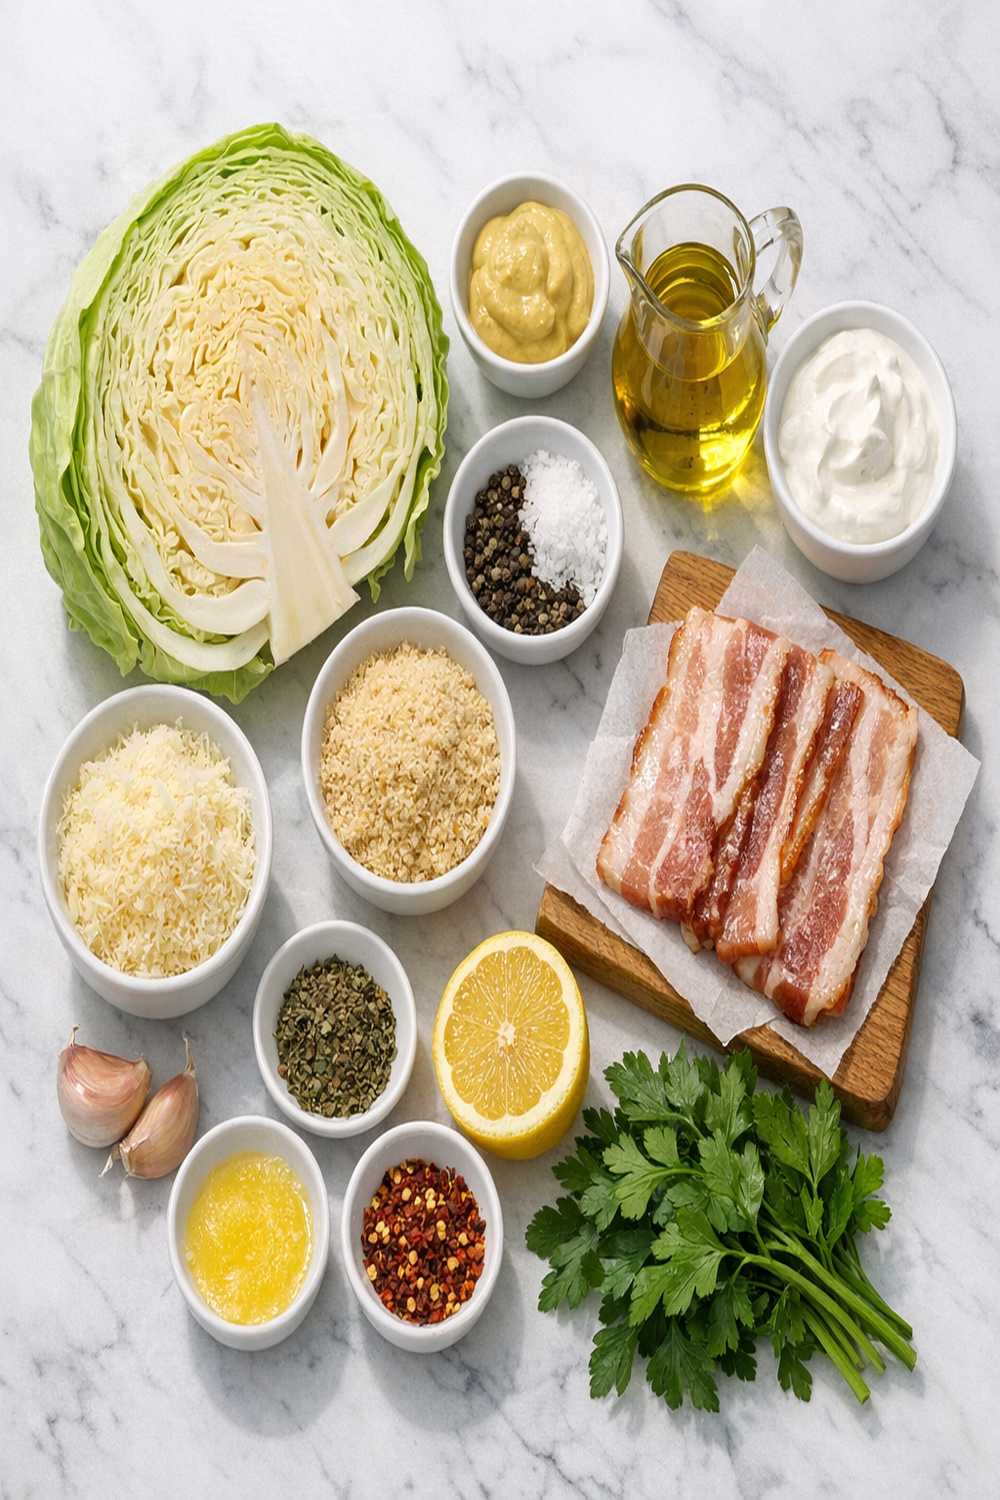
I’ve intentionally kept this ingredient list minimal because cabbage is the star here. The additions amplify what’s already there rather than masking it. Notice I’m not calling for vegetable broth, butter, or complicated flavor compounds. That’s deliberate. Fresh, whole vegetables don’t need those crutches when you use the right cooking method.
- ½ teaspoon red pepper flakes (optional, but adds depth that makes people say “what is that amazing flavor?”)
- Olive oil cooking spray, about 2-3 tablespoons total (prevents sticking and enables browning without adding excess fat)
- 1 teaspoon garlic powder (fresh garlic will burn at high heat, but powder caramelizes beautifully)
- 1 large green cabbage, about 2 pounds before trimming (choose one that feels heavy for its size, indicating good water content and density)
- ¼ teaspoon smoked paprika (this is my addition—it deepens the caramelization and adds subtle smokiness without overpowering)
- 1 teaspoon Diamond Crystal kosher salt (the larger crystals dissolve more evenly than table salt and won’t make cabbage taste metallic)
Expert’s Nutritional Tip: Cabbage is a cruciferous vegetable packed with sulforaphane, a compound with powerful anti-inflammatory properties. Here’s what most people miss: cooking actually makes this compound more bioavailable. The roasting process breaks down cell walls slightly, making it easier for your body to absorb these benefits. You’re not destroying nutrition with heat—you’re unlocking it. Plus, one wedge contains roughly 22 calories and 5 grams of fiber. That’s essentially free food in terms of volume versus calories.
How to Make the Best Version of Baked Cabbage Wedge Recipe
Every step here has a purpose. I’m not including busy-work instructions—just the techniques that directly impact your results.
Step 1: Set Your Oven Temperature and Prep Your Pan
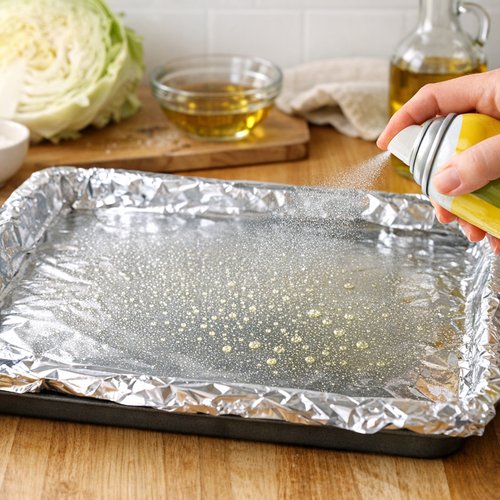
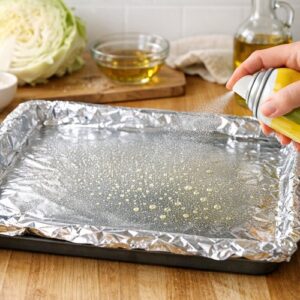
Start by preheating your oven to 400°F. This temperature is the sweet spot—hot enough to create good browning and caramelization, but not so scorching that the outside burns before the inside becomes tender. Line a rimmed baking sheet with foil (makes cleanup effortless) and spray it generously with olive oil cooking spray. Don’t be shy here. A light coating won’t cut it; you want a visible sheen across the entire surface. This prevents sticking and helps those edges get properly crispy.
Step 2: Prepare Your Cabbage Wedges Correctly
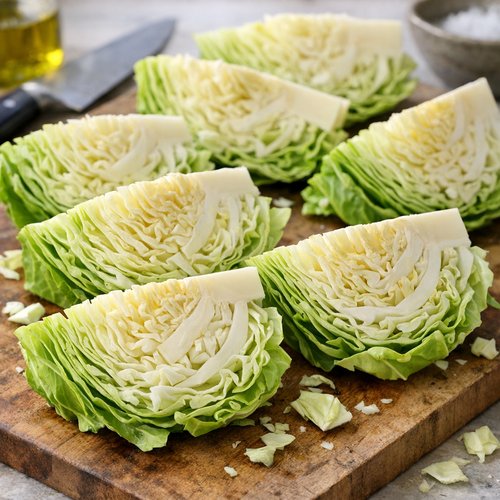
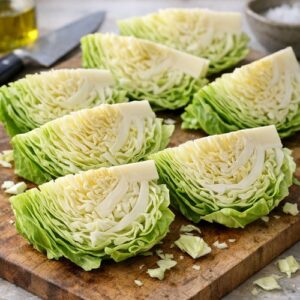
Remove and discard the damaged outer leaves—usually one or two layers that show bruising or significant damage. Now comes the critical technique most recipes miss: cut your cabbage in half from top to root, then cut each half into thick wedges. Leave the core intact. This is non-negotiable. The core holds everything together during cooking. Without it, your beautiful wedges fall into separate leaves, and you lose that satisfying presentation and the concentrated texture of the center.
Each wedge should be roughly 1.5 to 2 inches wide at the widest point. You’ll get about 6-8 wedges from one large cabbage, which serves 4-6 people depending on appetites and what you’re serving alongside.
Step 3: Rinse and Dry Thoroughly
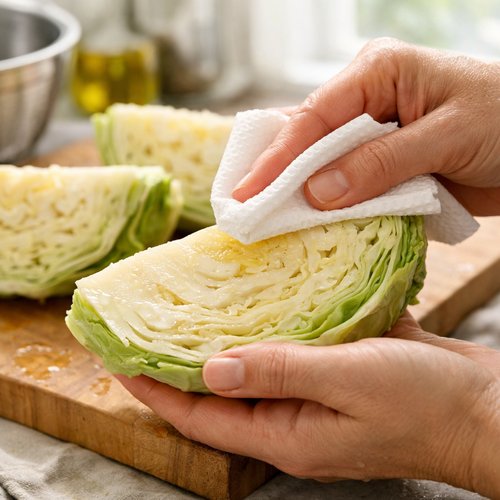
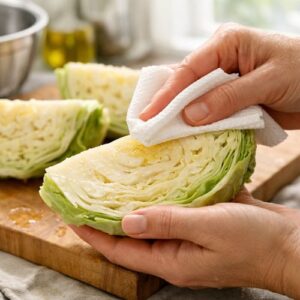
Rinse your wedges under cool water to remove any dirt or loose outer leaves. Then comes the part that separates good results from great ones: dry them completely using paper towels. Pat each wedge on both flat sides and along the edges. Moisture is the enemy of browning and caramelization. If you skip this step, you’ll steam your cabbage instead of roasting it. Think of it like making a grilled cheese—you need a dry surface to achieve that golden exterior.
Step 4: Arrange and Oil
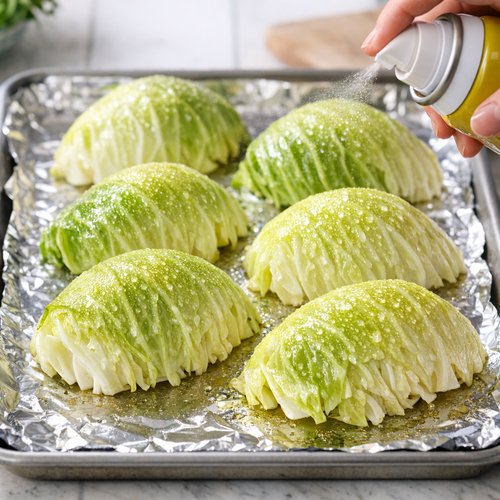
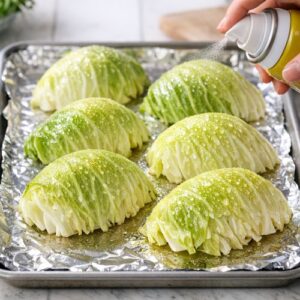
Place your dried wedges on the prepared baking sheet in a single layer. They should sit flat, with the cut sides down on the foil. Once arranged, spray the top side (the rounded side of each wedge) generously with olive oil cooking spray. You’re aiming for that visible sheen again—enough that the seasoning will stick and browning will happen, but not so much that you’re creating a pool of oil.
Step 5: Season with Intention
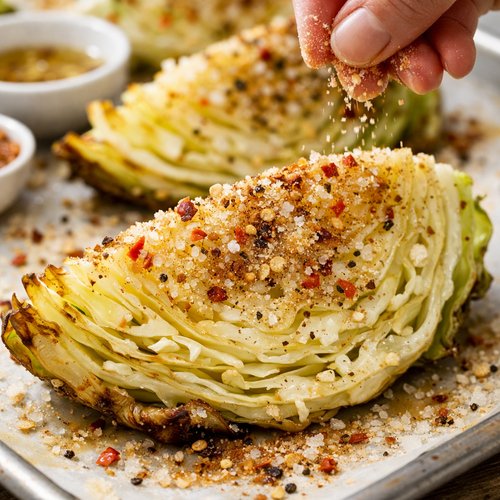
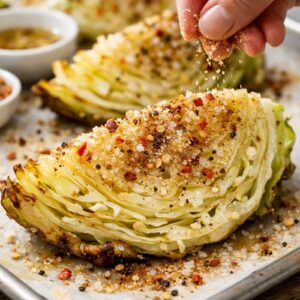
Sprinkle the kosher salt, garlic powder, red pepper flakes, and smoked paprika evenly across all the wedges. The salt draws out moisture while allowing the exterior to crisp (this is called osmosis, and it’s the same principle that makes salt-roasted potatoes so good). The garlic powder caramelizes in the heat rather than burning like fresh garlic would. The red pepper flakes add heat without bitterness. The smoked paprika ties everything together and creates complexity that makes people ask what spice you used.
Step 6: Roast Until Golden and Tender
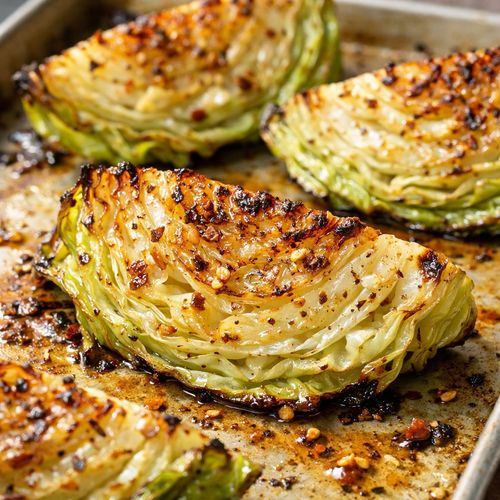
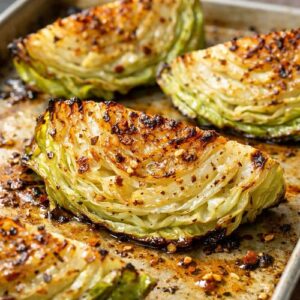
Transfer your sheet to the preheated oven and roast for 25-30 minutes. About halfway through (around the 12-15 minute mark), I like to shake the pan or rotate it if my oven has hot spots, but it’s not essential. You’re looking for the flat sides to turn golden brown with some darker caramelized spots, and the edges to show a slight char. When you pierce the thickest part of a wedge with a fork, it should slide through with minimal resistance—tender but not mushy.
The exact timing depends on your oven and the size of your wedges, so use visual cues as your guide. When they look golden and smell incredible, they’re done. Don’t wait for them to be fully soft; that’s overcooked. You want a slight resistance with plenty of caramelized flavor.
Step 7: Serve Immediately
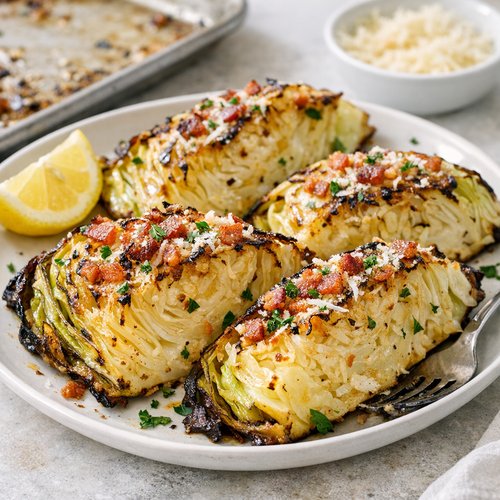
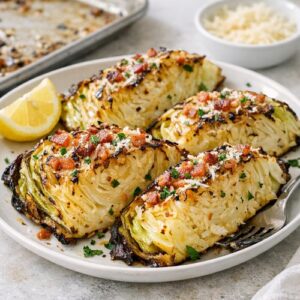
Transfer the wedges to your serving plate right out of the oven. The residual heat helps them maintain texture. If you leave them on the hot pan too long, they’ll continue cooking and softening. The contrast between the crispy exterior and tender interior is what makes this dish sing, so timing your service with your other components matters.
Side-by-Side Results: What to Expect
When you pull these wedges from the oven, you’ll immediately notice the difference from other methods. The flat sides should show deep golden brown coloring with irregular darker patches where caramelization happened most intensely. The edges might have a slight char—don’t be alarmed; this is where the flavor concentrates. The aroma should be toasted, sweet, and savory with hints of garlic and smoke.
The texture is where the real revelation happens. Visually, the cabbage looks almost translucent in places and has lost that bright green color from raw cabbage, but it’s not the dull, washed-out gray-green of boiled cabbage. Cut into a wedge and you’ll see the leaves have softened and will pull apart easily, but the core (if you kept it intact like instructed) holds everything together and provides a slightly more substantial bite.
Taste one, and you’ll notice natural sweetness that wasn’t apparent in raw cabbage. This is the sugars concentrating and caramelizing. There’s savory depth from the garlic powder and paprika, a gentle heat from the red pepper flakes, and salt that enhances without overwhelming. The whole thing tastes more like roasted vegetable and less like “that thing people say is healthy but tastes bad.”
Compare this to steamed cabbage, which tastes watery and bland. Compare it to pan-seared cabbage, which often has uneven browning and a rubbery texture from being cooked at high direct heat. This method delivers consistency and balanced flavor across every wedge.
When to Use Each Method
- Oven Roasting (This Recipe) – You’re cooking dinner on a normal weeknight and want something reliable, delicious, and mostly hands-off. You have 30 minutes and a sheet pan. You’re serving this to people who claim they don’t like vegetables. Use this method.
- Stovetop Pan-Searing – You’re an experienced cook, you have 20 minutes, you enjoy managing multiple elements, and you don’t mind splatter. You’re comfortable cooking at high heat and monitoring doneness constantly. Use this if you want to show off your skills.
- Steaming – You’re making vegetable stock. You’re preserving cabbage for storage. You’re not actually trying to make cabbage taste good in the traditional sense. Use this only if necessity requires it, not for flavor.
Can I Store Baked Cabbage Wedge Recipe?
Yes, and this is where the make-ahead magic happens. Store cooled wedges in an airtight container in the refrigerator for up to 4 days. The flavor actually deepens slightly after a day, kind of like how soup tastes better the next day. Texture will soften as they sit, becoming more like regular roasted cabbage rather than crispy-edged, but they’ll still be delicious.
To reheat, place them on a sheet pan and warm in a 350°F oven for about 8-10 minutes. The microwave works if you’re in a hurry, but you’ll lose the crispy edge texture. I recommend reheating in the oven if time allows—it restores some of that caramelized exterior quality.
Make-Ahead Guide: You can prep these entirely the night before. After Step 3 (rinsing and drying), arrange your wedges on the foil-lined pan, cover tightly with plastic wrap, and refrigerate overnight. In the morning or at dinner time, simply spray with oil, season, and roast as instructed. This is perfect for people who want to simplify weeknight cooking. The cold wedges might take an extra 3-5 minutes to roast since they’re starting from refrigerator temperature, but the results are identical.
You can also freeze baked wedges for up to 3 months in a freezer-safe container. Thaw in the refrigerator overnight before reheating, or reheat from frozen at 375°F for about 15 minutes. Texture changes slightly with freezing (ice crystals form and rupture cell walls), so frozen-then-reheated cabbage becomes softer overall, but it’s still nutritious and tasty.
Nutrition Information
Based on USDA data, one wedge (approximately 150-180 grams) contains roughly 50 calories, 3 grams of protein, 1 gram of fat (mostly from the cooking spray), and 10 grams of carbohydrates with 2.5 grams of fiber. That means 7.5 grams of net carbs per serving—essentially free food in terms of volume.
More importantly, you’re getting an excellent source of vitamin C (about 35% of daily needs per wedge), vitamin K (crucial for bone health and blood clotting), and folate (essential for cellular function). You’re also getting those sulforaphane compounds I mentioned earlier—the anti-inflammatory phytonutrients that make cruciferous vegetables so special.
This recipe contains minimal sodium from the salt I use (under 400mg per wedge when divided into 6 servings), making it appropriate for most salt-restricted diets. There’s no added sugar, no processed ingredients, no hidden preservatives. It’s essentially whole food, roasted.
What Can I Serve With Baked Cabbage Wedge Recipe?
This is where having a good vegetable side becomes magical—it pairs beautifully with almost any protein. I typically serve these wedges with something that has complementary flavors or that needs a fresh, crispy counterpoint.
- Baked Center-Cut Pork Chops – The richness of pork needs the bright, crispy vegetable. Cabbage is a classic pairing for a reason.
- Baked Cod With Lemon and Capers – Light fish benefits from a more substantial vegetable side. The savory cabbage balances the brightness of lemon and capers perfectly.
- Roasted chicken thighs – Dark meat chicken and cabbage is a beloved combination across European cuisines. Serve with mustard on the side.
- Grilled steak or beef – The caramelization on the cabbage mirrors the crust on good steak. They speak the same flavor language.
- Sausages or bratwurst – German, Polish, and Central European traditions knew what they were doing pairing cabbage with sausage. Add some spicy mustard and a hearty bread.
- Black beans and rice – Cabbage adds texture and nutritional balance to a vegetarian main course. The crispy edges contrast beautifully with creamy beans.
Common Mistakes to Avoid
Mistake #1: Skipping the drying step – This is the single most common error I see home cooks make. Wet cabbage steams instead of roasts. You’ll end up with soft, pale wedges instead of golden, caramelized ones. Pat those wedges dry. It takes two minutes and changes everything.
Mistake #2: Removing the core – I understand the impulse; you might think the core is tough or inedible. It’s not. The core holds the entire wedge together during cooking and becomes perfectly tender when roasted. Remove it and you’ll have individual leaves scattered across your sheet pan instead of intact wedges.
Mistake #3: Not using enough oil – You need enough oil spray to create a visible sheen on the cabbage. If you’re trying to cut oil to bare minimum, your cabbage won’t brown properly and will stick to the pan. Ironically, you end up with worse results while trying to be healthier. A light coat of oil actually enables better browning and caramelization.
Mistake #4: Overcrowding the pan – If wedges are touching or overlapping, you’re steaming the sides that touch. Arrange them in a single layer with a little space between each wedge. If you’re cooking for a large group and can’t fit everything on one sheet, use two pans rather than stacking layers.
Seasonal Variations
Spring/Summer: Add fresh lemon zest and a tiny pinch of lemon pepper before roasting. A squeeze of fresh lemon juice after coming out of the oven brightens everything. You can also add fresh herbs like dill or chives right at the end.
Fall/Winter: Add a light dusting of cumin or caraway seeds before roasting (these are traditional with cabbage in cooler months). Some people add a light drizzle of balsamic vinegar right before serving. These warmer spices pair beautifully with root vegetables and heartier mains.
Year-Round Variation: If you have Asian Brussels Sprouts on your mind, try this approach with a touch of soy sauce or tamari spritzed on before roasting, plus a drizzle of sesame oil right before serving and a sprinkle of sesame seeds. It takes this recipe in a completely different flavor direction while using the exact same technique.

Baked Cabbage Wedge Recipe
Ingredients
Method
- Start by preheating your oven to 400°F. This temperature is the sweet spot—hot enough to create good browning and caramelization, but not so scorching that the outside burns before the inside becomes tender. Line a rimmed baking sheet with foil (makes cleanup effortless) and spray it generously with olive oil cooking spray. Don't be shy here. A light coating won't cut it; you want a visible sheen across the entire surface. This prevents sticking and helps those edges get properly crispy.
- Remove and discard the damaged outer leaves—usually one or two layers that show bruising or significant damage. Now comes the critical technique most recipes miss: cut your cabbage in half from top to root, then cut each half into thick wedges. Leave the core intact. This is non-negotiable. The core holds everything together during cooking. Without it, your beautiful wedges fall into separate leaves, and you lose that satisfying presentation and the concentrated texture of the center. Each wedge should be roughly 1.5 to 2 inches wide at the widest point. You'll get about 6-8 wedges from one large cabbage, which serves 4-6 people depending on appetites and what you're serving alongside.
- Rinse your wedges under cool water to remove any dirt or loose outer leaves. Then comes the part that separates good results from great ones: dry them completely using paper towels. Pat each wedge on both flat sides and along the edges. Moisture is the enemy of browning and caramelization. If you skip this step, you'll steam your cabbage instead of roasting it. Think of it like making a grilled cheese—you need a dry surface to achieve that golden exterior.
- Place your dried wedges on the prepared baking sheet in a single layer. They should sit flat, with the cut sides down on the foil. Once arranged, spray the top side (the rounded side of each wedge) generously with olive oil cooking spray. You're aiming for that visible sheen again—enough that the seasoning will stick and browning will happen, but not so much that you're creating a pool of oil.
- Sprinkle the kosher salt, garlic powder, red pepper flakes, and smoked paprika evenly across all the wedges. The salt draws out moisture while allowing the exterior to crisp (this is called osmosis, and it's the same principle that makes salt-roasted potatoes so good). The garlic powder caramelizes in the heat rather than burning like fresh garlic would. The red pepper flakes add heat without bitterness. The smoked paprika ties everything together and creates complexity that makes people ask what spice you used.
- Transfer your sheet to the preheated oven and roast for 25-30 minutes. About halfway through (around the 12-15 minute mark), I like to shake the pan or rotate it if my oven has hot spots, but it's not essential. You're looking for the flat sides to turn golden brown with some darker caramelized spots, and the edges to show a slight char. When you pierce the thickest part of a wedge with a fork, it should slide through with minimal resistance—tender but not mushy. The exact timing depends on your oven and the size of your wedges, so use visual cues as your guide. When they look golden and smell incredible, they're done. Don't wait for them to be fully soft; that's overcooked. You want a slight resistance with plenty of caramelized flavor.
- Transfer the wedges to your serving plate right out of the oven. The residual heat helps them maintain texture. If you leave them on the hot pan too long, they'll continue cooking and softening. The contrast between the crispy exterior and tender interior is what makes this dish sing, so timing your service with your other components matters.
FAQs
Can I use red cabbage instead of green cabbage?
Absolutely. Red cabbage works beautifully with this method. The cooking time is identical, and the flavors are slightly earthier and less sweet. Nutritionally, red cabbage contains anthocyanins (the pigments that make it red), which are powerful antioxidants. The color will intensify during roasting, becoming a deep burgundy. Red cabbage pairs especially well with seared ahi tuna if you want to try something elegant, though it’s delicious with everything. The main difference is that red cabbage can be slightly more dense, so it might take an additional 2-3 minutes to become fork-tender.
What if my wedges are smaller or larger than average?
Adjust your roasting time accordingly. Thinner wedges (less than 1 inch) will be done in 18-22 minutes. Thicker wedges (more than 2 inches) might need 35-40 minutes. Use visual cues and the fork-tender test as your guide rather than watching the clock strictly. You want caramelization and tenderness, not a specific time.
Can I make this in a toaster oven?
Yes, with a caveat. Toaster ovens have less even heat distribution, so you’ll need to rotate your pan more frequently (every 10 minutes or so) and watch more carefully. The cooking time will likely be slightly longer. Results are still good, just requiring more attention. If you’re roasting just 2-3 wedges instead of a full cabbage, a toaster oven might actually be more efficient than heating a full-size oven.
Is there a difference between different types of salt?
Absolutely, and this matters. Table salt has smaller crystals that dissolve quickly but can leave a metallic taste and make seasoning uneven. Kosher salt (which I specify Diamond Crystal brand) has larger crystals that dissolve more slowly and distribute more evenly. If you only have table salt, use about half the amount I call for because it’s more concentrated. Sea salt works fine too, though it costs more for no real flavor advantage in this application. Don’t use specialty salts like Himalayan pink salt for everyday cooking like this—save those for finishing dishes where you taste individual crystals.
Why does my cabbage sometimes taste bitter?
This usually happens if your oven temperature was too high or if you cooked the cabbage too long, causing the sugars to burn rather than caramelize. Bitterness indicates burning, not proper caramelization. Stick to 400°F and watch for golden brown, not dark brown. It could also mean you used cabbage that was already slightly bitter before cooking (older cabbage from the bottom of a store bin rather than fresh). Choose cabbage that feels heavy, has tight leaves, and shows no dark spots or damage.
More Recipes You’ll Love
- Baked Latke Recipe – Crispy roasted potato pancakes that teach the same caramelization principles
- Baked Pear Recipe – Roasted fruit that shows how dry heat concentrates natural sweetness in any ingredient
- Asian Brussels Sprouts Recipe – Same roasting technique with a different cruciferous vegetable and complementary flavors
This baked cabbage wedge recipe represents what I’ve learned from years of helping people fall back in love with whole vegetables. It’s not complicated. It’s not fussy. It’s not a reinvention of anything; it’s simply cooking cabbage the way that lets its best qualities shine through—with good heat, simple seasoning, and enough time to develop real flavor.
When you serve these golden wedges at your table, something shifts. People don’t think “oh, vegetables.” They think “this is actually delicious.” That’s the point of everything I do in my kitchen and my practice—making food that nourishes your body and genuinely tastes good so that healthy eating feels like a choice you want to make, not a chore you have to manage.
Take care with love and flavor!