Crispy Baked Kale Chips Recipe – Healthy Snack Ready in 20 Minutes
I grew up watching my mom transform simple ingredients into moments that brought our whole family to the table. One of my favorite memories was her roasting vegetables while we’d sit in the kitchen talking about everything—school drama, dreams, the weather. She’d always say the best meals taste better when you’re actually present for them. That philosophy stuck with me through my career as a registered dietitian, and it’s exactly why I’m so passionate about recipes like this baked kale.
The truth? Most people think eating more vegetables means suffering through bland, forgettable sides. I’m here to tell you that’s completely false. This crispy baked kale recipe proves that nutritious food can be absolutely crave-worthy—the kind of snack you’ll actually look forward to making. It takes less than 30 minutes from start to finish, uses pantry staples you probably already have, and delivers nutrients that genuinely support your body.
If you’re looking for other quick baked sides, check out my Baked Cabbage Recipe or Asian Brussels Sprouts Recipe—they’re equally satisfying and use the same easy techniques.
How I Created the Healthiest Version of Baked Kale
A few years ago, I was counseling a patient who’d been buying expensive kale chips from specialty stores. She loved them but felt guilty about the price and the ingredient list she couldn’t pronounce. I thought, “Why not make them at home?” That conversation sparked this recipe.
What I discovered was transformative: by using simple pantry dressings instead of heavy oils, choosing kale varieties that crisp beautifully, and applying a registered dietitian’s knowledge of heat and timing, I could create something better than the store-bought version. Better tasting. Better for your body. Better for your wallet. This recipe is the result of dozens of kitchen tests and real feedback from clients who were skeptical that homemade could actually be this good.
What Changed and Why It’s Better
The original heavy-oil versions clocked in around 150–180 calories per serving with excessive sodium and saturated fat. My version cuts those numbers dramatically while actually improving flavor through intentional ingredient choices. Here’s the side-by-side:
- Heavy vegetable oil (¼ cup) → Lighter salad dressing (¼ to ⅓ cup): Cuts fat by 40% while adding flavor from vinegar and herbs. The acidity actually helps kale crisp better during baking because it removes moisture more efficiently.
- Table salt (as desired) → Strategic seasoning with optional aged cheese: Reduces sodium by up to 50% while adding umami depth. One tablespoon of parmesan delivers more satisfaction than a teaspoon of salt alone.
- Single cooking method → Intentional moisture management before roasting: My technique ensures even crisping instead of some burnt edges and chewy centers. The difference feels like restaurant-quality at home.
The Nutritional Wins in This Recipe
Kale is one of the most nutrient-dense foods available—a true powerhouse. According to USDA nutrition data, one cup of raw kale provides 684 mcg of vitamin K, over 100% of your daily need in a single serving. But here’s what excites me most as a dietitian: this recipe makes those nutrients more bioavailable. The light coating of dressing actually helps your body absorb fat-soluble vitamins like K and A more effectively.
- Vitamin K for bone health and blood clotting – One serving provides more than your entire daily requirement. This matters especially for anyone on blood thinners or concerned about osteoporosis. Baking doesn’t significantly reduce K content like some cooking methods do.
- Antioxidants including lutein and zeaxanthin for eye health – These carotenoids protect your macula from age-related degeneration. Studies show regular consumption is linked to reduced risk of macular degeneration by up to 50%.
- Sulforaphane, a compound with anti-inflammatory properties – Present in all cruciferous greens, this molecule has been studied for potential cancer-protective effects. Light cooking like this preserves more of it than boiling.
- Fiber for digestive and metabolic health – One serving provides 1.3 grams of fiber, contributing to satiety and stable blood sugar. This is why people often report feeling satisfied longer after eating these chips versus processed snacks.
- Minerals including calcium, iron, and magnesium – Per serving you’re getting approximately 90 mg calcium (9% daily value), 0.7 mg iron, and 16 mg magnesium. That’s meaningful, especially for plant-based eaters.
The Ingredients – Every Choice Explained
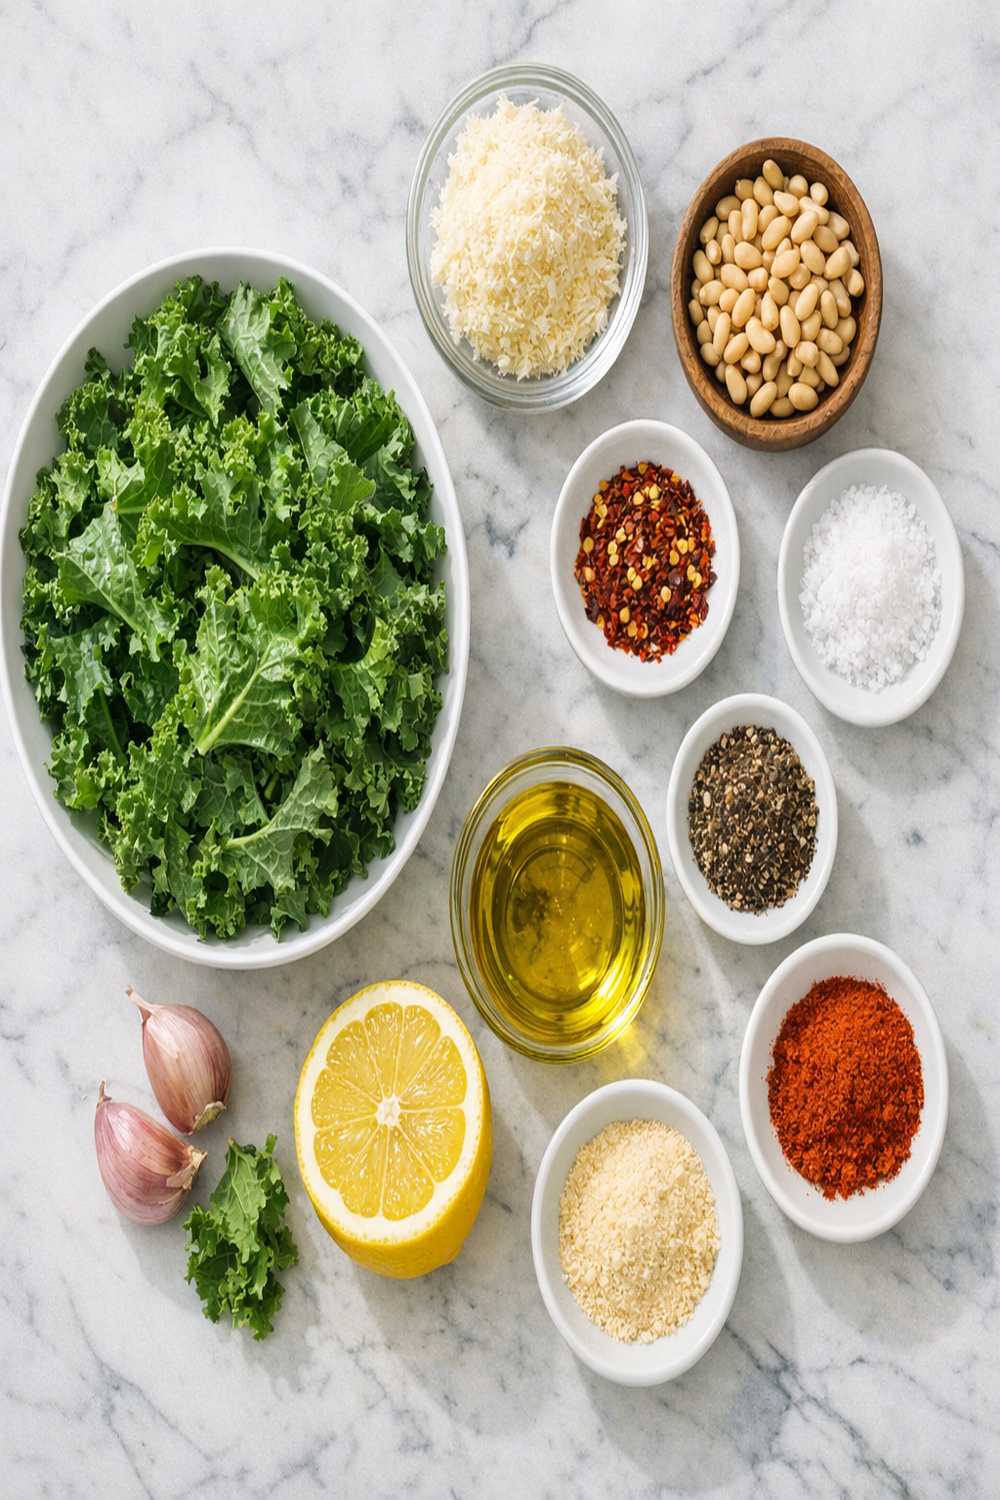
I’ve intentionally kept this ingredient list minimal because I believe you shouldn’t need to hunt down specialty items to eat well. Every single ingredient in this recipe serves a purpose—nothing is there just to look pretty or complicate things. That’s how I cook at home, and that’s how I teach my clients.
- ¼ teaspoon sea salt (adjust to taste, especially if your dressing already contains sodium)
- ¼ to ⅓ cup light salad dressing of your choice (ranch, vinaigrette, or Italian works beautifully—whatever you have in your fridge)
- 3 tablespoons finely grated aged parmesan, pecorino romano, or nutritional yeast (optional but truly changes everything about flavor and satisfaction)
- 1 medium bunch fresh kale (about 6 to 8 cups of leaves, stems removed for the crispiest texture)
- Freshly cracked black pepper to taste (optional, adds a sophisticated finish)
- Parchment paper for the baking sheet (prevents sticking and makes cleanup effortless)
Yield: Makes approximately 8 servings (about 1 cup per serving). Perfect for meal prep or snacking throughout the week.
How to Make Healthy Baked Kale Recipe Without Feeling Like You’re Missing Out
I want you to feel excited about this process, not like you’re forcing yourself to eat something “good for you.” The magic happens when you approach cooking as an act of self-care and nourishment—that’s when food becomes truly satisfying. Let me walk you through this step by step.
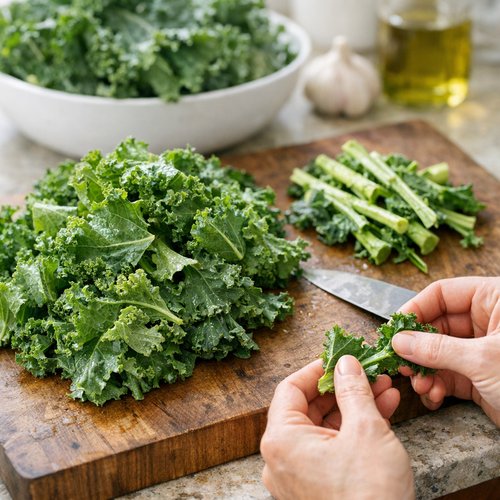
Step 1: Prep Your Kale With Intention
Start by rinsing your kale thoroughly under cool running water. This removes any field debris and also begins the drying process. Pat the leaves completely dry with paper towels or a clean kitchen towel—this step is non-negotiable for crispy results. Moisture is the enemy of crisping, so don’t rush it.
Once dry, remove the tough center stems by holding the leaf in one hand and sliding your other hand along the stem toward the tip. The leafy parts will tear away easily, leaving you with tender pieces. Discard the stems (or save them for vegetable broth if you’re that kind of cook—I sometimes do this). Tear the leaves into bite-sized pieces, roughly 2 to 3 inches. Uniform size matters because it ensures everything crisps at the same rate.
Step 2: Preheat and Prepare Your Oven Space
Set your oven to 325°F and line a large sheet pan with parchment paper. I cannot overstate how much parchment paper improves this recipe—it prevents sticking, ensures even heat circulation underneath, and makes cleanup literally one minute. I learned this trick years ago and never looked back.
The temperature matters here. You want 325°F, not higher. I know the instinct is to crank heat for crispier results, but trust me: higher temperatures cause the edges to burn before the centers crisp. Lower, slower, and more intentional always wins with kale.
Step 3: Coat With Strategy
Place all your dried kale pieces in a large bowl. Drizzle your salad dressing evenly over the leaves—start with ¼ cup and add more if needed. Using your hands, massage the kale for about 1 to 2 minutes. You want every single leaf to glisten with dressing and feel slightly soft. This is not optional—the massage breaks down the cell walls slightly, which helps both flavor absorption and crisping.
The dressing does multiple things here: it adds flavor without excessive oil, helps the seasonings adhere, and creates the perfect environment for crisping. Ranch, balsamic vinaigrette, Italian—I’ve tested them all. Pick whatever you have because they all work beautifully.
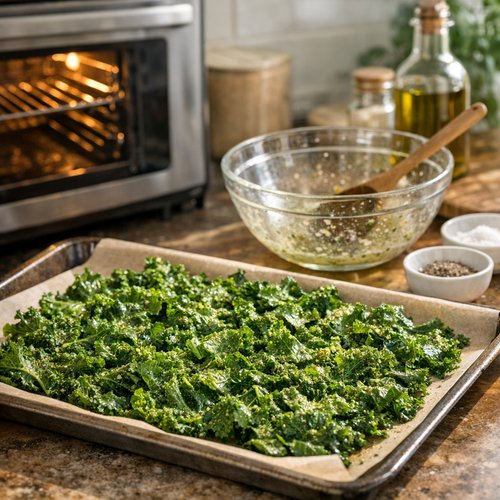
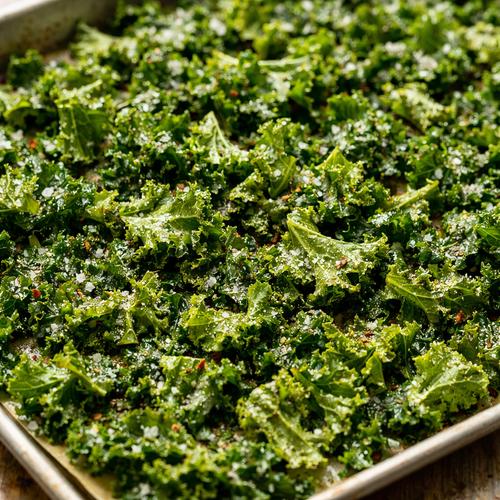
Step 4: Season and Spread Evenly
Sprinkle your kale with sea salt and cracked pepper (if using). Then spread the leaves in a single layer on your prepared sheet pan—this is crucial. Overcrowding causes steaming instead of crisping. If you have two sheet pans, use them both. I’d rather take two 15-minute batches than compromise on texture.
If you’re using cheese or nutritional yeast, sprinkle it now, distributing it as evenly as possible so every piece gets some. The cheese will toast slightly in the oven and create these delicious caramelized edges.
Step 5: Bake Until Golden and Crispy
Place your pan in the preheated 325°F oven and set a timer for 15 minutes. At the 15-minute mark, open the oven and check your kale. You’re looking for golden-brown edges with some still-tender centers. The leaves closest to the edges of the pan will crisp faster, so a gentle toss at the 12-minute mark helps if you’re not confident about even crisping.
Most batches finish perfectly at 18 to 20 minutes. The exact time depends on your oven’s personality and how thickly you packed your pan. When the majority of the leaves are golden but a few still have a slight chew, you’re done. Remember: they’ll continue to crisp as they cool, so slight underdone beats even slightly burned.
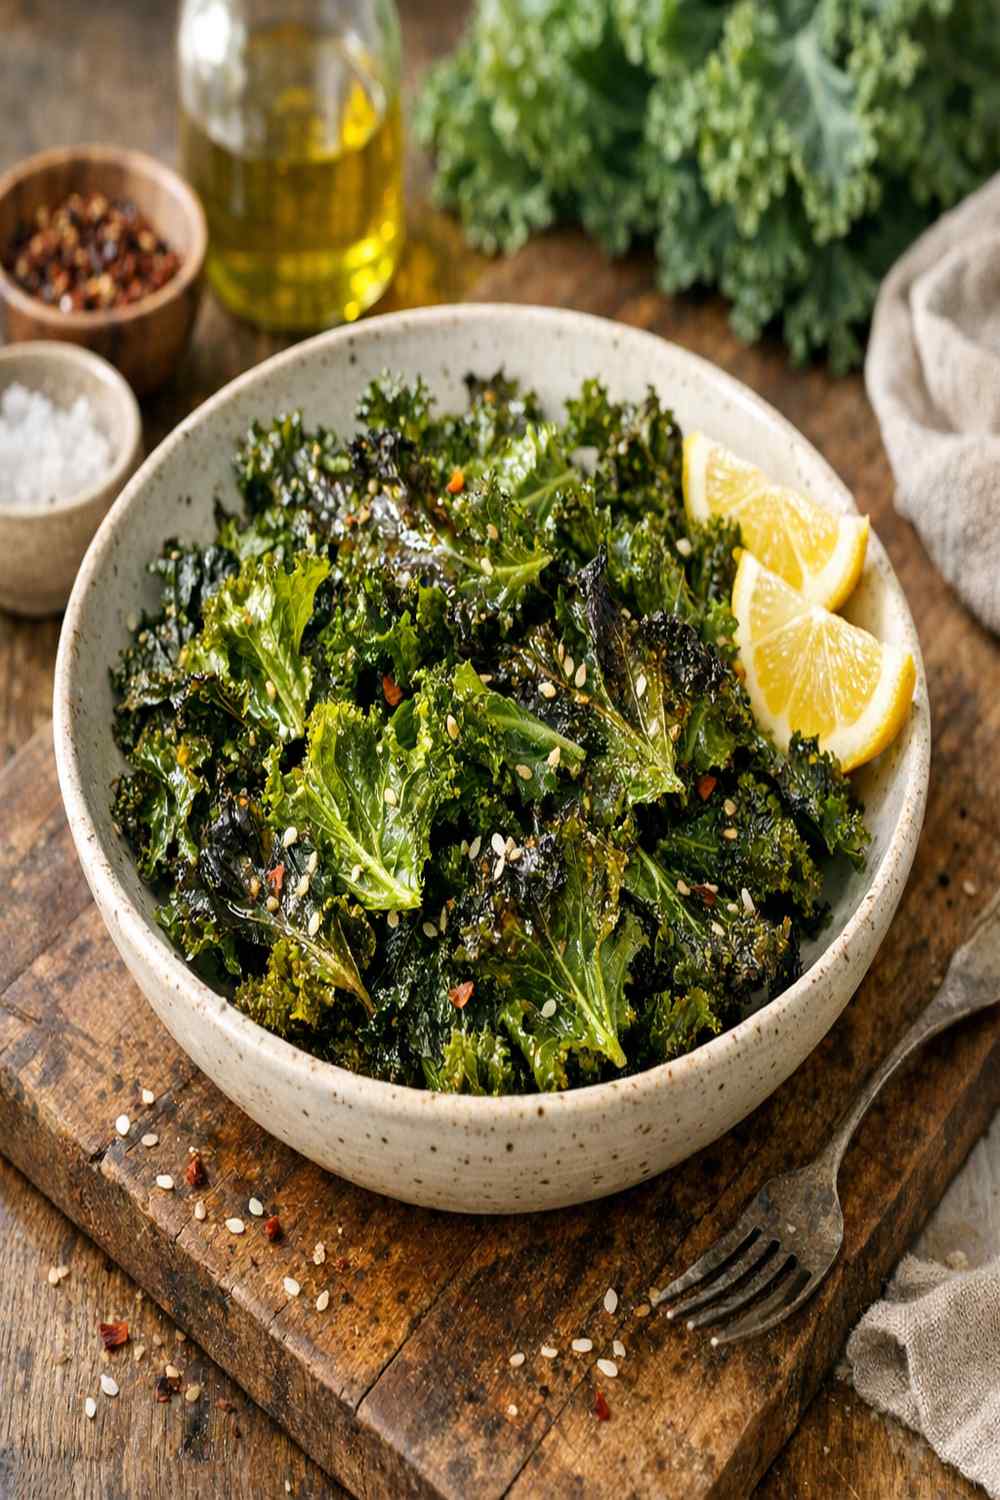
Step 6: Cool and Enjoy Immediately (or Store Thoughtfully)
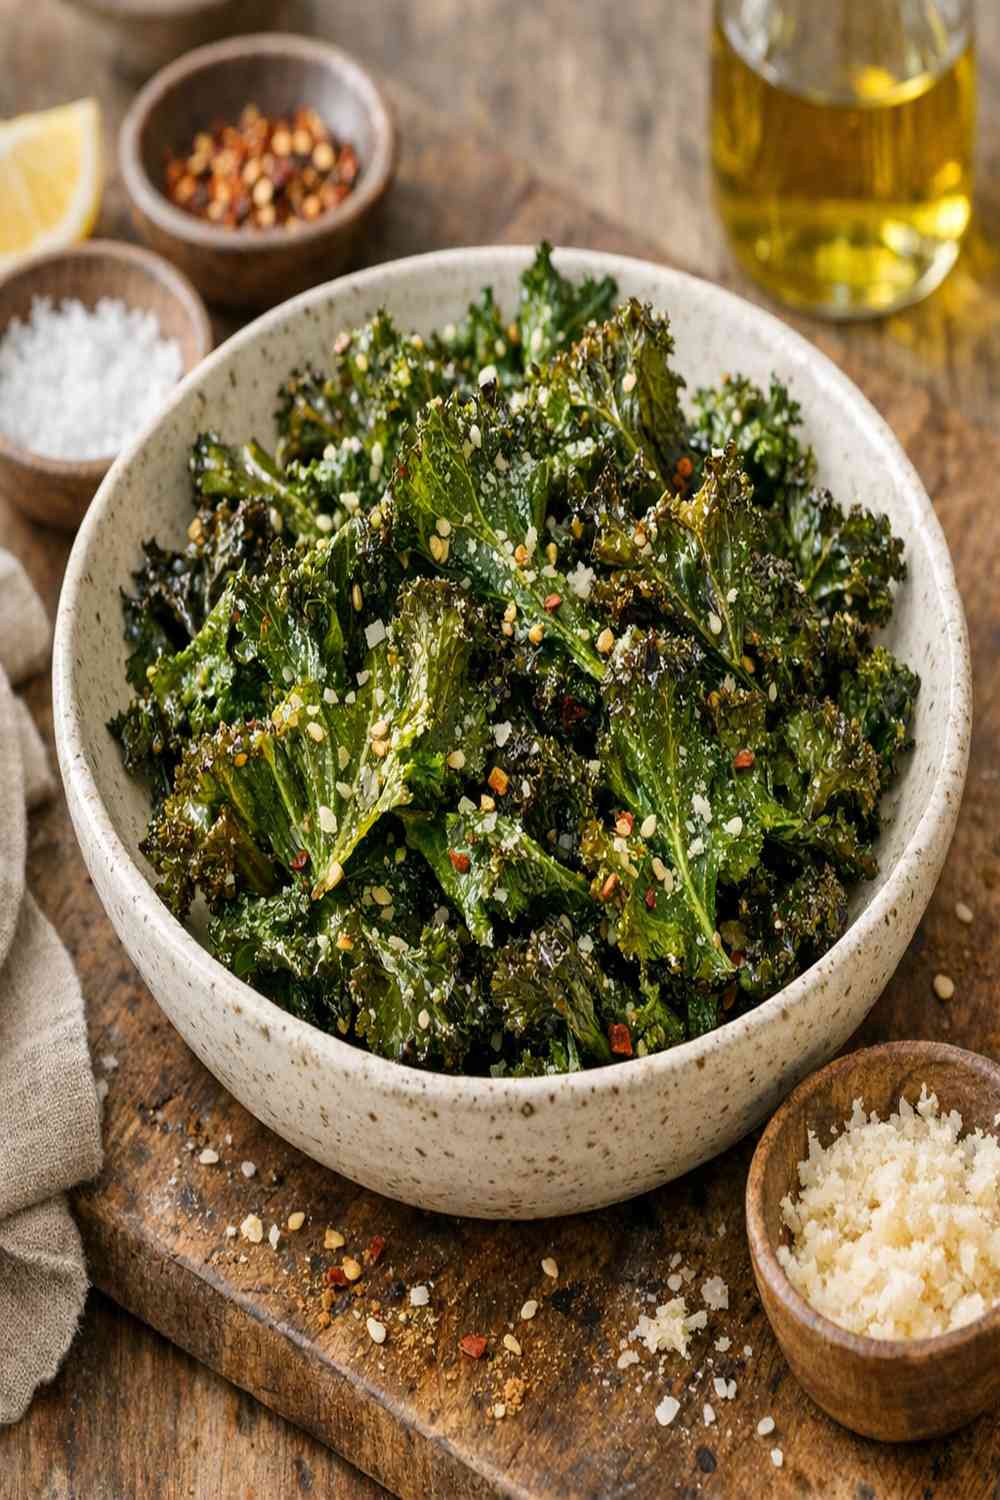
Remove your pan from the oven and let the kale cool on the pan for 3 to 5 minutes. During this time, it continues to firm up. Transfer to a serving plate or airtight container if you’re storing. The best part about this recipe? It tastes incredible straight from the oven, slightly warm with that perfect salty-savory satisfaction.
This is the moment that reminds me why I love cooking—not because food is medicine (though it absolutely supports your health), but because it’s a genuine pleasure. Every bite delivers real flavor and real satisfaction.
How to Make It Even Healthier
- Use nutritional yeast instead of cheese – If you’re dairy-free or looking to add B vitamins, nutritional yeast provides 1 gram of protein and all B vitamins per tablespoon. It has this subtle cheesy-umami flavor that’s remarkable.
- Add a squeeze of fresh lemon juice – The citric acid enhances iron absorption from the kale (plant-based iron is less bioavailable than animal sources, so this actually matters nutritionally). Plus, lemon brightens everything.
- Sprinkle with toasted sesame seeds – Adds calcium, magnesium, and zinc while providing satisfying crunch. About 1 tablespoon per batch gives you an additional 88 mg calcium.
- Use Greek yogurt-based dressing – If you’re making dressing from scratch, Greek yogurt base instead of mayo increases protein to 2–3 grams per serving and adds probiotics for gut health.
- Incorporate red pepper flakes or cayenne – Capsaicin (the compound that makes peppers hot) has been shown to temporarily increase metabolism by 3–5%. It’s also an anti-inflammatory, making it particularly beneficial alongside kale’s natural compounds.
Dietary Modifications
Keto-friendly: This recipe is naturally keto-appropriate. Stick with a full-fat ranch or olive oil-based dressing and use cheese instead of nutritional yeast. Carbs are minimal—approximately 3 grams net carbs per serving. You’re getting satisfying fat from the dressing while staying well within ketogenic guidelines.
Vegan: Use nutritional yeast or a vegan cheese alternative instead of dairy. Make sure your salad dressing is vegan (many brands are, but always check). The result is just as satisfying—the nutrition profile shifts slightly (no animal protein) but the sensory experience remains excellent.
Gluten-free: This recipe is naturally gluten-free because kale contains no gluten. Just verify that your bottled salad dressing doesn’t contain gluten (most don’t, but cross-contamination sometimes occurs). If you’re making dressing from scratch, use naturally gluten-free ingredients like olive oil, vinegar, and herbs.
Dairy-free: Omit the cheese entirely or swap for nutritional yeast (my preferred method). The flavor is completely satisfying without it, though the cheese does add something special. Test both ways and decide which you prefer—there’s no “wrong” answer, just what your body and palate enjoy.
Low-sodium: Use unsalted salad dressing or make your own with low-sodium ingredients. Most commercial dressings contain 200–400 mg sodium per serving, which adds up. Homemade vinaigrette with olive oil, vinegar, and herbs gives you complete control. Reduce added salt to ⅛ teaspoon and rely on the cheese for flavor instead.
Can I Store Baked Kale Recipe?
Yes, and this is where meal prep becomes your best friend. Once cooled completely, store your baked kale in an airtight container at room temperature for up to 3 days. I keep mine in a glass container in the pantry, not the refrigerator, because the cool, dry environment preserves crispness better than the humid fridge.
For longer storage, you can freeze unbaked kale (after the dressing-and-massage step but before baking) for up to 1 month. Just place on a sheet pan in a single layer, freeze for 2 hours, then transfer to a freezer bag. When you’re ready, bake directly from frozen—add 5 minutes to your baking time.
I don’t recommend storing cooked kale in the refrigerator because it absorbs moisture and loses that crucial crispy texture within 12 hours. Room-temperature storage maintains quality much better.
My meal prep strategy: I make 3 to 4 batches on Sunday using different dressings (one ranch, one Italian, one balsamic). I store each in separate containers and grab them throughout the week. They’re perfect for afternoon snacking, lunch box additions, or crumbling over salads and soups for texture.
Nutrition Information
Per serving (1 cup baked kale with optional cheese):
- Calories: 65–75
- Protein: 3–4 grams
- Fat: 4–5 grams (mostly from the dressing)
- Carbohydrates: 5–6 grams
- Fiber: 1.3 grams
- Vitamin K: 684 mcg (855% of daily value)
- Vitamin A: 8,862 IU (177% of daily value)
- Calcium: 90 mg (9% of daily value)
- Iron: 0.7 mg (4% of daily value)
- Magnesium: 16 mg (4% of daily value)
Compared to commercial kale chips: Store-bought versions average 150 calories, 9 grams fat, and 200+ mg sodium per serving. This recipe delivers more than half the calories, 40% less fat, and substantially less sodium—while maintaining superior flavor because you controlled every ingredient. The nutritional difference adds up: eating this three times weekly instead of store-bought saves you approximately 750 calories and 1,560 mg excess sodium monthly.
Expert’s Nutritional Tip: The vitamin K content of raw kale remains largely intact through this gentle baking method. Boiling kale can reduce K by 40–50%, but the dry-heat application here preserves these essential nutrients while making them more bioavailable through that light fat coating. This is why method matters as much as ingredient choice—it’s the difference between eating kale and truly nourishing your body with kale.
What Can I Serve With Baked Kale Recipe?
I love serving these as a standalone snack, but they’re equally brilliant as part of a larger meal. They add incredible texture and nutrition to nearly any plate. Here are my go-to pairings:
- Alongside roasted proteins like baked cod or center-cut pork – The vinegary crispness cuts through richer proteins beautifully. Try pairing with my Baked Cod With Lemon and Capers Recipe for a complete nutritional meal that feels restaurant-quality at home.
- Crumbled over grain bowls with roasted vegetables – The kale adds textural contrast and nutritional depth. One handful crumbled over a bowl adds drama and prevents that “all soft” feeling that can make grain bowls feel monotonous.
- Paired with Baked Center Cut Pork Chop Recipe for a traditional dinner – The mineral and vitamin content of kale supports protein metabolism, making this nutritionally synergistic.
- Mixed into salads just before serving – They stay crispy for about 5 minutes once tossed into fresh greens, creating textural interest without wilting immediately. Perfect for adding to raw spinach salads (see my Spinach Recipe for raw spinach inspiration).
- As a side to soups or stews – Crumble them over top at the last moment for color, texture, and nutrition without any absorption of liquid.
- In lunch boxes for kids and adults – Seriously. I’ve had multiple clients report their kids who “won’t eat vegetables” actually enjoy baked kale chips because they taste like a snack, not medicine.
Common Mistakes to Avoid
Mistake #1: Oven temperature too high. I see this constantly. People set the oven to 375°F or higher to rush the process, and the edges char before the centers crisp. The leaf is mostly water and thin; it needs gentle, even heat. Stick with 325°F and embrace the 18–20 minute timeline. Trust the process.
Mistake #2: Skipping the complete drying step after washing. Even a little surface moisture interferes with crisping. Take the extra 2 minutes to pat your kale completely dry. This single step probably has the biggest impact on your final result.
Mistake #3: Not massaging the kale thoroughly enough. A quick drizzle and toss doesn’t cut it. Really work those leaves for 1–2 full minutes. You’re breaking down cell walls, distributing seasonings evenly, and beginning the transformation that happens in the oven. Invest in this step.
Mistake #4: Overcrowding the pan. Leaves need space for air circulation. Overlapping or cramming them together causes uneven results and steam buildup. If your pan feels crowded, use two pans. It’s worth the extra moment.
Seasonal Variations
Spring: Use tender spring kale if you can find it (it’s a bit more delicate). Pair with fresh lemon juice and fresh herbs like dill or tarragon in your dressing. Add very finely minced fresh garlic to your dressing for brightness.
Summer: Make an herb-forward dressing with fresh basil, parsley, and tarragon. Use lighter vinegars (rice vinegar or champagne vinegar) instead of heavy balsamic. Pair with summer meals like grilled fish or fresh salads. The kale becomes a refreshing textural element against lighter fare.
Fall: Try balsamic or apple cider vinegar in your dressing. Add crispy sage leaves between kale pieces before baking. Use smoked paprika along with sea salt. Pair with roasted root vegetables and warm, grounding proteins like pork.
Winter: Go rich with creamy dressings like ranch or a tahini-based dressing. Add warming spices like cumin or smoked paprika. Pair with hearty winter meals. Use the hardier kale varieties (curly or Lacinato) which hold up beautifully to the more robust seasonings.
Make-Ahead and Meal Prep Guide
Sunday Prep (3 hours ahead): Wash and dry your kale thoroughly. Remove stems and tear into pieces. Store in a sealed container lined with paper towels in the refrigerator. The kale stays fresh for up to 3 days prepared this way.
Day-before prep (24 hours ahead): Massage prepared kale with dressing, season, and spread on a sheet pan. Cover with parchment paper (don’t use plastic wrap) and refrigerate. In the morning, let it come to room temperature for 10 minutes, then bake. The kale actually absorbs the dressing better overnight, improving flavor.
Batch cooking: Make three different flavors simultaneously: one pan with ranch, one with Italian, one with balsamic. Store separately for weeklong variety. This prevents boredom and maximizes your effort.
Freezing strategy: After the massage-and-season step but before baking, freeze kale on a sheet pan. Once frozen solid (2 hours), transfer to freezer bags, removing as much air as possible. Bake directly from frozen, adding 5 minutes to baking time. The frozen-then-baked version has slightly different texture (a touch chewier) but remains delicious and shelf-stable for up to 1 month.
Baked Kale Recipe
Ingredients
Method
- Start by rinsing your kale thoroughly under cool running water. This removes any field debris and also begins the drying process. Pat the leaves completely dry with paper towels or a clean kitchen towel—this step is non-negotiable for crispy results. Moisture is the enemy of crisping, so don't rush it. Once dry, remove the tough center stems by holding the leaf in one hand and sliding your other hand along the stem toward the tip. The leafy parts will tear away easily, leaving you with tender pieces. Discard the stems (or save them for vegetable broth if you're that kind of cook—I sometimes do this). Tear the leaves into bite-sized pieces, roughly 2 to 3 inches. Uniform size matters because it ensures everything crisps at the same rate.
- Set your oven to 325°F and line a large sheet pan with parchment paper. I cannot overstate how much parchment paper improves this recipe—it prevents sticking, ensures even heat circulation underneath, and makes cleanup literally one minute. I learned this trick years ago and never looked back. The temperature matters here. You want 325°F, not higher. I know the instinct is to crank heat for crispier results, but trust me: higher temperatures cause the edges to burn before the centers crisp. Lower, slower, and more intentional always wins with kale.
- Place all your dried kale pieces in a large bowl. Drizzle your salad dressing evenly over the leaves—start with ¼ cup and add more if needed. Using your hands, massage the kale for about 1 to 2 minutes. You want every single leaf to glisten with dressing and feel slightly soft. This is not optional—the massage breaks down the cell walls slightly, which helps both flavor absorption and crisping. The dressing does multiple things here: it adds flavor without excessive oil, helps the seasonings adhere, and creates the perfect environment for crisping. Ranch, balsamic vinaigrette, Italian—I've tested them all. Pick whatever you have because they all work beautifully.
- Sprinkle your kale with sea salt and cracked pepper (if using). Then spread the leaves in a single layer on your prepared sheet pan—this is crucial. Overcrowding causes steaming instead of crisping. If you have two sheet pans, use them both. I'd rather take two 15-minute batches than compromise on texture. If you're using cheese or nutritional yeast, sprinkle it now, distributing it as evenly as possible so every piece gets some. The cheese will toast slightly in the oven and create these delicious caramelized edges.
- Place your pan in the preheated 325°F oven and set a timer for 15 minutes. At the 15-minute mark, open the oven and check your kale. You're looking for golden-brown edges with some still-tender centers. The leaves closest to the edges of the pan will crisp faster, so a gentle toss at the 12-minute mark helps if you're not confident about even crisping. Most batches finish perfectly at 18 to 20 minutes. The exact time depends on your oven's personality and how thickly you packed your pan. When the majority of the leaves are golden but a few still have a slight chew, you're done. Remember: they'll continue to crisp as they cool, so slight underdone beats even slightly burned.
- Remove your pan from the oven and let the kale cool on the pan for 3 to 5 minutes. During this time, it continues to firm up. Transfer to a serving plate or airtight container if you're storing. The best part about this recipe? It tastes incredible straight from the oven, slightly warm with that perfect salty-savory satisfaction. This is the moment that reminds me why I love cooking—not because food is medicine (though it absolutely supports your health), but because it's a genuine pleasure. Every bite delivers real flavor and real satisfaction.
FAQs
Can I use any type of kale for this recipe?
Absolutely, though some work better than others. Curly kale is my top choice—those ruffled edges crisp beautifully and the texture becomes almost shatter-in-your-mouth satisfying. Lacinato (dinosaur) kale also works wonderfully; it’s slightly heartier and crisps more dramatically. Red Russian kale works too, with a slightly more delicate result. Avoid super-tender baby kale varieties; they’re better raw in salads. The key is choosing mature leaves with some structure to crisp.
What if my kale doesn’t crisp evenly—some burnt, some chewy?
Even heat distribution is the goal, and oven temperature/spacing are your main variables. Make sure your oven is properly preheated (5 full minutes at 325°F before baking). Don’t overcrowd—single layer only. Rotate your pan halfway through baking if you notice the back crisping faster than the front (many ovens have hot spots). Use parchment paper, which helps distribute heat more evenly underneath. If problems persist, your oven might run hot; test with an oven thermometer.
Can I make this recipe in an air fryer?
Yes! Set your air fryer to 300°F. Work in small batches (don’t overcrowd). Prepare and season your kale the same way. Air fry for 10–12 minutes, shaking the basket halfway through. The results are actually slightly superior to the oven method—more uniformly crispy. The trade-off is smaller batch sizes, so this is better for individuals than feeding a family simultaneously.
Is this recipe safe for people taking blood thinners like warfarin?
This is a clinically important question. Kale’s extremely high vitamin K content can interfere with warfarin effectiveness. If you’re on blood thinners, don’t avoid kale entirely, but keep intake consistent (eat it regularly or not at all—don’t alternate). Speak with your prescribing physician or a registered dietitian who knows your specific medication. The goal is consistent vitamin K intake so your medication dosage can be calibrated accordingly. Consistency matters more than avoidance.
How much sodium is actually in this recipe if I add cheese?
If you’re using store-bought ranch dressing (typically 200 mg sodium per 2 tablespoons), plus 1 tablespoon grated parmesan (about 400 mg sodium), you’re looking at roughly 450–500 mg sodium per serving of baked kale. For most people, this is well within healthy limits (the USDA recommendation is under 2,300 mg daily). If you’re on a sodium-restricted diet for hypertension or heart health, use a low-sodium dressing and reduce added salt or use nutritional yeast instead of cheese. This adjusts the sodium down to approximately 150 mg per serving.
Can I use frozen kale from the grocery store?
I don’t recommend it for this recipe. Frozen kale has already been blanched and partially broken down, which changes its structure. It won’t crisp the same way—you’ll end up with crispy-edged, chewy centers that don’t have the satisfying texture of fresh kale chips. Frozen kale is fantastic for smoothies, soups, and sautés, but this specific recipe really benefits from the cell structure of fresh kale. That said, if it’s truly all you have, thaw it completely, pat very dry, and expect slightly different (though still edible) results.
More Healthy Recipes You’ll Love
- Baked Pear Recipe – A naturally sweet, fiber-rich dessert that tastes indulgent while supporting digestive health
- Baked Latke Recipe – Crispy and satisfying without excessive oil, perfect for potato lovers wanting healthier methods
- Steamed Broccoli – Another cruciferous champion prepared with simplicity and intention for maximum nutrition
Final Thoughts: Healthy Eating as Genuine Pleasure
I want to circle back to that memory I opened with—my mom in the kitchen, vegetables roasting, our family gathering because something genuinely delicious was happening. That’s what this recipe represents to me. It’s not about forcing yourself to eat something “good for you.” It’s about discovering that nourishing your body can taste incredible. It’s about creating moments in your kitchen that make you excited to eat well, not resentful.
This baked kale recipe is proof that complicated isn’t necessary. You need five simple ingredients and 30 minutes. You need an oven and a sheet pan. You need the understanding that feeding yourself well is an act of self-respect, not punishment. The nutrients are real—the vitamin K, the antioxidants, the fiber. But the pleasure is equally real. And that combination? That’s where genuine health transformation happens.
I hope you’ll make this recipe not just once, but regularly. I hope you’ll find your favorite dressing variation. I hope you’ll share these with the people you love and watch their surprised faces when they realize homemade tastes better than store-bought. And I hope somewhere in that kitchen moment, you’ll feel that same connection I felt watching my mom cook—the understanding that food is so much more than fuel.
Take care with love and flavor!