Baked Pork Chop Recipe
This post contains affiliate links. As an Amazon Associate I earn from qualifying purchases.
I still remember Thursday nights at my grandmother’s table in Norwood—the kind of evening where the oven would be humming, and the smell of seasoned pork would fill our kitchen long before dinner was served. My grandmother wasn’t fancy about her cooking, but she understood something fundamental: good food doesn’t require complicated techniques or exotic ingredients.
It requires attention, love, and the confidence to work with what you have. When she’d pull those golden pork chops from the oven, we weren’t just eating protein and vegetables. We were gathered around something that said, “I took time to nourish you.”
That’s what drew me to become a registered dietitian—the realization that nutrition isn’t about perfection or restriction. It’s about creating moments of connection through real food that tastes incredible.
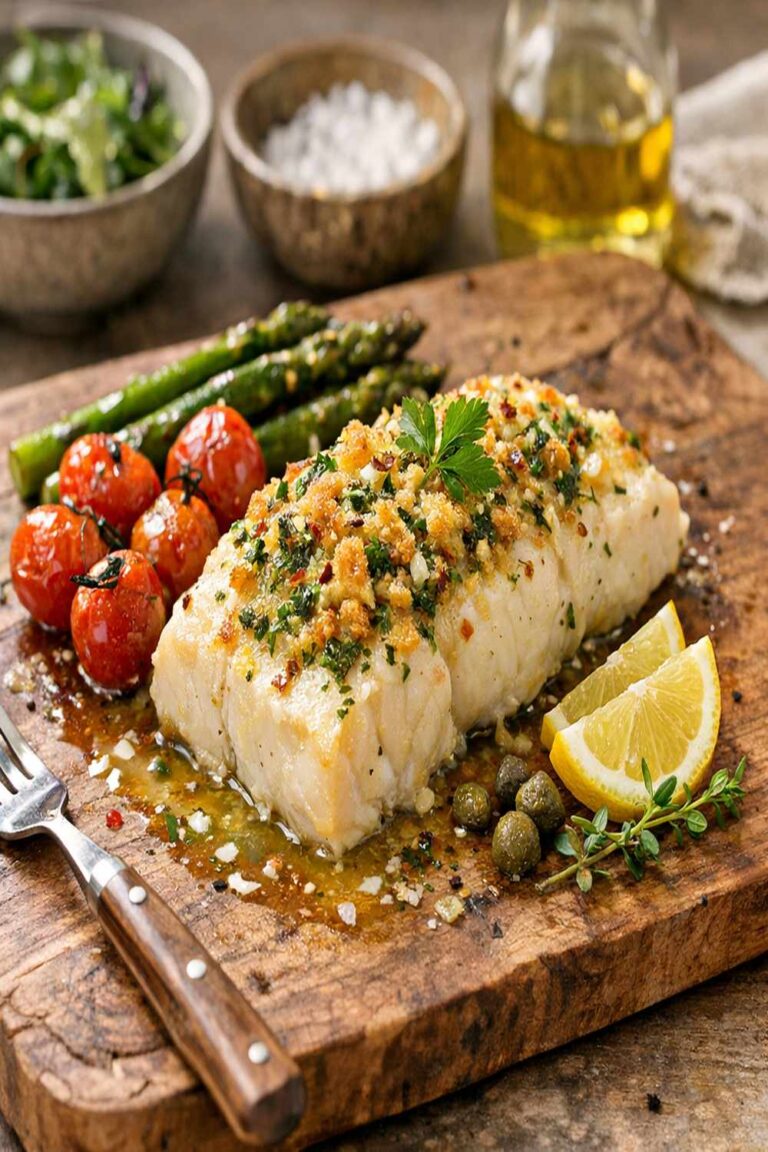
Today, I’m sharing her approach to baked pork chops with you, along with the nutritional wisdom I’ve gained through my clinical work. Like my earlier posts on baked cod with lemon and capers, this recipe proves that the simplest dishes are often the most nourishing.
Authentic Baked Pork Chop Recipe: The Story Behind the Dinner Table Essential
The baked pork chop represents something deeply American, yet rooted in centuries of culinary tradition. This isn’t a dish with exotic origins—it’s a recipe born from practicality and home cooking wisdom. What makes it authentic isn’t adherence to a single cultural tradition, but rather the commitment to technique and respect for the ingredient itself.
When I think about the “authentic” baked pork chop, I’m thinking about the way my grandmother approached it: with intention. She understood that pork chops are forgiving when treated with respect—they need heat, they need seasoning, and they need just enough time to develop flavor without drying out. That philosophy has guided every home cook in America for generations, from farmhouse kitchens in the Midwest to family tables in growing suburbs.
What moves me most about this recipe is how it bridges generations. My grandmother cooked this way because it was efficient and nourishing. Today, as a dietitian working with overwhelmed families, I recommend it because it’s one of the most reliable ways to get a complete protein on the table without stress or complicated steps.
The History and Cultural Significance of Baked Pork Chop Recipe
Pork has been central to American home cooking since colonial times, when pigs were one of the most reliable sources of protein for farming families. What started as a necessity—preserving pork through smoking, salting, and curing—evolved into a celebration of fresh pork as refrigeration made its way into American homes in the early 20th century.
The baked pork chop as we know it emerged during the post-World War II era, when home cooking became a symbol of comfort and normalcy. Cookbooks of the 1950s and 1960s featured countless variations, but they all honored the same principle: a quality piece of meat deserved simple, straightforward preparation that let its natural flavor shine through. The baked method became especially popular because it required minimal supervision and could feed a family efficiently.
In Midwestern kitchens like my family’s, the baked pork chop became a weeknight staple—reliable, affordable, and a vehicle for connection. It wasn’t about impressing anyone; it was about showing up with something warm, seasoned well, and served with care. This dish represents the democratization of dinner: proof that you don’t need fancy techniques or expensive ingredients to create something nourishing and memorable.
What Makes an Authentic Baked Pork Chop Recipe
When I talk about authenticity in this context, I’m not referring to a single country or culture that “owns” this dish. Rather, I’m pointing to the principles that define a truly excellent baked pork chop—the kind that comes out of the oven tender, juicy, and full of flavor.
The hallmark of authentic preparation is respect for the meat itself. A quality pork chop—boneless, about one inch thick, with good marbling—needs only the right temperature and timing to reach its potential. From a nutritional standpoint, this thickness is ideal because it allows for even cooking while maintaining the moisture that makes pork delicious and digestible.
- Simple, High-Quality Seasoning – Authentic baked pork chops use a minimal spice blend that complements rather than masks the meat. Paprika, garlic powder, onion powder, salt, and pepper create a flavor profile that’s been proven effective across American home cooking for decades. These spices enhance the natural pork flavor rather than competing with it.
- Proper Oil Coating – Extra virgin olive oil serves a critical function beyond flavor. It creates an even heat distribution across the surface of the meat, helps the seasonings adhere, and prevents the exterior from drying out during baking. This technique comes directly from European cooking traditions that influenced American home cooking.
- Precise Temperature Control – The authentic method requires an oven preheated to 400°F and careful monitoring to reach an internal temperature of 145°F. This is the USDA’s recommended safe internal temperature for pork, and it ensures food safety while maintaining the meat’s natural juiciness. Home cooks who understand this detail are following both food science and culinary tradition.
- Resting Period – The five-minute rest after cooking is non-negotiable in authentic preparation. During this time, the meat’s muscle fibers relax and redistribute moisture, resulting in a more tender bite. This single step separates good pork chops from great ones.
The Ingredients – Sourcing the Real Thing
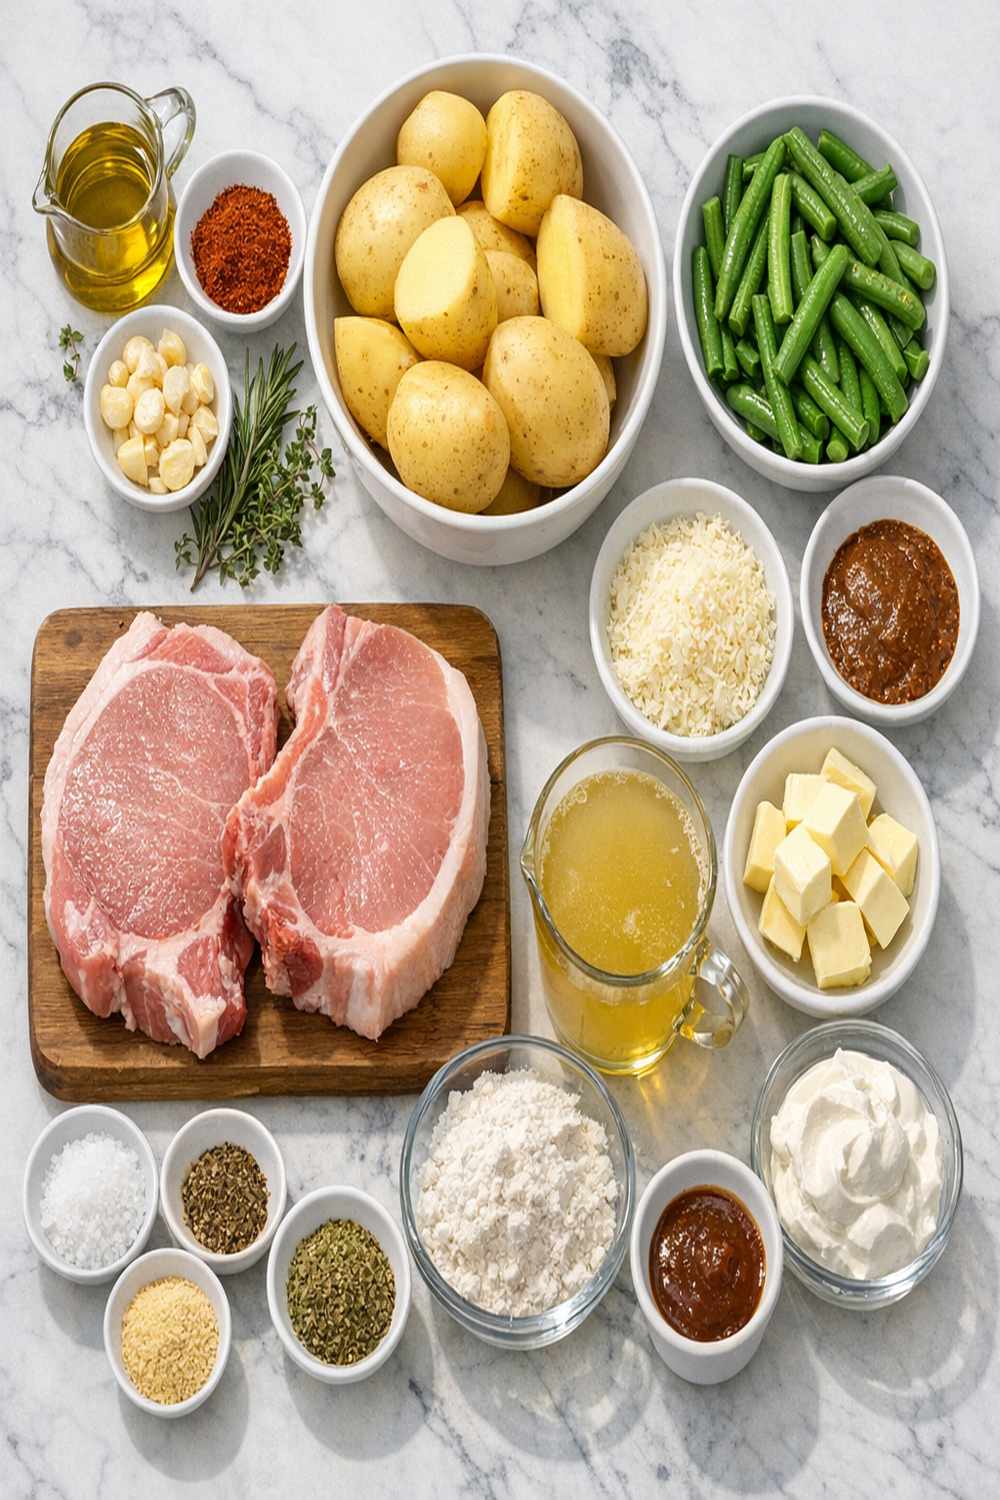
One of my core beliefs as a dietitian is that good nutrition starts with ingredient quality. You don’t need specialty stores or mail-order sources for exceptional baked pork chops—just thoughtfulness about what you’re bringing into your kitchen.
- 6 boneless pork chops (approximately 1 inch thick, preferably from pasture-raised or heritage breed sources when possible)
- ½ teaspoon onion powder (dehydrated onion provides concentrated flavor without moisture)
- 1 teaspoon salt (kosher salt dissolves more evenly than table salt)
- 1 teaspoon black pepper (freshly ground from whole peppercorns for maximum flavor and aroma)
- 1 teaspoon paprika (sweet Spanish variety adds warmth without heat)
- 2 tablespoons extra virgin olive oil (cold-pressed, first extraction for superior flavor)
- ½ teaspoon garlic powder (not garlic salt, which adds excess sodium)
Sourcing Notes: Buy your pork chops from a butcher counter rather than pre-packaged when possible. A good butcher can cut them to precisely one inch thick and can tell you about the source of the meat. For spices, purchase from bulk bins or reputable brands—spices lose potency after about six months, so fresher is always better. Your local grocery store’s standard brands work beautifully; you don’t need anything exotic here.
The Traditional Method: How to Make Authentic Baked Pork Chop Recipe
I’m going to walk you through this the way my grandmother taught me, and the way I recommend it to clients in my practice. This method takes about 30 minutes from start to finish, making it perfect for weeknight dinners when you need something reliable and nourishing.
Step 1: Prepare Your Oven and Baking Vessel
Start by positioning your oven rack to the center position and preheating your oven to 400°F. This takes about 10 minutes, and it’s crucial that your oven reaches this temperature before the pork goes in. A properly preheated oven ensures even cooking and helps develop the exterior of the meat slightly.
While your oven preheats, lightly coat a 9×13-inch baking dish with nonstick cooking spray. I prefer this simple approach to elaborate preparation—it prevents sticking without adding unnecessary fat or flavor that might compete with the pork itself. Pat your work surface dry and keep it clear so you have plenty of room to work comfortably.

Step 2: Create Your Seasoning Blend
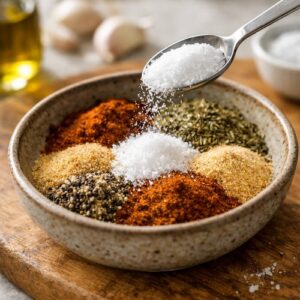
In a small bowl, combine 1 teaspoon salt, 1 teaspoon freshly ground black pepper, 1 teaspoon paprika, ½ teaspoon onion powder, and ½ teaspoon garlic powder. Mix these together thoroughly with a small spoon or your fingertips until the blend is even and consistent. This step ensures that every pork chop receives balanced seasoning rather than pockets of intense flavor and bland spots.
From a nutritional perspective, this seasoning blend is brilliant because it adds significant flavor without adding extra sodium—that single teaspoon of salt is distributed across six portions, meaning each serving contains less than 200 milligrams of sodium from the salt itself. The spices add beneficial plant compounds and antioxidants, particularly paprika, which contains capsaicinoids and carotenoids.

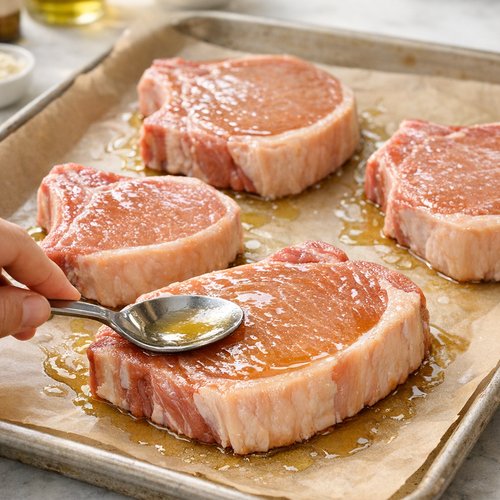
Step 3: Arrange and Oil the Pork Chops
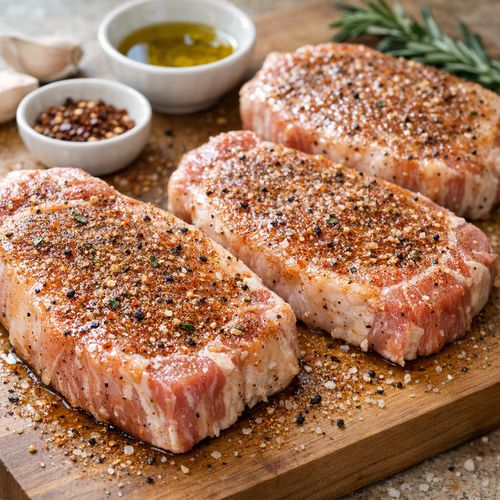
Place all six boneless pork chops (each about 1 inch thick) in your prepared baking dish, arranging them so they don’t overlap. They should fit comfortably without crowding—if your chops are touching edge-to-edge, they’ll steam rather than bake, and you’ll lose some of that desirable browning on the exterior.
Drizzle 2 tablespoons of extra virgin olive oil evenly over the pork chops. Using a silicone basting brush or the back of a spoon, gently spread the oil across each chop so the surface is evenly coated. Pay special attention to the sides and edges—oil that reaches these areas helps the seasonings adhere and prevents drying during cooking. This even coating is what separates adequate results from excellent ones.
Step 4: Season with Intention
Now sprinkle your seasoning mixture evenly across all six pork chops. Using your basting brush or clean hands, distribute the seasonings so they coat not just the top surface but also the sides of each chop. This might feel like an extra step, but it’s the difference between a chop with a seasoned crust and one that’s evenly flavorful throughout.
Take a moment to look at your work. Each pork chop should appear lightly coated with oil and spices, with no large bare patches. If you see spots that need more seasoning, add a pinch more—you’re building a flavorful exterior that will develop slightly during baking.
Step 5: Bake with Confidence
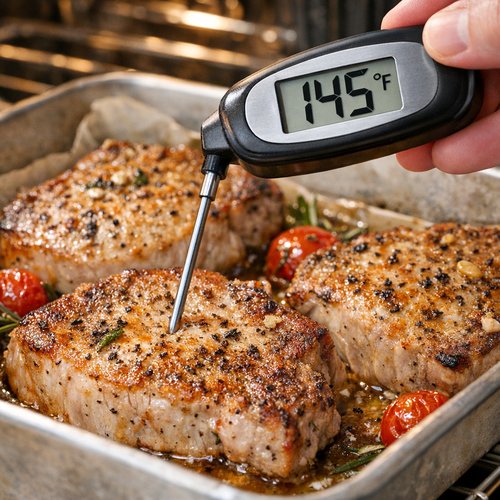
Place your baking dish in the preheated 400°F oven. Set a timer for 15 minutes, then check the internal temperature of the thickest chop using an instant-read meat thermometer inserted into the center without touching bone. The USDA recommends an internal temperature of 145°F for food safety.
If your chops haven’t reached 145°F after 15 minutes, return them to the oven for another 3–5 minutes and check again. This variability depends on factors like your oven’s accuracy, the exact thickness of your chops, and how cold they were when they went into the oven. Most home cooks find that 18–20 minutes total is typical.
As a registered dietitian, I want to emphasize this temperature point: cooking pork to 145°F (not the outdated 160°F recommendation) is both safe and results in meat that’s tender and juicy. The USDA updated this guidance because research shows that pork is safe at this lower temperature, and it tastes significantly better.
Step 6: Rest and Serve
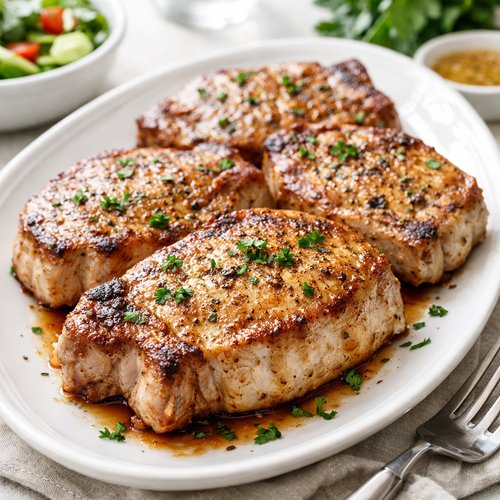
Remove the baking dish from the oven and let the pork chops sit undisturbed for 5 minutes. This resting period is non-negotiable if you want tender, juicy results. During this time, the muscle fibers relax and reabsorb moisture that was driven toward the surface during cooking. If you cut into a pork chop immediately after removing it from the oven, you’ll lose this moisture to your plate rather than your mouth.
After resting, transfer the pork chops to a serving platter or individual plates and serve while warm. The residual heat in the meat will keep it at the perfect temperature for eating while your family gathers around the table.
Regional Variations Around the World
While baked pork chops are distinctly American, the principles travel beautifully across cultures. Here’s how different traditions adapt this simple preparation:
- German-Style – Germans often add caraway seeds and mustard to their pork preparations, creating a more herbaceous version. Applesauce or sauerkraut serves as the traditional accompaniment, balancing richness with acidity. This reflects the German tradition of serving pork with acidic sides to aid digestion.
- Italian-Style – Italian home cooks might incorporate oregano, thyme, and a splash of white wine into their baked pork chops. They’re more likely to serve them alongside roasted vegetables rather than starches, reflecting Mediterranean dietary patterns that emphasize vegetables.
- Scandinavian-Style – Swedish and Danish preparations often include dill and a light cream sauce, creating a richer version perfect for colder climates where cream-based dishes are traditional. The herbs reflect the Nordic connection to wild herbs foraged from forests and gardens.
Traditional Serving Customs
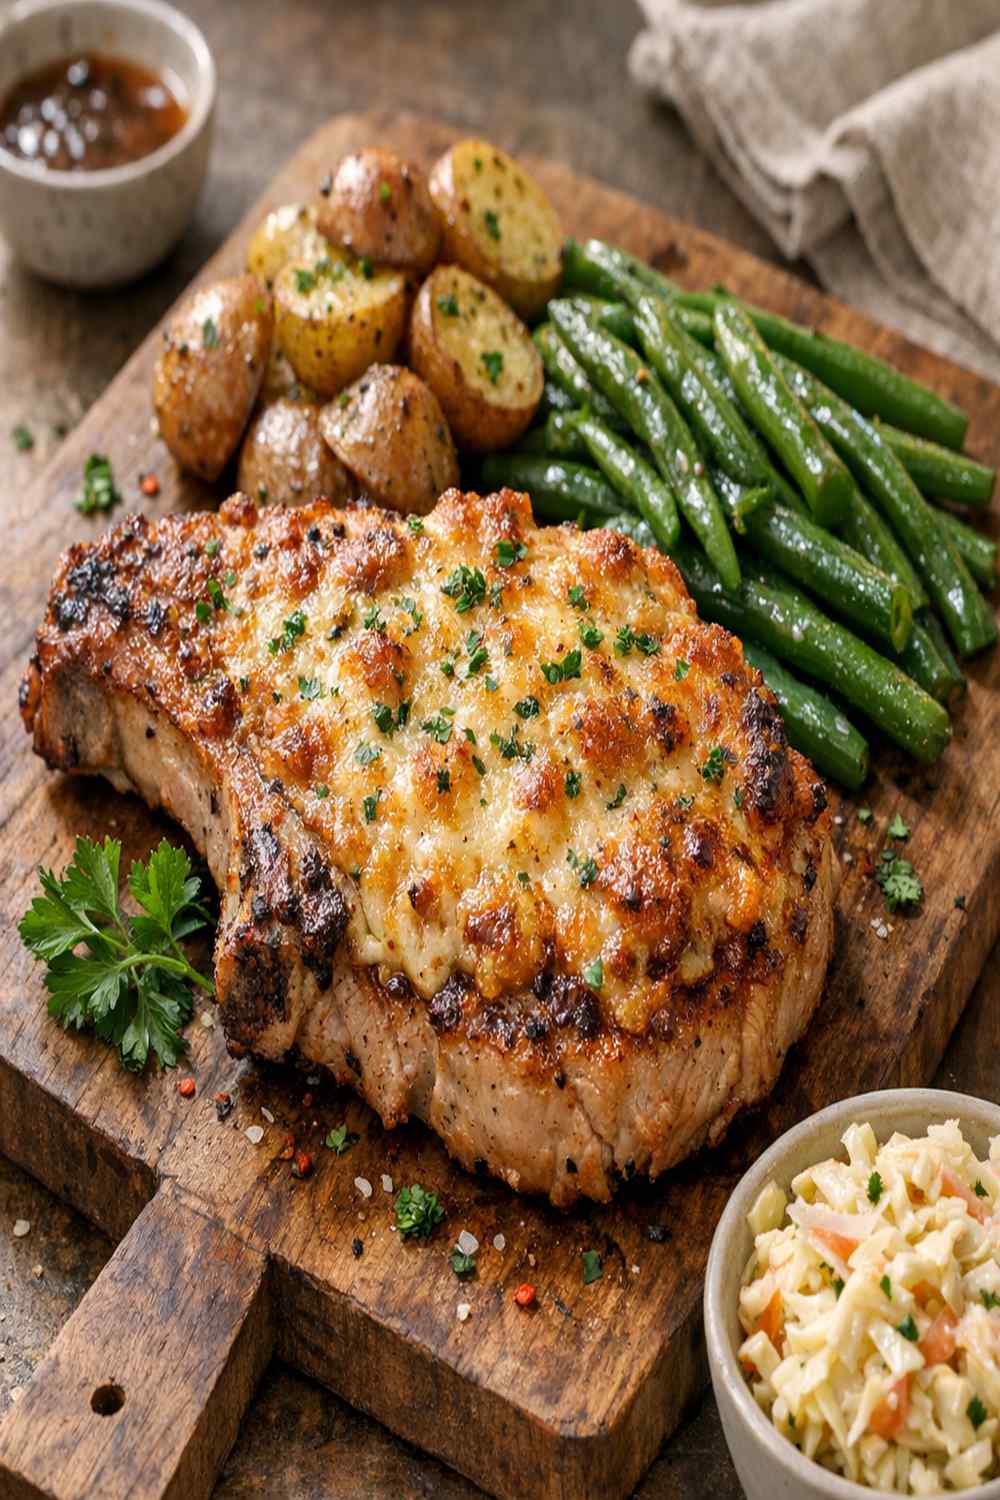
In American home cooking, baked pork chops have traditionally been served as the centerpiece of a complete dinner plate—a composed meal rather than a casual dish. The occasions range from simple weeknight dinners to Sunday family gatherings, and the presentation reflects the care taken in preparation.
Traditionally, pork chops are served hot from the oven on warmed plates, with sides arranged thoughtfully around them. The meal is plated in the kitchen rather than brought to the table family-style, a custom that emerged from mid-century American dining etiquette. Beverages typically include water, milk, or iced tea—something that complements rather than competes with the pork’s mild, slightly sweet flavor.
The dinner itself has always been an occasion for conversation and connection. There’s no elaborate plating or chef’s kiss moment—just good food served with intention. In many families, pork chops on the dinner table signaled a normal, grounded evening at home.
Can I Store Baked Pork Chop Recipe?
Yes, and this is where these baked chops shine as a practical meal-planning solution. Once cooled to room temperature, store your leftover pork chops in an airtight container in the refrigerator for up to four days. The meat will remain safe and delicious throughout this window.
To reheat, place chops on a baking sheet, cover loosely with aluminum foil, and warm in a 350°F oven for about 10 minutes until heated through. Avoid the microwave if possible—while it’s faster, it can dry out the meat. Reheating in the oven allows the exterior to stay slightly tender while the interior warms gently.
For longer storage, pork chops can be frozen for up to three months. Wrap each cooled chop individually in plastic wrap, then place them in a freezer-safe container or bag. Label with the date so you remember when you froze them. Thaw overnight in the refrigerator before reheating using the oven method above.
These chops also work beautifully in grain bowls, sliced over salads, or chopped into fried rice, making them endlessly versatile for meal prep and creative leftovers.
Nutrition Information
Each serving (one pork chop) contains approximately 280 calories, 28 grams of protein, 8 grams of fat, and zero grams of carbohydrates. This makes baked pork chops an excellent choice for anyone prioritizing protein intake or managing blood sugar, and it aligns beautifully with balanced plate guidelines.
Pork is often overlooked as a nutritional powerhouse, but it’s genuinely excellent. Beyond protein, pork provides B vitamins (especially B12 and niacin), selenium, phosphorus, and zinc—nutrients that support energy metabolism, immune function, and bone health. The USDA has long recognized pork as a lean protein source when you choose cuts like boneless chops.
The olive oil in this recipe adds monounsaturated fats, which research consistently shows support heart health and nutrient absorption. The spices—paprika particularly—contribute polyphenols and antioxidants that reduce inflammation. This simple recipe, prepared without any processed components, delivers complete nutrition aligned with evidence-based dietary guidelines.
When I recommend this dish to clients managing various health conditions—whether they’re focused on weight management, heart health, or simply trying to eat better—I highlight this nutritional density. You’re getting substantial nutrition in a 30-minute meal.
Expert’s Nutritional Tip: The Power of Proper Temperature
As a registered dietitian, I want to share something important: cooking pork to the right temperature actually enhances nutrient bioavailability. Proper heat breaks down muscle fibers in a way that makes protein more digestible and allows your body to absorb B vitamins more efficiently. When people undercook pork (trying to keep it “juicy”), they’re actually making it harder for their digestive system to extract nutrition. The USDA’s 145°F recommendation hits the sweet spot—completely safe, fully nutrient-accessible, and genuinely delicious. Don’t skip the thermometer; use it confidently.
Make-Ahead Guide: Meal Prep Like a Professional
One of the questions I hear most from overwhelmed home cooks is: “Can I prepare this ahead of time?” The answer is yes, with strategic planning.
Day-Before Prep: Mix your seasoning blend in advance and store it in an airtight container. Pat your pork chops dry, wrap them individually in plastic wrap, and store in the refrigerator overnight. The next day, you’ll literally spend just 5 minutes arranging, oiling, and seasoning before they go into the oven.
Freezer Prep: Season your raw pork chops, arrange them on a baking sheet, flash-freeze for 2 hours, then transfer to a freezer-safe container. When you’re ready to cook, you can bake them directly from frozen—just add 5–7 extra minutes to your cooking time and check temperature carefully.
Batch Cooking: Double or triple this recipe. Bake all the chops, cool them, and portion into individual containers for the refrigerator or freezer. Throughout the week, you have a complete protein ready for quick meal assembly. I recommend this approach to busy clients because it removes the decision-making fatigue from weeknight dinners.
Common Mistakes to Avoid
After years of working with home cooks and teaching nutrition in practical kitchen settings, I’ve identified the mistakes that most often derail this otherwise foolproof recipe.
Mistake 1: Skipping the Preheat – Some home cooks try to save time by putting pork in a cold oven. This results in uneven cooking and a pale, unappealing exterior. Your oven needs to reach 400°F before the pork goes in. This 10-minute preheat is non-negotiable.
Mistake 2: Crowding the Pan – When pork chops touch or overlap in the baking dish, they steam instead of bake. Steam creates a pale, soft exterior rather than the slightly caramelized surface that makes pork delicious. Arrange your chops in a single layer with about ½-inch space between each one.
Mistake 3: Cooking Without a Thermometer – Time guidelines are helpful, but ovens vary considerably. Some run hot, some run cold. A basic instant-read meat thermometer costs about $15 and guarantees your pork reaches 145°F—not overcooked, not undercooked, just right. This single tool eliminates guessing.
Mistake 4: Skipping the Rest – Impatience here costs you juiciness. Those five minutes aren’t optional; they’re when your pork becomes maximally tender and flavorful. Use this time to set the table or plate your sides.
Seasonal Variations: Adapting Through the Year
While this basic recipe is reliable year-round, you can adapt it beautifully to seasonal ingredients and your family’s changing preferences.
Spring: Add ½ teaspoon fresh thyme or tarragon to your seasoning blend. Serve alongside asparagus and new potatoes. The fresh herbs echo spring gardens and pair naturally with young vegetables.
Summer: Include a pinch of smoked paprika and serve with grilled corn, tomato salad, or roasted zucchini. The smoky depth feels appropriate alongside grilled sides and warm-weather vegetables.
Fall: Add ½ teaspoon sage and ¼ teaspoon cayenne to your seasoning blend. Serve with roasted Brussels sprouts, apples, or wild rice. These earthier flavors align with fall’s heavier vegetables and grains.
Winter: Include a pinch of ground cinnamon and nutmeg in your seasoning blend—they won’t make it sweet, just warm and complex. Serve alongside roasted root vegetables, braised cabbage, or hearty greens. This warmth is comforting on cold evenings.
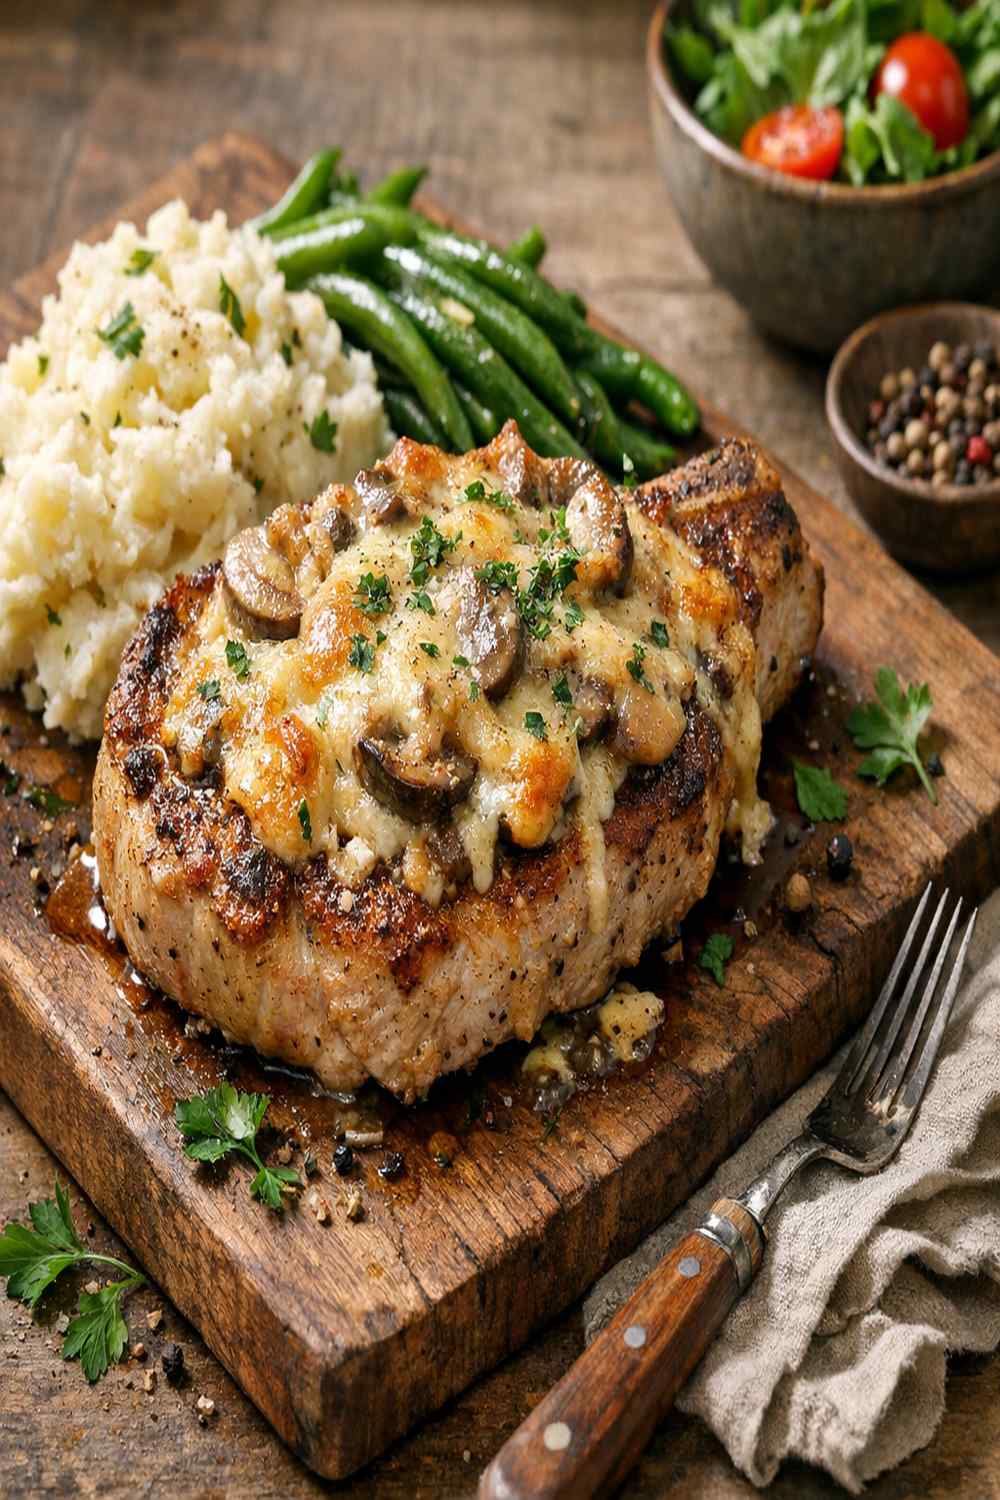
What Can I Serve With Baked Pork Chop Recipe?
The beauty of baked pork chops is their versatility. They pair gracefully with virtually any vegetable or grain, making them perfect for building balanced meals. Based on traditional serving customs and nutritional balance, here are my recommendations.
A classic approach uses a vegetable-starch-vegetable plate: something like roasted baked cabbage alongside rice or potatoes, with a simple salad. This structure ensures you’re getting fiber, complex carbohydrates, and the complete protein from the pork in a single meal.
- Roasted Root Vegetables – Carrots, parsnips, or sweet potatoes roasted with a bit of olive oil and salt echo the simplicity of the pork and add natural sweetness. These cook simultaneously with your pork if you start them when you preheat the oven.
- Steamed or Sautéed Greens – Spinach, kale, or green beans prepared simply with garlic and olive oil provide nutrients and fiber. These are quick to prepare in the 5 minutes your pork is resting.
- Rice, Potatoes, or Grains – A starch rounds out the plate nutritionally and makes the meal feel complete. Brown rice, mashed potatoes, farro, or wild rice all pair beautifully. Choose what feels right for the season and your family’s preferences.
- Simple Green Salad – Crisp greens with a basic vinaigrette provide freshness and acidity that balances the pork’s richness. Toss your salad just before serving so greens stay crisp.
- Applesauce or Fruit Accompaniment – A small serving of applesauce (homemade or store-bought) is traditional in many American households and adds brightness. Fresh fruit works too, especially in spring and summer.
Baked Pork Chop Recipe
Ingredients
Method
- Start by positioning your oven rack to the center position and preheating your oven to 400°F. This takes about 10 minutes, and it's crucial that your oven reaches this temperature before the pork goes in. A properly preheated oven ensures even cooking and helps develop the exterior of the meat slightly. While your oven preheats, lightly coat a 9x13-inch baking dish with nonstick cooking spray. I prefer this simple approach to elaborate preparation—it prevents sticking without adding unnecessary fat or flavor that might compete with the pork itself. Pat your work surface dry and keep it clear so you have plenty of room to work comfortably.

- In a small bowl, combine 1 teaspoon salt, 1 teaspoon freshly ground black pepper, 1 teaspoon paprika, ½ teaspoon onion powder, and ½ teaspoon garlic powder. Mix these together thoroughly with a small spoon or your fingertips until the blend is even and consistent. This step ensures that every pork chop receives balanced seasoning rather than pockets of intense flavor and bland spots. From a nutritional perspective, this seasoning blend is brilliant because it adds significant flavor without adding extra sodium—that single teaspoon of salt is distributed across six portions, meaning each serving contains less than 200 milligrams of sodium from the salt itself. The spices add beneficial plant compounds and antioxidants, particularly paprika, which contains capsaicinoids and carotenoids.
- Place all six boneless pork chops (each about 1 inch thick) in your prepared baking dish, arranging them so they don't overlap. They should fit comfortably without crowding—if your chops are touching edge-to-edge, they'll steam rather than bake, and you'll lose some of that desirable browning on the exterior. Drizzle 2 tablespoons of extra virgin olive oil evenly over the pork chops. Using a silicone basting brush or the back of a spoon, gently spread the oil across each chop so the surface is evenly coated. Pay special attention to the sides and edges—oil that reaches these areas helps the seasonings adhere and prevents drying during cooking. This even coating is what separates adequate results from excellent ones.

- Now sprinkle your seasoning mixture evenly across all six pork chops. Using your basting brush or clean hands, distribute the seasonings so they coat not just the top surface but also the sides of each chop. This might feel like an extra step, but it's the difference between a chop with a seasoned crust and one that's evenly flavorful throughout. Take a moment to look at your work. Each pork chop should appear lightly coated with oil and spices, with no large bare patches. If you see spots that need more seasoning, add a pinch more—you're building a flavorful exterior that will develop slightly during baking.

- Place your baking dish in the preheated 400°F oven. Set a timer for 15 minutes, then check the internal temperature of the thickest chop using an instant-read meat thermometer inserted into the center without touching bone. The USDA recommends an internal temperature of 145°F for food safety. If your chops haven't reached 145°F after 15 minutes, return them to the oven for another 3–5 minutes and check again. This variability depends on factors like your oven's accuracy, the exact thickness of your chops, and how cold they were when they went into the oven. Most home cooks find that 18–20 minutes total is typical. As a registered dietitian, I want to emphasize this temperature point: cooking pork to 145°F (not the outdated 160°F recommendation) is both safe and results in meat that's tender and juicy. The USDA updated this guidance because research shows that pork is safe at this lower temperature, and it tastes significantly better.

- Remove the baking dish from the oven and let the pork chops sit undisturbed for 5 minutes. This resting period is non-negotiable if you want tender, juicy results. During this time, the muscle fibers relax and reabsorb moisture that was driven toward the surface during cooking. If you cut into a pork chop immediately after removing it from the oven, you'll lose this moisture to your plate rather than your mouth. After resting, transfer the pork chops to a serving platter or individual plates and serve while warm. The residual heat in the meat will keep it at the perfect temperature for eating while your family gathers around the table.

FAQs
How Thick Should My Pork Chops Be?
About one inch thick is ideal for this baking method. This thickness allows the interior to cook through while the exterior has time to develop slight browning. Thinner chops (½ inch or less) cook too quickly and tend to dry out. Thicker chops (1.5 inches or more) take significantly longer and require careful temperature monitoring. Ask your butcher to cut them to one inch, or measure with your fingers—it should be roughly the width of your index finger.
Can I Use Bone-In Pork Chops Instead of Boneless?
Absolutely. Bone-in chops actually cook beautifully with this method. The bone conducts heat and can help cook the meat more evenly. You’ll need to add about 3–5 minutes to your cooking time, and you should still use a meat thermometer to verify doneness. Many people find bone-in chops slightly more flavorful, though both versions work wonderfully.
What If My Pork Chops Are Different Thicknesses?
Arrange them in your baking dish with the thickest chops toward the center of the dish and thinner chops toward the edges, where heat is slightly less intense. Check temperature on the thickest chop, and remove any thinner chops that reach 145°F before the thick ones finish cooking. This ensures nothing gets overcooked while you’re waiting for the thickest chops to finish.
Can I Add Liquid to the Baking Dish?
Yes, though it’s not necessary. Some cooks add ¼ cup chicken broth, water, or white wine to the dish, which creates a bit of steam and can prevent drying. However, the oil-coating method I’ve described works beautifully without added liquid. If you choose to add liquid, reduce it slightly—too much creates steam that prevents browning.
Why Is My Pork Dry Even Though I Followed the Recipe?
This usually indicates one of three issues: your oven temperature might be running hot (use an oven thermometer to check), your pork chops might have been thinner than one inch, or you might be cooking past 145°F. The USDA’s 145°F truly is the sweet spot—more cooking than that begins to dry the meat. Use a reliable meat thermometer every time, and trust the process.
More Recipes From This Tradition
- Baked Center Cut Pork Chop Recipe – A variation using the tender center-cut portion of the loin for a premium presentation
- Baked Pear Recipe – A perfect dessert to follow your pork dinner, bringing fruit and warmth to your table
- Baked Latke Recipe – A crispy, healthier alternative to fried latkes that pairs beautifully with baked pork
As I’ve shared this recipe with you, I hope you’ve felt the care that goes into real home cooking. This isn’t a complicated dish, but it’s deeply nourishing—for your body and for the moments you create around your table. My grandmother understood that every meal is an opportunity to show up for the people you love, and that understanding never gets old.
Whether you’re cooking for yourself on a busy Tuesday or preparing dinner for your whole family, I want you to approach this pork with confidence. You have the knowledge, the method, and the ingredient list. What you bring to it—your attention, your intention, your willingness to slow down just a little—that’s what transforms a simple dinner into something meaningful.
I’d love to hear how your pork chops turn out. Share your experience, your variations, your table stories. That’s how we build community around food that matters. Take care with love and flavor!