Boneless Braised Short Rib Recipe
This post contains affiliate links. As an Amazon Associate I earn from qualifying purchases.
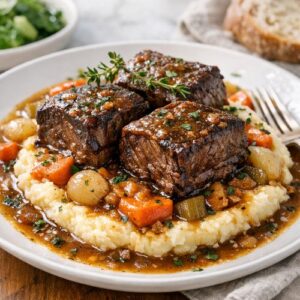
I’m Kelly Blackford, a registered dietitian here in Norwood, Ohio, and I’m sharing one of my favorite ways to turn humble beef short ribs into restaurant-quality comfort food that feeds your family and your soul. This braised short rib recipe transforms into fall-apart-tender meat in under three hours, and it pairs beautifully with mashed potatoes, roasted vegetables, or even over egg noodles. If you’re looking for more show-stopping dinner ideas, check out my Chicken and Dumplings recipe—it has that same cozy, homemade magic.
How Sunday Dinners Taught Me to Love Braised Meat
Growing up, my family gathered around the dinner table every Sunday without fail. My mom would have something simmering in the oven for hours—the whole house smelled like red wine, thyme, and caramelized meat. I remember sneaking into the kitchen around 4 p.m., lifting the lid just enough to peek at whatever was braising away, and my mom would laugh and tell me, “Patience, Kelly. The best things take time.”
That lesson stuck with me. Not just in cooking, but in how I approach nutrition and wellness with my clients. Braising is honest cooking—it’s about low, slow heat transforming tough cuts into something extraordinary. It’s about showing up for your family with food that says, “I took time for you today.”
What is Braised Short Rib?
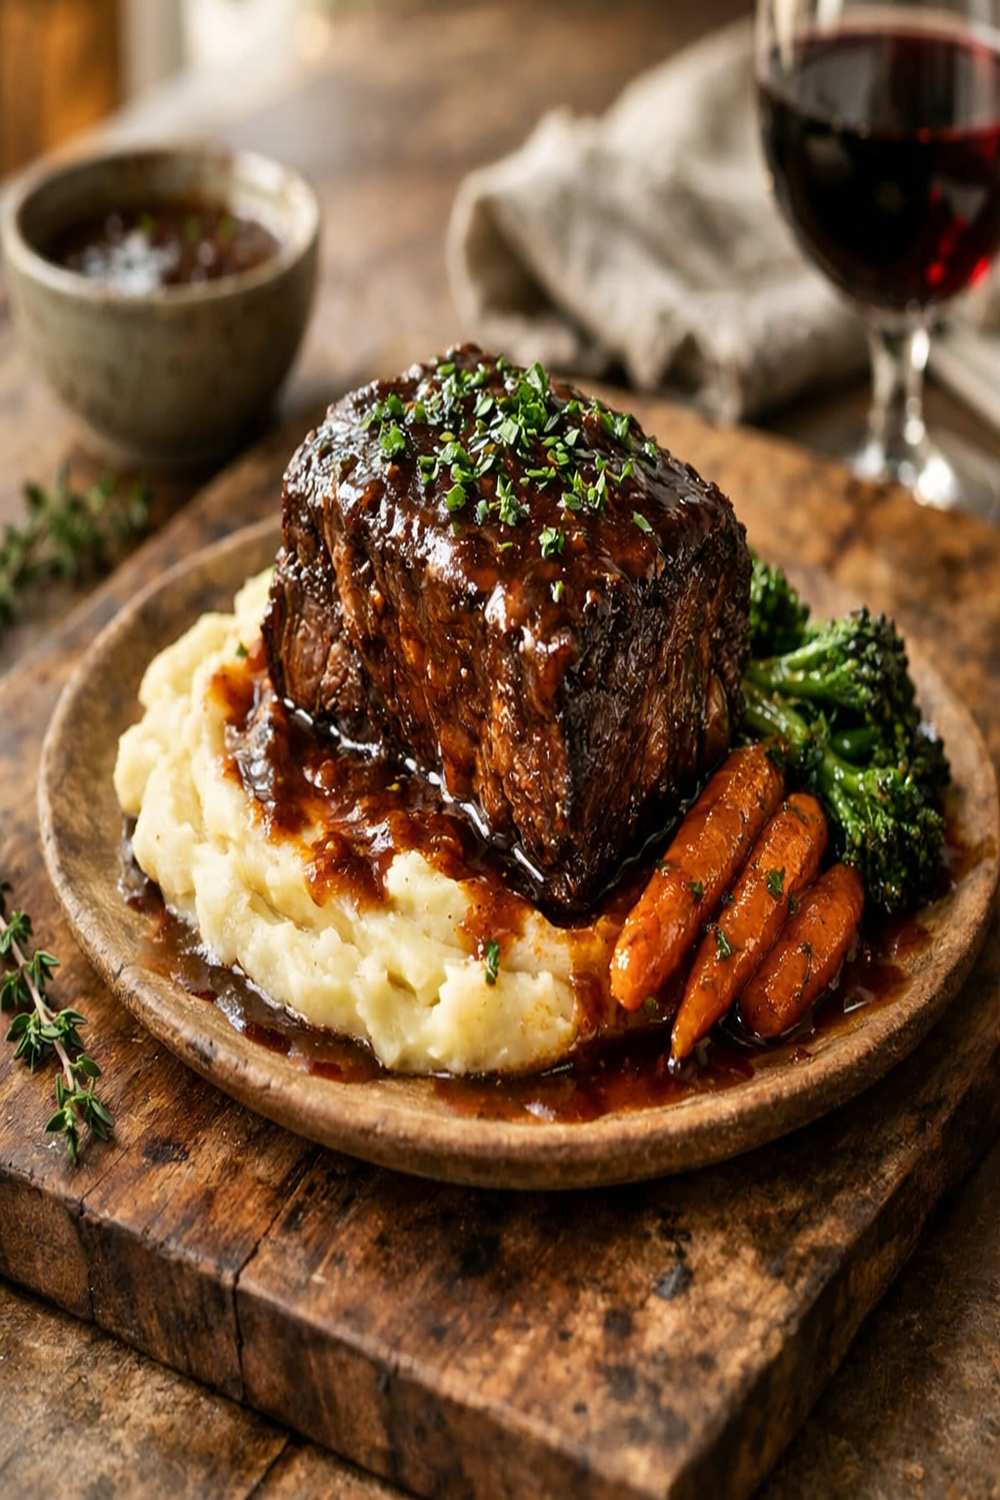
Braising is one of the world’s most ancient and beloved cooking techniques, originating in European cuisines where cooks made use of every part of the animal. Beef short ribs are a cut that comes from the rib section—packed with connective tissue and marbling that becomes incredibly tender when cooked low and slow in liquid.
Unlike grilling or searing, braising uses steam and moist heat to break down collagen into gelatin, creating that silky, luxurious texture that makes you close your eyes with satisfaction. The ribs spend hours nestled in a fragrant broth enriched with wine, aromatics, and fresh herbs. By the end, the meat is so tender it practically falls away from the bone with just a fork.
This isn’t a quick weeknight dinner in the traditional sense—it’s a three-and-a-half-hour commitment. But here’s what I love about it: most of that time is hands-off oven time. You’re genuinely only spending about 20 minutes actively cooking. The rest is just patience and aroma therapy happening in your kitchen.
Why You’ll Love This Braised Short Rib Recipe
- Minimal active cooking time – You’ll spend roughly 20 minutes on hands-on prep and browning. The oven does the heavy lifting, which means you can fold laundry, help with homework, or just breathe while dinner comes together.
- Feeds a crowd from one pot – A single Dutch oven holds enough ribs and braising liquid to serve 6-8 people comfortably, making this perfect for family dinners, potlucks, or meal prep for the week ahead.
- Built-in gravy – The braising liquid becomes the most incredible pan sauce. It’s rich, flavorful, and happens naturally as the meat releases its essence into the broth. No flour slurry needed.
- Budget-friendly protein – Short ribs are often more affordable than premium steaks, yet they deliver deep, beefy flavor that makes people think you spent hours in culinary school.
- Naturally nutrient-dense – Beef short ribs provide iron, zinc, B vitamins, and collagen. The long, slow cooking makes these nutrients more bioavailable, and the gelatin created from the bone and connective tissue supports gut health.
- Flexible and forgiving – This recipe adapts beautifully to whatever vegetables you have on hand, whatever wine is open on your counter, and even different brasing liquids if you prefer beef stock instead of wine.
The Ingredients
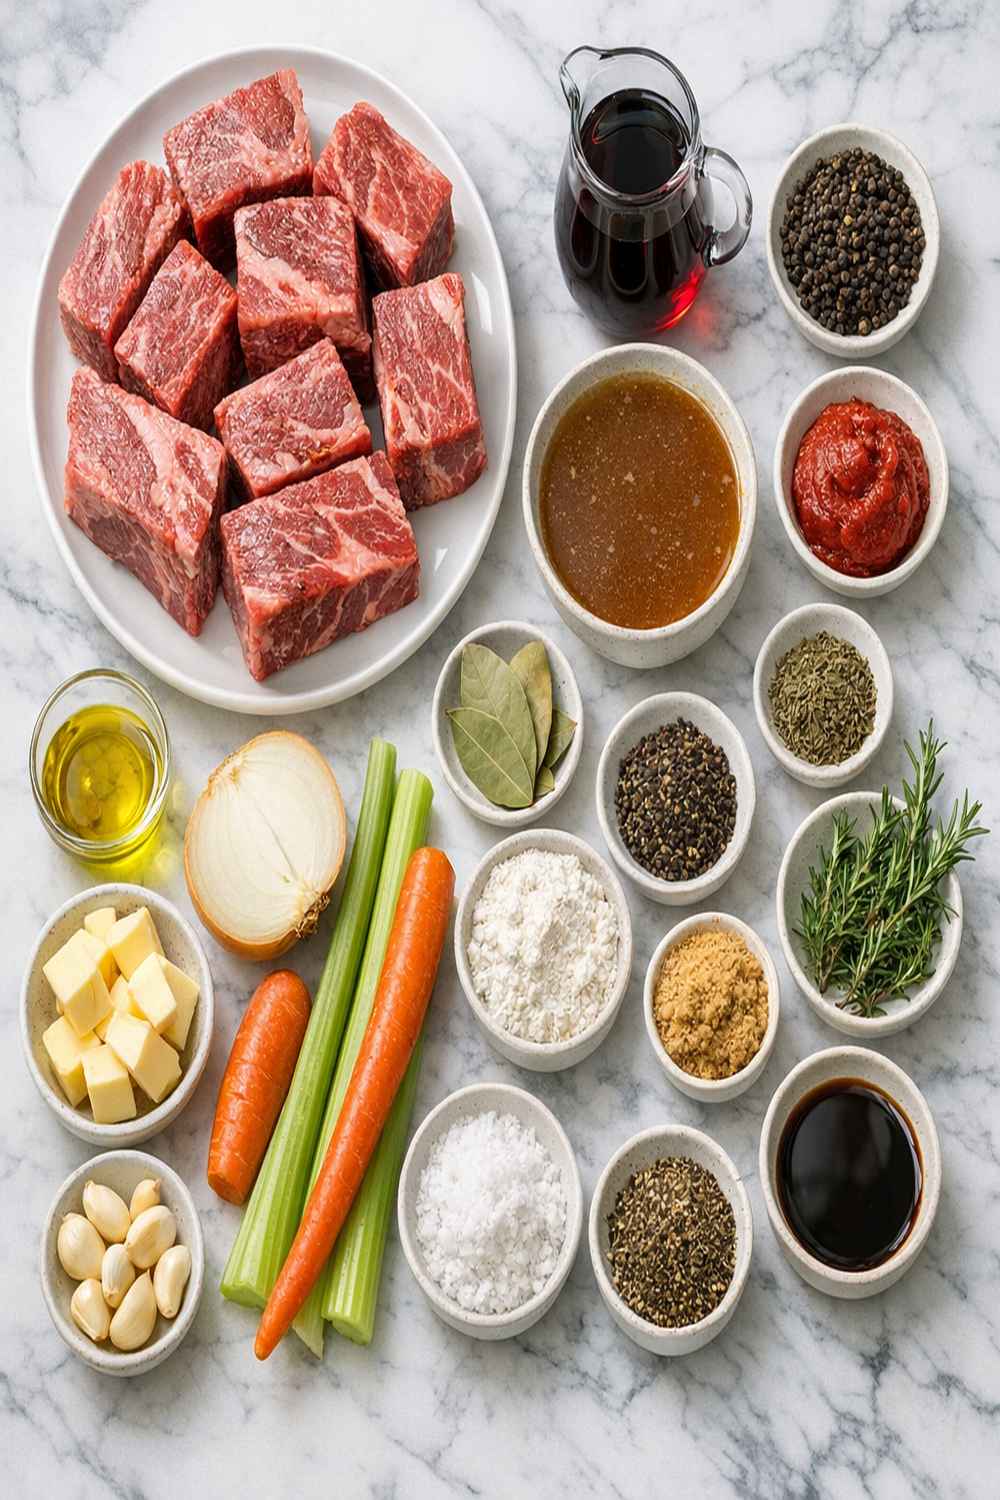
I’ve kept this ingredient list intentionally simple—these are all pantry staples and things I know you likely have at home or can grab in one quick grocery run. The beauty of this dish is that it doesn’t need exotic ingredients to shine. Good quality, whole ingredients do all the talking.
This recipe makes approximately 6-8 generous servings, depending on how hungry your family is and what you’re serving alongside the ribs.
- ¼ cup all-purpose flour (for coating the ribs before browning)
- 8 beef short ribs (bone-in, roughly 4-5 pounds total—ask your butcher to cut them into manageable pieces)
- 1 bay leaf (optional, but adds subtle depth)
- 3 medium carrots (chopped into 2-inch segments)
- Fine sea salt and freshly cracked black pepper (to taste, roughly 1½ teaspoons each)
- 2 tablespoons tomato paste (concentrated, no water added)
- 1 cup dry red wine (a Pinot Noir or Côte du Rhône works beautifully—use something you’d actually drink)
- 3 tablespoons extra virgin olive oil (divided, for browning vegetables and meat)
- 2 whole sprigs fresh rosemary (about 4-5 inches long, woody stems removed)
- 3 whole sprigs fresh thyme (tied together loosely, or 1 teaspoon dried thyme if fresh isn’t available)
- ½ teaspoon garlic powder (adds background umami without being aggressive)
- 2½ cups low-sodium beef broth (homemade is wonderful if you have it, but quality store-bought works perfectly fine)
- 1 large yellow onion (diced into roughly ¾-inch pieces)
How to Make Braised Short Ribs
I’m going to walk you through this step by step, with specific cues about what you should see, smell, and feel at each stage. Cooking is as much about your senses as it is about the clock, and I want you to feel confident at every turn. Set aside about three and a half hours total, with roughly 20 minutes of active cooking time at the beginning and end.
Step 1: Preheat Your Oven and Prepare Your Workspace
Start by positioning your oven rack to the middle position and preheating your oven to 350°F. While it’s heating, pull out your largest Dutch oven or heavy-bottomed oven-safe pot with a tight-fitting lid. Make sure it’s big enough to hold all eight ribs in a relatively single layer—this helps with browning.
As a registered dietitian, I always recommend having all your ingredients prepped and ready before you begin cooking. This is called mise en place, and it eliminates scrambling and keeps your focus on what’s happening in the pot. Dice your onion, chop your carrots, pat your ribs dry with paper towels (this is crucial for browning), and measure out your wine, broth, and tomato paste. Tie your thyme sprigs together with kitchen twine, and have your rosemary sprigs ready.
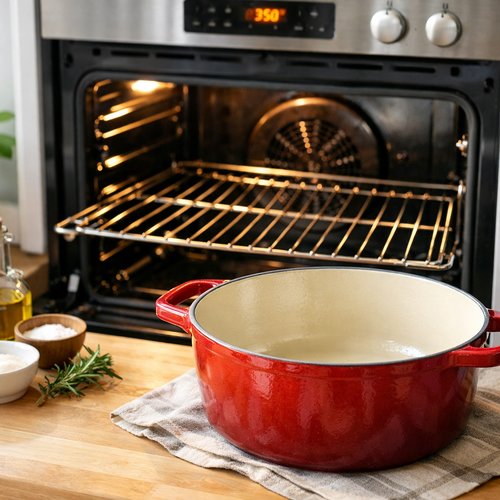
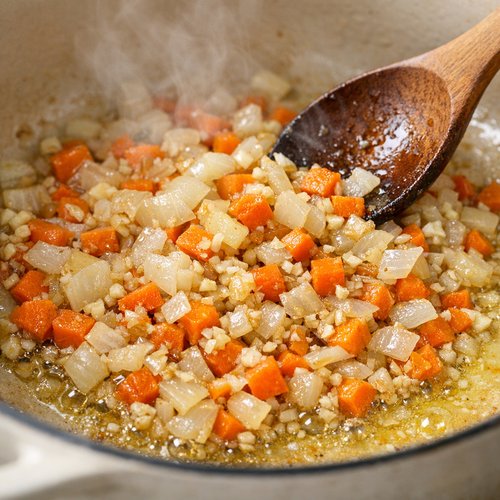
Step 2: Sauté the Aromatics Until Fragrant
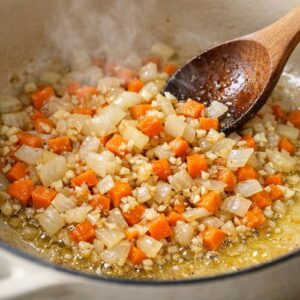
Add 1 tablespoon of your olive oil to the Dutch oven over medium-high heat. Once it shimmers (you’ll see it become loose and glossy, about 1-2 minutes), add your diced onion and chopped carrots. Stir frequently for about 4-5 minutes until the onion becomes translucent and the carrots just begin to soften at the edges.
You’re looking for a gentle sizzle, not aggressive browning at this stage. The vegetables should smell sweet and fragrant—that’s when you know they’re ready. Transfer them to a clean plate and set aside. These veggies will get cooked again during braising, so don’t worry about them being fully tender.
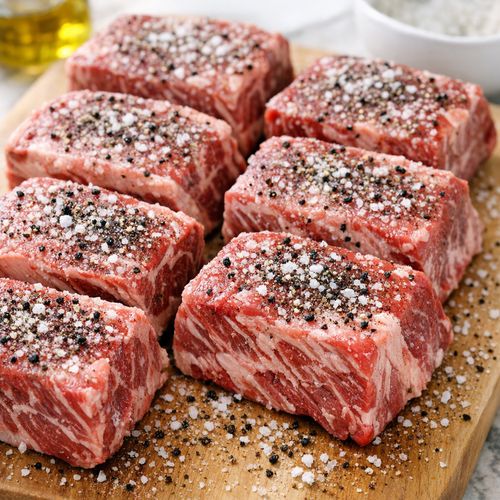
Step 3: Season and Flour Your Ribs
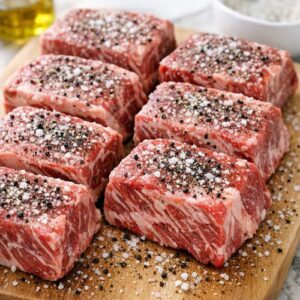
While your vegetables are cooking, season all eight of your beef short ribs generously on all sides with fine sea salt and freshly cracked black pepper. Be confident with your seasoning—you want every surface lightly coated. Sprinkle the flour over a shallow plate and dredge each rib in the flour, shaking off any excess.
The flour creates a thin crust during browning that helps develop a rich fond (those caramelized brown bits) at the bottom of the pot. Those bits are liquid gold when it comes to flavor. Don’t skip this step, and don’t worry about the flour being completely even—rough patches are actually preferable because they brown beautifully.
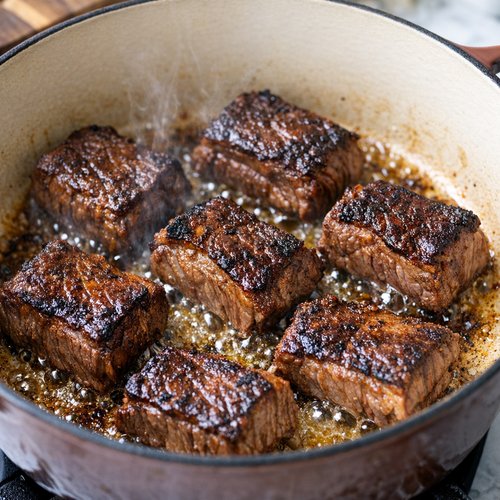
Step 4: Brown the Ribs for Maximum Flavor
Add the remaining 2 tablespoons of olive oil to your Dutch oven and increase the heat to high. You want the oil to be hot enough that it shimmers and moves loosely around the pan—this typically takes 2-3 minutes. Once it’s ready, carefully add your floured short ribs.
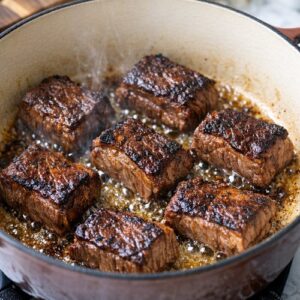
Brown them for approximately 45 seconds to 1 minute per side. You’re looking for a deep golden-brown crust, almost mahogany in color. Work in batches if needed to avoid crowding the pan—crowding causes steaming instead of browning. Once all ribs are beautifully browned on all surfaces, transfer them to a clean plate. Don’t wash the pot—those brown bits are your next step.
Step 5: Deglaze and Build Flavor
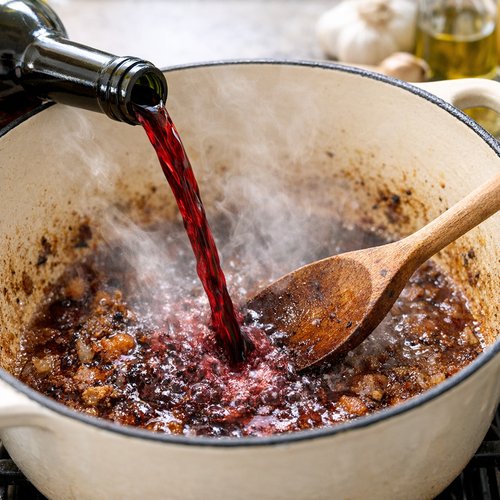
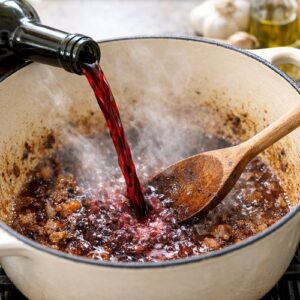
Pour your dry red wine directly into the hot Dutch oven. You’ll immediately hear a sizzle, and the wine will begin to reduce. Using a wooden spoon or silicone spatula, scrape the bottom and sides of the pot vigorously, breaking up all those caramelized brown bits and incorporating them into the wine. This is deglazing, and it’s how you capture all that deep, savory flavor.
Let the wine reduce for about 2 minutes at a gentle boil. You should see the liquid reduce by about half, and it will smell rich and slightly sweet. The alcohol will cook off, leaving only the wine’s depth behind.
Step 6: Build Your Braising Liquid
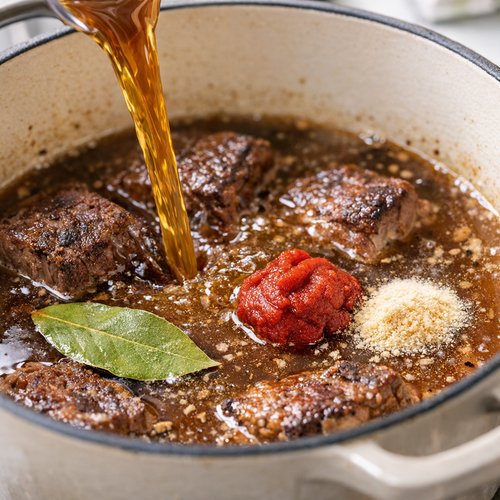
Add your 2½ cups of low-sodium beef broth to the pot, along with the 2 tablespoons of tomato paste, ½ teaspoon of garlic powder, and your bay leaf if using. Stir everything together thoroughly, making sure the tomato paste is fully dissolved and distributed throughout the liquid. Taste the broth and add additional salt and pepper to your preference—it should taste like something you’d enjoy drinking, because essentially, this becomes your sauce.
This is where my clinical expertise comes in: by building layers of flavor now, you’re creating umami-rich braising liquid that’s naturally satisfying. You won’t need cream or extra fat to make this luxurious—the collagen from the bones and the gelatin released during cooking will do that work for you.
Step 7: Combine and Braise
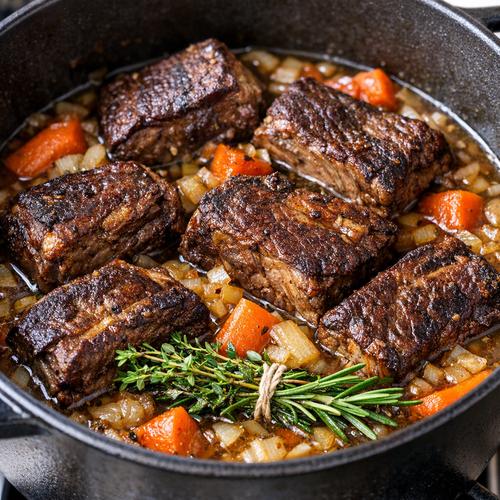
Return your browned short ribs to the pot along with your sautéed onions and carrots. Tuck your tied thyme sprigs and rosemary sprigs into the liquid so they’re partially submerged. The braising liquid should come about three-quarters of the way up the sides of the ribs—if it doesn’t, add a bit more broth.
Cover the Dutch oven with its lid and carefully transfer it to your preheated 350°F oven. Set a timer for 2 hours.
Step 8: First Check and Temperature Adjustment
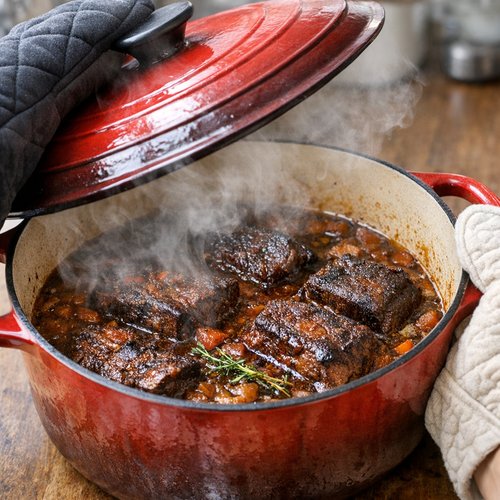
After 2 hours, carefully remove the Dutch oven from the oven (use both hands and oven mitts—it’s heavy and hot). Lift the lid away from you to avoid steam burns. The ribs should be getting tender, but they might not be quite there yet. This is where your intuition matters.
Reduce your oven temperature to 325°F and return the covered pot to the oven for an additional 30-45 minutes. The lower temperature allows for gentler, more even cooking. The ribs are done when a fork easily pierces the meat with almost no resistance, and the meat is beginning to pull away from the bone.
Step 9: Rest Before Serving
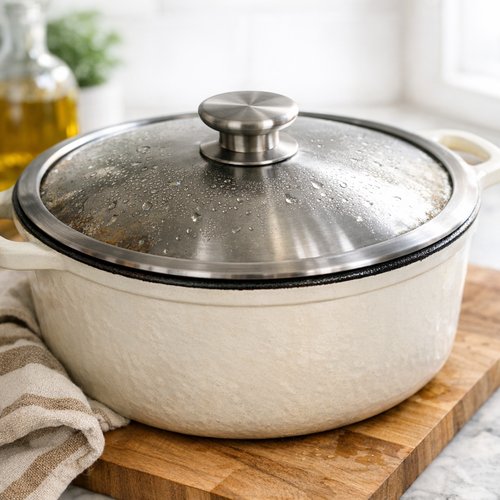
Once your ribs are perfectly tender, remove the pot from the oven and let it rest, covered, for 20 minutes. This resting period allows the collagen to set slightly and the meat to reabsorb some of the braising liquid, keeping it incredibly moist.
While it’s resting, prepare your serving vessel—whether that’s mashed potatoes, egg noodles, or cauliflower rice. During this time, you can skim any excess fat from the top of the braising liquid if you prefer. I usually leave some of that fat because it carries flavor, but it’s entirely your choice.
Step 10: Plate and Serve With Gravy
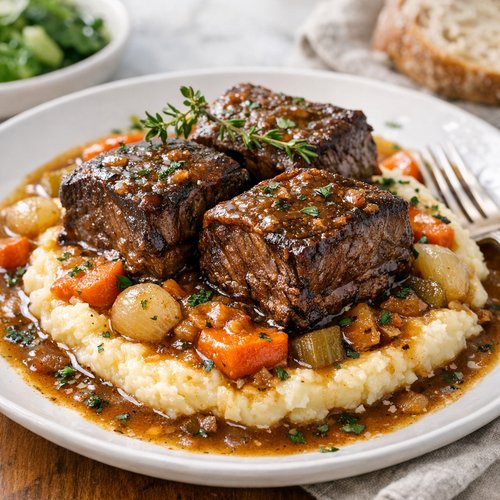
Arrange your short ribs over your chosen base, spoon the braising liquid and vegetables around them generously, and serve immediately while everything is hot. The gravy is the star here—don’t skimp on it.
Expert’s Nutritional Insight
As a registered dietitian, I want to highlight something important about this dish: beef short ribs contain high levels of conjugated linoleic acid (CLA), a fatty acid that supports metabolic health, and they’re rich in carnosine and anserine, compounds with antioxidant properties. The long, slow braising process makes the collagen break down into gelatin, which is easier for your body to absorb and utilize for joint, skin, and gut health.
The wine in the braising liquid contributes polyphenols and resveratrol, compounds associated with cardiovascular health. The vegetables add fiber, vitamins, and minerals. When you finish the meal with the braising liquid and vegetables, you’re not just eating delicious comfort food—you’re getting a nutritionally complete meal that supports your body in multiple ways.
Tips and Tricks
- Ask your butcher to cut the ribs – Beef short ribs can be unwieldy. A good butcher will cut them into manageable pieces and trim excess fat if you ask. This also helps them cook more evenly.
- Don’t skip the browning step – It takes about 10 minutes, but it’s where most of the flavor development happens. Properly browned meat creates a Maillard reaction that you simply can’t replicate by going straight to braising.
- Use wine you’d actually drink – The quality of your braising liquid matters. A cheap, unpleasant wine will result in unpleasant flavors in your dish. I like Pinot Noir because it has enough body without being too heavy.
- Fresh herbs make a difference – If you have them, use fresh thyme and rosemary. Dried herbs can work, but fresh brings a brighter, more complex flavor that really elevates this dish.
- Make extra braising liquid – If you’re feeding a crowd, increase the broth to 3 cups instead of 2½. Extra sauce is never a problem, and it freezes beautifully.
- Plan for make-ahead cooking – This dish is actually better the next day because flavors have more time to meld. You can braise the ribs completely, cool them, and refrigerate overnight. Reheat gently in a 325°F oven, covered, for about 30-40 minutes.
- Temperature matters – Don’t be tempted to raise the oven temperature to speed things up. High heat causes the meat to become tough and stringy. Low and slow is the only way to achieve that melt-in-your-mouth texture.
Make-Ahead Guide for Busy Weeknights
Prep Day (Up to 24 hours ahead): Dice your onion, chop your carrots, and measure out your wine, broth, and tomato paste into separate containers. Store the vegetables in a sealed container and the liquids in labeled jars. Pat your ribs dry, season them, and refrigerate covered until you’re ready to cook.
Cook Once, Eat Twice: This recipe is perfect for a Sunday cooking session. Make the full batch, let it cool completely, and refrigerate for up to 4 days. You can reheat individual portions in a skillet over medium-low heat, or reheat the entire pot gently in a 325°F oven. The flavors actually improve overnight as everything melds together.
Freezer Friendly: Cool the braised ribs completely, then transfer to freezer-safe containers or bags, making sure the meat is covered by braising liquid. They’ll keep for up to 3 months. Thaw overnight in the refrigerator and reheat gently to avoid toughening the meat.
Common Mistakes to Avoid
- Not drying the ribs before browning – Moisture is the enemy of browning. Pat your ribs completely dry with paper towels before they hit the pot, or they’ll steam instead of sear.
- Crowding the pot during browning – Working in batches takes a few extra minutes, but it ensures each rib gets a beautiful, caramelized crust. Crowding causes the temperature to drop and creates steam.
- Using low-quality braising liquid – The braising liquid becomes your sauce, so it matters. Use a wine you’d drink and good-quality broth. Cheap broth tastes thin and one-dimensional.
- Cooking at too high a temperature or too short a time – I know it’s tempting to raise the temperature to finish faster, but beef short ribs need those 2.5-3 hours at low heat to develop proper tenderness. Rushing results in tough, dry meat.
Seasonal Variations
Fall/Winter Version: Add 1 cup of diced root vegetables like parsnips and celery root along with the onions and carrots. Include ½ teaspoon of smoked paprika and 1 star anise pod in the braising liquid for depth.
Spring Version: Use half red wine and half beef broth to lighten the dish. Add fresh peas and diced spring vegetables like asparagus toward the end of cooking (about 15 minutes before serving). Brighten with fresh tarragon instead of rosemary.
Beer-Braised Version: Replace the red wine with a full-bodied amber or brown ale for a different but equally delicious flavor profile. Add ½ teaspoon of Dijon mustard for complexity.
Can I Store Braised Short Ribs?
Absolutely, and they store beautifully. Let the braised short ribs cool to room temperature, then transfer to an airtight container with some of the braising liquid. Refrigerate for 3-4 days, depending on the freshness of your ingredients. The ribs will keep their tender texture and the flavors will deepen overnight.
You can freeze for up to 3 months in a freezer-safe container, making sure the meat is covered by braising liquid to prevent freezer burn. Thaw overnight in the refrigerator before reheating. Reheat gently in a 325°F oven, covered, for about 30-40 minutes until warmed through. Alternatively, reheat individual portions in a skillet over medium-low heat.
The braising liquid itself is liquid gold. Save it, refrigerate it, and use it as a base for soups, gravies for other meals, or braise chicken or vegetables in it. Flavor doesn’t go to waste in my kitchen.
Nutrition Information
Based on USDA nutrition database analysis, per serving (one short rib with braising liquid and vegetables, serves 6-8):
- Calories: 385-460 (depending on serving size)
- Protein: 38-42 grams
- Total Fat: 20-24 grams (includes beneficial CLA and omega-3s)
- Saturated Fat: 8-10 grams
- Carbohydrates: 8-10 grams
- Fiber: 1-2 grams
- Iron: 3.5-4.2 mg (roughly 20-23% of daily value)
- Zinc: 6-7 mg (roughly 40-45% of daily value)
- B12: 1.8-2.1 mcg (roughly 75-88% of daily value)
- Collagen: Approximately 4-5 grams per serving (from bone and connective tissue)
This is a nutrient-dense meal that provides sustained energy, supports muscle repair and maintenance, and delivers essential minerals that many people don’t get enough of. Pair it with a vegetable side or whole grain to add additional fiber and micronutrients.
What Can I Serve With Braised Short Ribs?
The beauty of this dish is its versatility. The braising liquid is rich and luxurious, so you want a base that can handle it. Here are my favorite pairings, many of which you’ll find throughout my recipe collection.
- Creamy mashed potatoes – This is the classic pairing. The starchy, buttery potatoes soak up the braising liquid beautifully. Use a mix of russet and Yukon gold potatoes for the best texture.
- Wide egg noodles – Toss them with a bit of butter and fresh parsley. The noodles catch the sauce and create the most comforting bite.
- Roasted root vegetables – Parsnips, celery root, and beets add earthiness and nutrients. Roast them separately so they stay crispy-edged while the ribs are braising.
- Creamy polenta – Rich, buttery polenta is phenomenal under these ribs. The contrast of textures is wonderful.
- Simple green salad – If you want something lighter, serve alongside a peppery arugula salad with lemon vinaigrette. It cuts through the richness beautifully.
- Crusty bread – Never underestimate the importance of good bread for soaking up every last drop of braising liquid. A rustic sourdough or crusty ciabatta is essential.
- Cauliflower rice or mashed cauliflower – For a lower-carbohydrate option that still feels luxurious and comforting.
If you’re looking for other beef dishes with similar flavor profiles, try my Pot Roast Recipe or my Slow Cooker Pot Roast Recipe. Both offer that same soul-satisfying, fall-apart-tender beef with rich braising liquid. For completely different protein, my Osso Buco follows the same braising technique with veal shanks and is equally showstopping.
Substitutes
- Different beef cuts – Chuck roast, beef brisket, or beef cheeks all braise beautifully and become incredibly tender. The cooking time might vary slightly, so check for tenderness starting around 2 hours.
- Red wine alternatives – If you don’t have red wine or prefer not to use it, substitute with additional beef broth and 1 tablespoon of balsamic vinegar or 2 tablespoons of Worcestershire sauce for depth. You’ll lose some complexity but gain in subtlety.
- Fresh herb swaps – If you don’t have fresh thyme and rosemary, use ½ teaspoon of dried Herbes de Provence or Italian seasoning. Add it to the broth mixture rather than as whole sprigs.
- Beef broth alternatives – Vegetable broth works in a pinch, though you’ll lose some depth. Homemade beef stock is wonderful if you have it. You could also use water with an additional tablespoon of tomato paste and a teaspoon of soy sauce for umami.
- Flour alternatives – For a gluten-free version, use cornstarch or arrowroot powder in equal measure. The browning might be slightly less dramatic, but it’ll still work beautifully.
- Dutch oven alternatives – A heavy-bottomed pot with an oven-safe lid works just fine. Avoid thin, light-colored aluminum, which conducts heat unevenly.

Boneless Braised Short Rib Recipe
Ingredients
Method
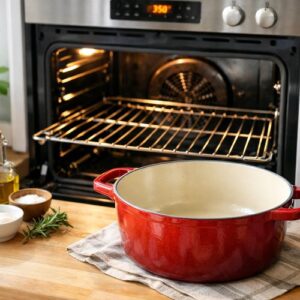
- Start by positioning your oven rack to the middle position and preheating your oven to 350°F. While it's heating, pull out your largest Dutch oven or heavy-bottomed oven-safe pot with a tight-fitting lid. Make sure it's big enough to hold all eight ribs in a relatively single layer—this helps with browning. As a registered dietitian, I always recommend having all your ingredients prepped and ready before you begin cooking. This is called mise en place, and it eliminates scrambling and keeps your focus on what's happening in the pot. Dice your onion, chop your carrots, pat your ribs dry with paper towels (this is crucial for browning), and measure out your wine, broth, and tomato paste. Tie your thyme sprigs together with kitchen twine, and have your rosemary sprigs ready.
- Add 1 tablespoon of your olive oil to the Dutch oven over medium-high heat. Once it shimmers (you'll see it become loose and glossy, about 1-2 minutes), add your diced onion and chopped carrots. Stir frequently for about 4-5 minutes until the onion becomes translucent and the carrots just begin to soften at the edges. You're looking for a gentle sizzle, not aggressive browning at this stage. The vegetables should smell sweet and fragrant—that's when you know they're ready. Transfer them to a clean plate and set aside. These veggies will get cooked again during braising, so don't worry about them being fully tender.
- While your vegetables are cooking, season all eight of your beef short ribs generously on all sides with fine sea salt and freshly cracked black pepper. Be confident with your seasoning—you want every surface lightly coated. Sprinkle the flour over a shallow plate and dredge each rib in the flour, shaking off any excess. The flour creates a thin crust during browning that helps develop a rich fond (those caramelized brown bits) at the bottom of the pot. Those bits are liquid gold when it comes to flavor. Don't skip this step, and don't worry about the flour being completely even—rough patches are actually preferable because they brown beautifully.
- Add the remaining 2 tablespoons of olive oil to your Dutch oven and increase the heat to high. You want the oil to be hot enough that it shimmers and moves loosely around the pan—this typically takes 2-3 minutes. Once it's ready, carefully add your floured short ribs. Brown them for approximately 45 seconds to 1 minute per side. You're looking for a deep golden-brown crust, almost mahogany in color. Work in batches if needed to avoid crowding the pan—crowding causes steaming instead of browning. Once all ribs are beautifully browned on all surfaces, transfer them to a clean plate. Don't wash the pot—those brown bits are your next step.
- Pour your dry red wine directly into the hot Dutch oven. You'll immediately hear a sizzle, and the wine will begin to reduce. Using a wooden spoon or silicone spatula, scrape the bottom and sides of the pot vigorously, breaking up all those caramelized brown bits and incorporating them into the wine. This is deglazing, and it's how you capture all that deep, savory flavor. Let the wine reduce for about 2 minutes at a gentle boil. You should see the liquid reduce by about half, and it will smell rich and slightly sweet. The alcohol will cook off, leaving only the wine's depth behind.
- Add your 2½ cups of low-sodium beef broth to the pot, along with the 2 tablespoons of tomato paste, ½ teaspoon of garlic powder, and your bay leaf if using. Stir everything together thoroughly, making sure the tomato paste is fully dissolved and distributed throughout the liquid. Taste the broth and add additional salt and pepper to your preference—it should taste like something you'd enjoy drinking, because essentially, this becomes your sauce. This is where my clinical expertise comes in: by building layers of flavor now, you're creating umami-rich braising liquid that's naturally satisfying. You won't need cream or extra fat to make this luxurious—the collagen from the bones and the gelatin released during cooking will do that work for you.
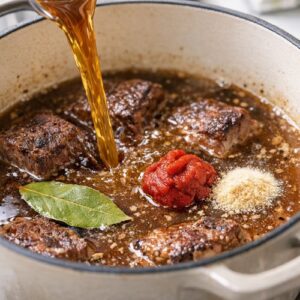
- Return your browned short ribs to the pot along with your sautéed onions and carrots. Tuck your tied thyme sprigs and rosemary sprigs into the liquid so they're partially submerged. The braising liquid should come about three-quarters of the way up the sides of the ribs—if it doesn't, add a bit more broth. Cover the Dutch oven with its lid and carefully transfer it to your preheated 350°F oven. Set a timer for 2 hours.
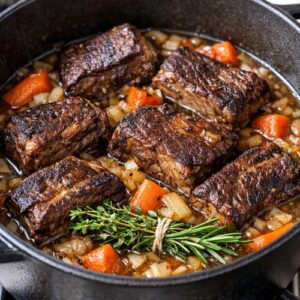
- After 2 hours, carefully remove the Dutch oven from the oven (use both hands and oven mitts—it's heavy and hot). Lift the lid away from you to avoid steam burns. The ribs should be getting tender, but they might not be quite there yet. This is where your intuition matters. Reduce your oven temperature to 325°F and return the covered pot to the oven for an additional 30-45 minutes. The lower temperature allows for gentler, more even cooking. The ribs are done when a fork easily pierces the meat with almost no resistance, and the meat is beginning to pull away from the bone.
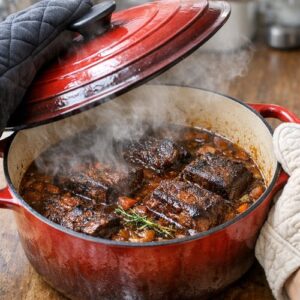
- Once your ribs are perfectly tender, remove the pot from the oven and let it rest, covered, for 20 minutes. This resting period allows the collagen to set slightly and the meat to reabsorb some of the braising liquid, keeping it incredibly moist. While it's resting, prepare your serving vessel—whether that's mashed potatoes, egg noodles, or cauliflower rice. During this time, you can skim any excess fat from the top of the braising liquid if you prefer. I usually leave some of that fat because it carries flavor, but it's entirely your choice.
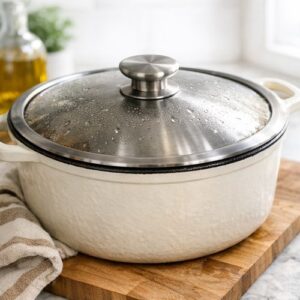
- Arrange your short ribs over your chosen base, spoon the braising liquid and vegetables around them generously, and serve immediately while everything is hot. The gravy is the star here—don't skimp on it.
Notes
FAQs
Can I cook this recipe in a slow cooker instead?
Yes, absolutely. Brown your ribs and sauté your vegetables using your stovetop, then transfer everything to a slow cooker along with your braising liquid. Cook on low for 6-8 hours, or on high for 4-5 hours. The meat will be tender and delicious, though you’ll lose some of the depth that comes from the initial browning and the oven’s even heat distribution. I personally prefer the oven method, but the slow cooker is a convenient alternative for busy days.
My ribs didn’t get tender after 2.5 hours—what went wrong?
Beef short rib tenderness depends on several factors: the age of the animal, the storage temperature, and your specific oven’s accuracy. Some ovens run hot or cold, which affects cooking time. Check for doneness by piercing the meat with a fork—it should slide through with almost no resistance. If it’s still tough, return it to the oven for another 20-30 minutes and check again. Older or larger ribs might need slightly longer than the recipe specifies.
Is it okay if some of the braising liquid evaporates?
A little evaporation is normal and actually desirable—it concentrates the flavors. However, if more than half your liquid evaporates, your ribs might be getting dry. If you notice this happening, add another ½ cup of broth during cooking. You want the ribs to stay submerged or nearly submerged throughout the braising process.
Can I use boneless short ribs instead of bone-in?
Boneless short ribs will work, though they cook slightly faster (usually about 2-2.5 hours total instead of 2.5-3 hours) and don’t develop quite as much of the gelatin-rich texture that makes braised meat so luxurious. Bone-in ribs are worth seeking out for this recipe because the bone adds so much flavor and the collagen creates an incredibly silky sauce.
How do I know if the braising liquid is seasoned correctly?
Taste it. Really taste it. Dip a spoon into the braising liquid and sip it like soup. It should taste savory, rich, and balanced—not salty, but not bland either. Taste before the ribs go in, and you can adjust seasoning then. Remember that as the ribs braise and release their juices, the liquid will develop more flavor, so don’t over-season at the beginning. You can always add more salt at the end, but you can’t take it out.
More Recipes You’ll Love
- Slow Cooker Pot Roast Recipe – A hands-off alternative for the same fall-apart-tender beef with minimal effort on a busy day.
- Baked Center Cut Pork Chop Recipe – A lighter protein option that uses a similar braising technique for incredible flavor and tenderness.
- Chicken and Dumplings – The same cozy, comforting vibe with a shorter cooking time and lighter protein.
- How To Make Beef Stock – Learn to make your own braising liquid from scratch using bones and scraps, elevating this recipe even further.
Listen, I know braised short ribs might feel like fancy restaurant food, but they’re genuinely one of the easiest impressive dishes you can make. There’s no stress, no technical skills required—just good ingredients, patience, and your oven doing most of the work for you. I’m telling you this as both a dietitian and a home cook who genuinely believes that the best meals come from showing up for your family, even if it’s just setting a timer and letting time do its thing.
Your family will remember this meal. They’ll ask you to make it again. They might even think you’re secretly a professional chef. And the best part? You can make a double batch and have incredible leftovers waiting for you all week long.
Take care with love and flavor!
META DESCRIPTION: Melt-in-your-mouth Braised Short Ribs recipe made with simple pantry staples—fall-apart tender beef with rich gravy, ready in 3 hours.