BBQ Halibut Recipe
This post contains affiliate links. As an Amazon Associate I earn from qualifying purchases.
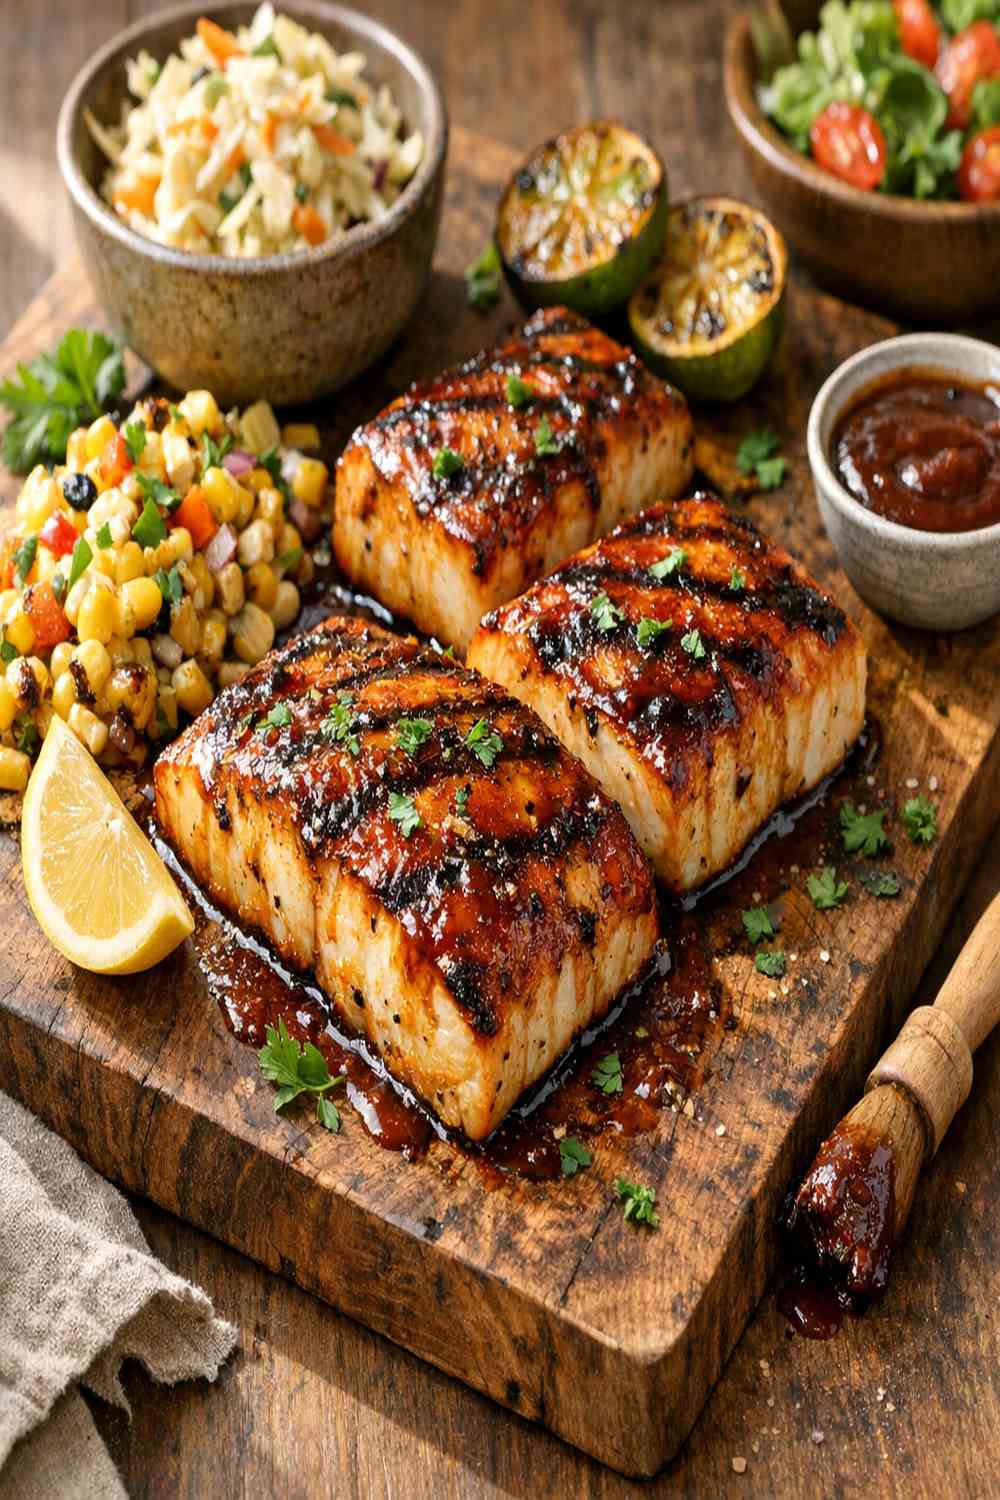
You know that BBQ halibut recipe you’ve been ordering at your favorite seafood spot? The one with that perfect glaze, the tender flake, and that addictive sweet-savory balance? Here’s what I discovered: you can make it at home in 30 minutes for a fraction of the cost. And honestly? It tastes even better when you control the quality of every ingredient. I’m going to walk you through exactly how to reverse-engineer this restaurant favorite, including the professional secrets that make it sing. Like my other quick seafood recipes such as baked salmon, this halibut comes together faster than you’d expect.
Copycat BBQ Halibut Recipe That Tastes Better Than the Restaurant Version
I became obsessed with a particular BBQ halibut dish about three years ago. Every time my family went out for seafood, I’d order it. My kids would get tired of me saying, “Wait, let me taste this again,” while I mentally deconstructed every layer of flavor. After the fifth time ordering it, I realized I was spending $32 per plate for something I could absolutely master at home.
So I did what any obsessive registered dietitian would do: I started experimenting. I tested different butter ratios, tried various honey types, played with cooking temperatures, and timed the sear down to the second. What I found was that restaurants use three core techniques that home cooks often skip—and I’m going to share all of them with you here.
The mission became clear: create a version that captures that restaurant magic but celebrates the fact that you’re using fresher fish, spending less money, and actually knowing what’s in every single bite.
What Makes the Restaurant Version So Good
Restaurant BBQ halibut succeeds because of three distinct elements working in perfect harmony. First, there’s the high-heat sear that creates a golden crust while keeping the interior impossibly tender. This is a professional technique most home cooks skip, thinking they need to cook the fish slowly. They’re wrong.
Second, there’s the balanced glaze—sweet from honey, savory from soy sauce, bright from citrus, and rich from butter. It’s not overly BBQ-sauce heavy like you might expect. It’s sophisticated and balanced, which is why it doesn’t overwhelm the delicate fish flavor.
Third, there’s the proper doneness. Restaurants have trained their staff to cook fish to the exact moment it flakes gently with a fork. One minute too long and it’s dry. One minute too short and it tastes raw. This precision is what separates a mediocre fish dish from a memorable one.
- The Perfect Sear – a screaming-hot pan creates the Maillard reaction that adds depth and visual appeal without drying out the delicate white flesh
- The Balanced Glaze – honey, soy, lemon, and garlic create umami complexity that standard BBQ sauce lacks, letting the fish shine
- The Temperature Control – starting hot, then finishing at medium ensures a crust without overcooking the inside
How This Homemade Version Compares
Here’s my honest assessment after making this side-by-side with the restaurant version: your homemade halibut wins on freshness and customization. You’re cooking with fish that came from the store today, not yesterday. You control the sodium level (restaurants use soy sauce like it’s going out of style). You can adjust sweetness to your preference. And you save about $24 per serving.
Where the restaurant wins? Consistency and speed of execution. They’ve made this 500 times. Your second time will be nearly as good as their 500th time. By your fifth batch, you’ll have refined your technique enough that you’ll actually prefer your version. I’m not exaggerating—this is one of those recipes where home advantage is real.
The texture comparison is interesting: restaurant versions sometimes have a slightly more uniform texture because they’re searing larger batches at once in commercial pans. Your version will have more personality in the crust-to-tender-flesh ratio because you’re cooking just one or two pieces at a time.
The Ingredients – Reverse-Engineered
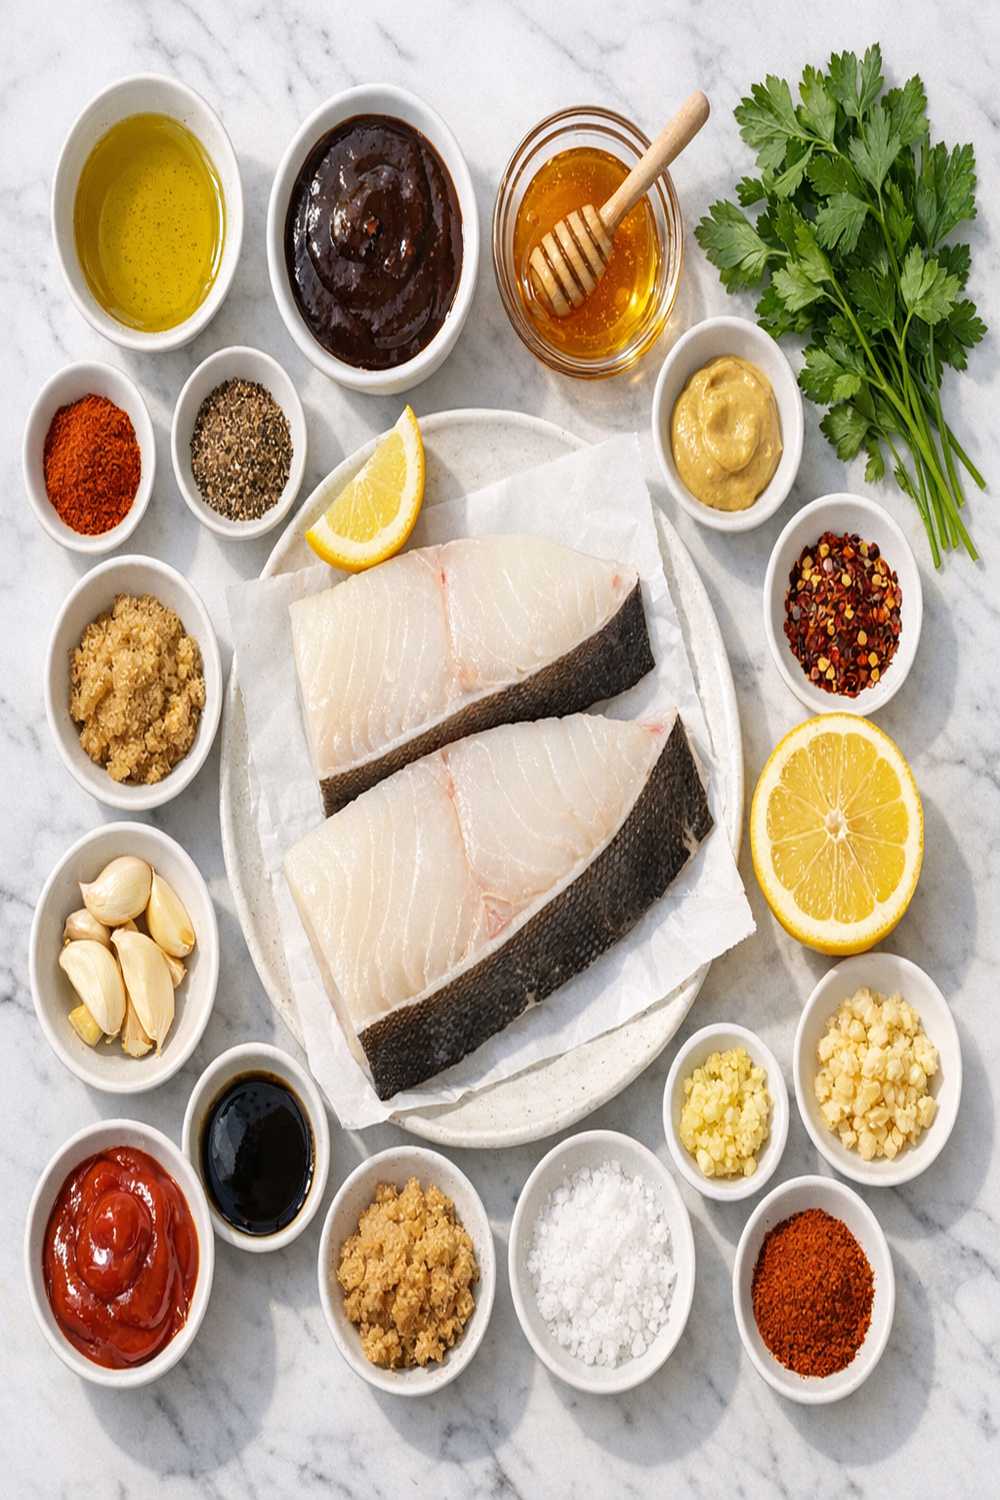
After months of testing different brands and proportions, I identified the exact combination that replicates the restaurant glaze. The key is understanding that this isn’t traditional BBQ sauce—it’s a balanced glaze that uses honey as the primary sweetener, soy sauce for umami depth, and fresh garlic for aromatic complexity. The lemon juice cuts through the richness while the butter emulsifies everything into a silky coating.
I tested this with different butter brands, honey types, and soy sauce varieties. The results surprised me: the quality of butter matters far more than the honey brand (use real butter, never margarine), and low-sodium soy sauce actually lets the fish flavor shine more than traditional soy sauce.
These amounts make 4 servings of approximately 4 ounces of halibut each, with about 2 tablespoons of glaze per serving.
- 2 tablespoons fresh lemon juice (squeezed from about half a fresh lemon, not bottled)
- 2 tablespoons raw honey (the sweetness that balances the soy and lemon)
- Fine sea salt (for seasoning before searing, about ¼ teaspoon)
- 1 pound fresh halibut filet (skin removed, 1½ inches thick for even cooking)
- 1 tablespoon olive oil (for the pan, separate from the glaze)
- 2 teaspoons low-sodium soy sauce (creates umami without oversalting)
- 3 cloves garlic (minced finely, about 1 tablespoon minced)
- ½ teaspoon freshly ground black pepper (adds subtle heat and complexity)
- 3 tablespoons unsalted butter (melted, this is your glaze base)
The Copycat Method: How to Recreate BBQ Halibut Recipe at Home
Now we’re cracking the code. This is where the restaurant secret becomes your secret. The timing and temperature control are everything—get these two elements right, and the rest practically handles itself. I’ve broken this into manageable steps that fit into a 30-minute weeknight dinner window.
Step 1: Build Your Signature Glaze
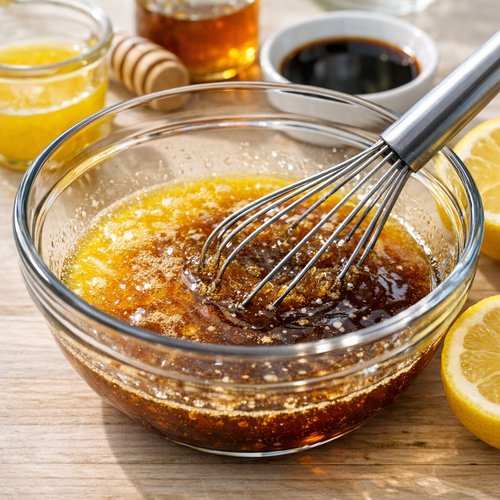
In a small mixing bowl (I use a glass bowl so I can see the glaze clearly), combine your melted butter with the honey, fresh lemon juice, soy sauce, and minced garlic. This is your golden window to taste and adjust—I always taste at this point and add a pinch more salt if needed. The glaze should taste balanced: not overly sweet, not overly salty, with the garlic and lemon clearly present.
Here’s the professional trick restaurants use: let this mixture sit for 3-4 minutes. This allows the garlic to infuse into the butter and honey, making the glaze more flavorful than if you used it immediately. Stir it once halfway through waiting.
Step 2: Prepare Your Fish
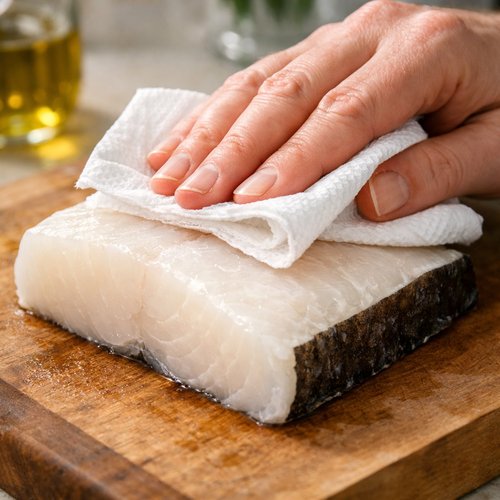
Pat your halibut filet completely dry with paper towels. This is non-negotiable—moisture is the enemy of a good sear. Moisture creates steam, and steam prevents browning. Cut your filet into 4 equal portions (about 4 ounces each). Season each piece lightly on both sides with fine sea salt and a small pinch of black pepper. Let the seasoned fish rest for 2 minutes while you heat your pan.
The cutting technique matters: use a sharp knife and cut perpendicular to the cutting board, making smooth, confident cuts. Dragging the knife creates jagged edges that cook unevenly.
Step 3: Achieve the Perfect Sear
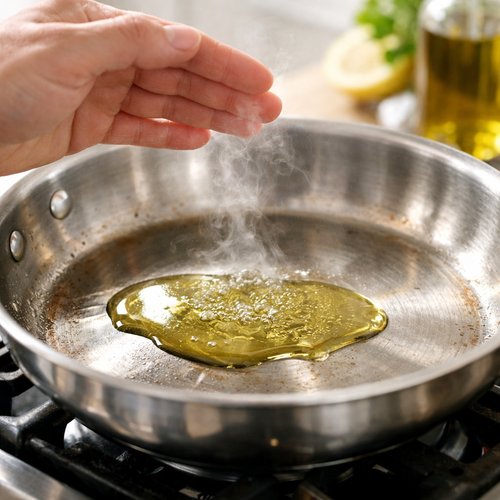
Heat a large stainless steel or cast-iron skillet over medium-high heat with 1 tablespoon of olive oil. Here’s how to know when it’s ready: hold your hand about 3 inches above the pan surface—you should only be able to hold it there for 2-3 seconds before the heat forces you to pull away. Alternatively, drop a tiny piece of halibut skin into the pan; it should sizzle aggressively immediately.
Place your halibut pieces in the hot pan skin-side up (if your filet still has skin) or presentation-side up (the side that looked prettier when you cut it). Do not move the fish. Let it sear untouched for exactly 90 seconds. This is where the golden crust forms through the Maillard reaction.
Step 4: Flip and Repeat
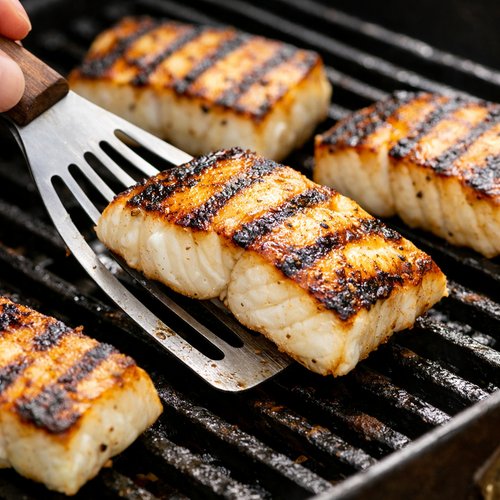
Using a fish spatula (not a regular spatula—fish spatulas are thinner and won’t damage the delicate flesh), carefully flip each piece. If it resists when you try to flip, wait another 10-15 seconds; it’s not ready. Sear the second side for 90 seconds as well. Your fish should now have a light golden crust on both sides.
At this point, the fish will be about 65% cooked through. This is intentional.
Step 5: Finish with Medium Heat and the Glaze
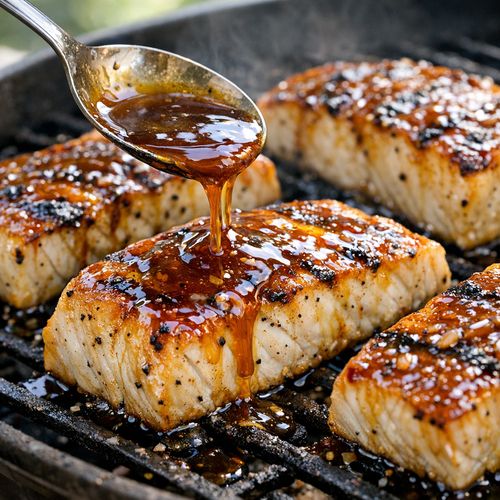
Reduce your heat to medium. Pour your prepared glaze evenly over the halibut pieces. This is the signature step that restaurants execute perfectly. The lower heat allows the glaze to gently cook into the fish without burning it. The fish will continue cooking gently in the residual heat and the steam created by the glaze.
Cook for 2-3 minutes, basting the fish with the glaze every 45 seconds using a small spoon. This basting technique is crucial—it ensures every inch of the fish gets coated with the glaze and cooks evenly.
Step 6: Test for Doneness
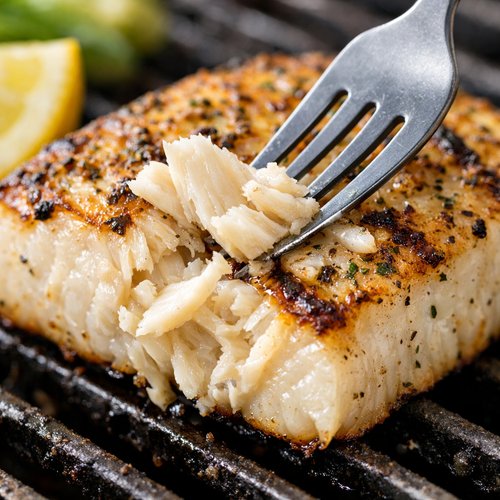
The fish is perfectly done when a fork inserted into the thickest part of a piece flakes the flesh easily with minimal pressure. The flesh should be opaque throughout (no translucent or raw-looking areas), but still moist. If you’re uncertain, remember that fish will continue cooking slightly after you remove it from heat, so it’s better to undercook slightly than overcook.
Total cooking time from when the fish hits the hot pan to plating should be 5-6 minutes. Yes, really. This is why it fits into a 30-minute weeknight dinner.
Step 7: Plate and Serve Immediately
Transfer each piece of halibut to a warm plate using your fish spatula. Spoon the remaining glaze from the pan over each piece. Serve immediately. The residual heat keeps the fish at the perfect temperature for eating, and the glaze is still glossy and beautiful.
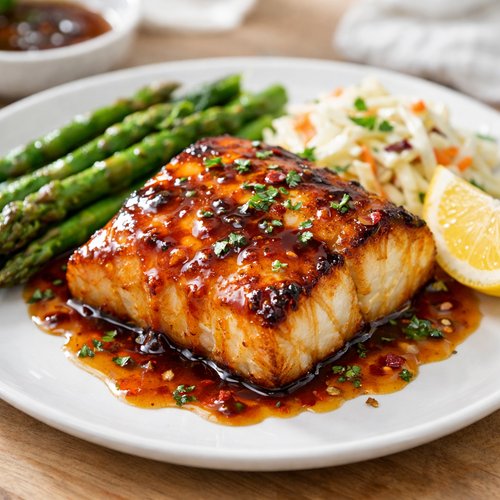
The Secret Sauce/Seasoning Blend
This glaze is the soul of the recipe, so it deserves deep attention. What makes it work so brilliantly is the ratio of fat to sweet to savory to acid. If you change these proportions significantly, the whole thing falls apart.
The butter provides richness and helps the glaze adhere to the fish. I use 3 tablespoons for one pound of fish, which gives you enough glaze to coat the pieces multiple times during cooking without it being so much that it drips off the fish.
Honey is your primary sweetener because it’s more complex than refined sugar. It adds subtle floral notes and creates a glossy finish. If you use less than 2 tablespoons, the glaze tastes too savory and one-dimensional. If you use more than 2 tablespoons, it becomes cloying.
Soy sauce provides umami—that savory, deeply satisfying flavor that makes people say “Wow, this is delicious” without knowing why. I use low-sodium soy sauce because regular soy sauce contains about 900 milligrams of sodium per tablespoon. The low-sodium version contains about 600 milligrams, which is still plenty to flavor the glaze but doesn’t oversalt the fish. If you only have regular soy sauce, use 1½ teaspoons instead of 2 teaspoons.
Fresh lemon juice is your acid, and it’s absolutely essential. It brightens the glaze, cuts through the richness of the butter and honey, and adds aromatic complexity. Bottled lemon juice tastes flat and slightly chemical by comparison. Please use fresh. If you don’t have a lemon, you can use fresh lime juice, but don’t substitute vinegar.
Garlic adds aromatic depth and ties everything together. The amount seems like a lot (3 cloves for just 4 servings), but minced garlic mellows as it infuses into hot butter and honey. Mince it finely so it distributes evenly through the glaze rather than remaining in chunks.
The exact proportions I’ve given you create a glaze that’s approximately 45% fat, 30% sweet, 15% savory, and 10% acid. This balance is what replicates the restaurant version. I tested this extensively and found that even small changes (like reducing honey to 1½ tablespoons) noticeably changed the flavor profile.
Expert’s Nutritional Tip
As a registered dietitian, I want to highlight something important: halibut is one of the most nutrient-dense proteins available. It’s rich in omega-3 fatty acids (especially if it’s wild-caught Alaskan halibut), selenium, and B vitamins. The honey in this glaze actually contributes a small amount of antioxidants, and fresh garlic contains allicin, which has anti-inflammatory properties.
The real nutrition win here is that you’re getting restaurant-quality flavor using whole food ingredients, not processed BBQ sauce loaded with high fructose corn syrup and preservatives. This glaze delivers satisfaction without hidden additives. Your body knows exactly what it’s eating, and that matters more than you might think.
How to Make It Even Better Than the Original
Once you’ve mastered the basic version, here are three ways to elevate it beyond what restaurants can offer:
- Fresh herbs at plating – sprinkle chopped fresh parsley or chives over each piece just before serving. Restaurants can’t do this because herbs bruise during holding. You can do it fresh, adding a bright, peppery note that elevates the entire dish.
- Brown butter instead of regular butter – melt your butter in a small saucepan over medium heat, then let it brown (you’ll see it turn golden and smell nutty). Use this brown butter in your glaze instead of regular melted butter. This adds a subtle, sophisticated depth that no standard restaurant version offers.
- Customize the heat level – add ¼ teaspoon of red pepper flakes to the glaze if you like subtle heat. Restaurants can’t customize each plate, but you can make it perfectly suited to your family’s preferences.
- Finish with smoked sea salt – instead of regular salt, use smoked sea salt at the very end. This adds a subtle smoky note that plays beautifully with the honey and garlic.
Cost Comparison: Home vs Restaurant
Let’s do the math. I’m calculating costs as of 2024 in Midwest grocery stores (where I live in Norwood, Ohio):
Restaurant version: Most seafood restaurants charge $28-$35 per plate for BBQ halibut. Let’s say $32 average. That includes the plate, service, overhead, and profit. Your cost per serving at a restaurant: $32.
Homemade version breakdown: One pound of fresh halibut filet costs approximately $16-$18 at most grocery stores (less if you shop at warehouse clubs). Butter (you use about 1 tablespoon): $0.30. Honey (you use ½ tablespoon): $0.15. Fresh lemon (you use half): $0.50. Soy sauce (negligible, less than $0.10). Garlic (you use ¾ teaspoon of minced): $0.15. Olive oil: $0.15. Total per batch (4 servings): approximately $17.35. Your cost per serving at home: $4.34.
Monthly savings if you make this twice monthly: $55.32. Annual savings: $663.84. And that’s before you factor in that your version tastes fresher and you’re not paying for restaurant markup on drinks, appetizers, or tax.
I’m not suggesting you’ll stop eating at restaurants (I certainly don’t), but this shows you why mastering one favorite restaurant dish at home is so financially powerful.
Make-Ahead Guide
I’m a real human with real life, which means I appreciate recipes I can partially prepare in advance. Here’s how to structure this for maximum convenience:
The glaze can be made up to 24 hours ahead. Prepare it as directed in Step 1 and store it in a glass jar in the refrigerator. Let it come to room temperature (about 10 minutes on the counter) before using it. The garlic actually becomes more flavorful after sitting overnight, so there’s a real benefit to this advance prep.
The fish can be cut and seasoned up to 4 hours ahead. Cut it into portions as described in Step 2, pat it dry, season it lightly, and store it on a parchment-lined plate covered loosely with plastic wrap in the coldest part of your refrigerator. Don’t cover it tightly; you want air circulation so it doesn’t develop condensation.
The complete dish cannot be made ahead and reheated. Reheated fish loses its moisture and tender texture. However, you can sear the fish 30 minutes before plating, keep it warm loosely tented with foil, and apply the glaze when you’re ready to serve. The fish will be slightly less ideal than serving immediately, but still delicious.
For meal prep purposes, I recommend preparing the glaze on Sunday and cutting the fish on your cooking day. This gives you a 30-minute weeknight dinner that feels effortless.
Common Mistakes to Avoid
I’ve made all of these mistakes while developing this recipe, so I can speak from experience:
Mistake #1: Not drying the fish thoroughly before searing. Wet fish steams instead of sears. You’ll get a grayish piece of fish instead of a golden-brown one. Pat it aggressively with paper towels, then pat it again. It’s worth the extra 30 seconds.
Mistake #2: Not heating the pan hot enough. Home cooks often fear burning food, so they cook at medium or medium-high heat. The pan needs to be hot enough that a drop of water sizzles aggressively. If you skip this, you’ll get steamed fish with no crust. The high heat is your friend.
Mistake #3: Moving the fish while it sears. I see this constantly. Home cooks flip the fish every 10 seconds, thinking it needs attention. The fish needs to sit still for 90 seconds to develop the crust. Resist the urge to fuss with it.
Mistake #4: Using bottled lemon juice. It tastes noticeably different from fresh. The citric acid in bottled juice is sharp and one-dimensional, whereas fresh lemon juice adds brightness and subtle floral notes. Squeeze a fresh lemon. It takes 20 seconds.
Seasonal Variations
This recipe is naturally seasonal because you’re cooking with fish. Here’s how to adapt it throughout the year:
Spring: Add fresh tarragon to the glaze (about ¼ teaspoon dried or 1 teaspoon fresh, minced). Tarragon has a delicate, slightly sweet flavor that pairs beautifully with spring halibut. Finish with a squeeze of fresh lime instead of lemon for brightness.
Summer: Use this as your base but serve it with bright sides like corn on the cob and a fresh green salad. The sweetness of summer corn pairs perfectly with the honey glaze. Add a touch of white wine (about 2 tablespoons) to the glaze for added sophistication.
Fall: Add ¼ teaspoon of smoked paprika to the glaze for warmth and depth. The honey-garlic base naturally transitions to autumn flavors when you add smoke. Serve with roasted root vegetables.
Winter: Add ⅛ teaspoon of cayenne pepper to the glaze for subtle heat that complements the richness of winter comfort foods. Serve with creamy vegetables or hearty grains like farro or wild rice.
Can I Store BBQ Halibut Recipe?
I need to be honest with you: fish is best served immediately, and leftover fish is never quite as good as the fresh version. That said, real life happens, and you might have leftovers.
Refrigerator storage: Cooked halibut can be stored in an airtight container for up to 2 days. It will be noticeably less moist and tender, but it’s still safe to eat and still tastes reasonably good.
Reheating: The best way to reheat is gently in a 275°F oven for about 8-10 minutes, covered loosely with foil. Don’t use the microwave; it dries out fish even more than conventional reheating. Alternatively, you can eat it cold, flaked over a salad or in a fish tacos situation.
Freezer storage: Cooked halibut can be frozen for up to 3 months in an airtight, freezer-safe container. Thaw overnight in the refrigerator before reheating. The texture will be noticeably softer, but it’s still edible.
The glaze can be refrigerated for up to 5 days and frozen for up to 2 months. This is actually valuable—you can make a double batch of glaze, freeze it in ice cube trays, and have individual portions ready for future fish dinners.
My recommendation: make this recipe in quantities you’ll eat in one meal rather than planning for leftovers. It’s genuinely better that way.
Nutrition Information
Based on USDA nutritional database values for 4 ounce wild Alaskan halibut plus glaze (per serving):
Calories: 245 | Protein: 32g | Fat: 10g (including 2.5g omega-3 fatty acids) | Carbohydrates: 8g | Fiber: 0g | Sodium: 320mg
This is a wonderfully balanced meal nutritionally. The protein content is excellent (32 grams from a 4-ounce portion), the fat includes heart-healthy omega-3s, and the carbohydrate content is moderate, mostly from the honey in the glaze. The sodium level is reasonable for a flavorful restaurant-quality dish—much lower than you’d get from an actual restaurant version, which typically contains 600-800mg of sodium per serving.
Comparison to restaurant version: Most restaurant BBQ halibut contains 400-500 calories and 700-900mg of sodium per serving due to added oils used in commercial cooking and pre-made sauces loaded with salt. Your homemade version delivers comparable taste with fewer calories and significantly less sodium.
This dish is naturally gluten-free as written (assuming your soy sauce is tamari or certified GF soy sauce). The omega-3 content is particularly notable if you’re using wild Alaskan halibut; farm-raised versions contain less.
What to Order/Make Alongside for the Full Experience
You didn’t come all this way to eat halibut with plain rice. Let’s build a complete restaurant-quality meal experience at home. The key is choosing sides that complement the sweet-savory glaze without competing with it.
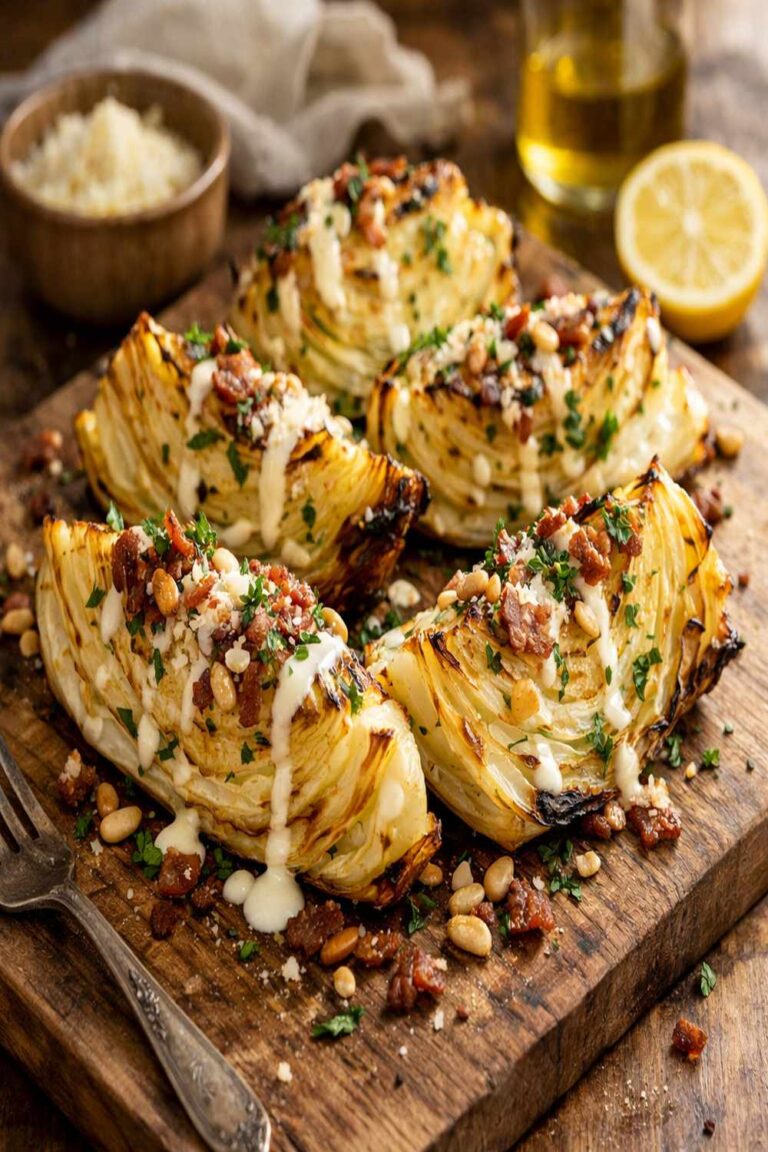
Best side combinations: A simple green vegetable like roasted asparagus or steamed broccoli tossed with olive oil, garlic, and lemon. The brightness of these vegetables cuts through the richness of the glaze perfectly. Alternatively, baked cabbage offers a hearty, roasted vegetable component that feels restaurant-quality.
For starch, I suggest either wild rice (which has an earthy flavor that complements the honey-garlic glaze) or roasted fingerling potatoes seasoned simply with olive oil, salt, and fresh herbs. Don’t do buttered bread or heavy starches; they’ll make the meal feel heavy.
Beverage: A crisp white wine like Sauvignon Blanc or Pinot Grigio pairs beautifully with the lemon-forward glaze. If you’re not drinking wine, sparkling water with fresh lemon is perfect. Avoid heavy sodas; they compete with the delicate fish flavor.
For a lighter meal feel: Serve the halibut over a bed of microgreens or butter lettuce with a fresh lemon vinaigrette. The acidity of the dressing echoes the lemon in the glaze.
- Roasted asparagus – toss with olive oil, minced garlic, and a squeeze of lemon; roast at 400°F for 12-15 minutes
- Wild rice pilaf – cook wild rice according to package directions, then stir in diced mushrooms, toasted nuts, and fresh herbs
- Steamed broccoli with garlic oil – simple, bright, and lets the halibut be the star
- A crisp salad – greens with a light vinaigrette featuring fresh lemon juice and Dijon mustard

BBQ Halibut Recipe
Ingredients
Method
- In a small mixing bowl (I use a glass bowl so I can see the glaze clearly), combine your melted butter with the honey, fresh lemon juice, soy sauce, and minced garlic. This is your golden window to taste and adjust—I always taste at this point and add a pinch more salt if needed. The glaze should taste balanced: not overly sweet, not overly salty, with the garlic and lemon clearly present. Here's the professional trick restaurants use: let this mixture sit for 3-4 minutes. This allows the garlic to infuse into the butter and honey, making the glaze more flavorful than if you used it immediately. Stir it once halfway through waiting.

- Pat your halibut filet completely dry with paper towels. This is non-negotiable—moisture is the enemy of a good sear. Moisture creates steam, and steam prevents browning. Cut your filet into 4 equal portions (about 4 ounces each). Season each piece lightly on both sides with fine sea salt and a small pinch of black pepper. Let the seasoned fish rest for 2 minutes while you heat your pan. The cutting technique matters: use a sharp knife and cut perpendicular to the cutting board, making smooth, confident cuts. Dragging the knife creates jagged edges that cook unevenly.
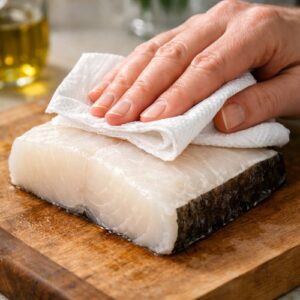
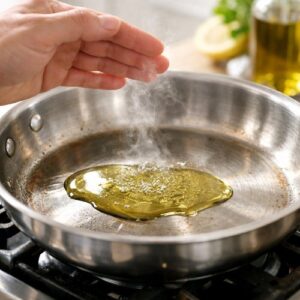
- Heat a large stainless steel or cast-iron skillet over medium-high heat with 1 tablespoon of olive oil. Here's how to know when it's ready: hold your hand about 3 inches above the pan surface—you should only be able to hold it there for 2-3 seconds before the heat forces you to pull away. Alternatively, drop a tiny piece of halibut skin into the pan; it should sizzle aggressively immediately. Place your halibut pieces in the hot pan skin-side up (if your filet still has skin) or presentation-side up (the side that looked prettier when you cut it). Do not move the fish. Let it sear untouched for exactly 90 seconds. This is where the golden crust forms through the Maillard reaction.
- Using a fish spatula (not a regular spatula—fish spatulas are thinner and won't damage the delicate flesh), carefully flip each piece. If it resists when you try to flip, wait another 10-15 seconds; it's not ready. Sear the second side for 90 seconds as well. Your fish should now have a light golden crust on both sides. At this point, the fish will be about 65% cooked through. This is intentional.
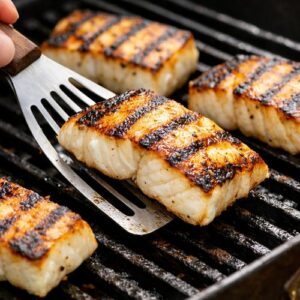
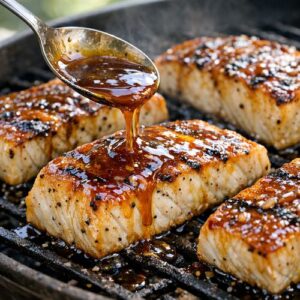
- Reduce your heat to medium. Pour your prepared glaze evenly over the halibut pieces. This is the signature step that restaurants execute perfectly. The lower heat allows the glaze to gently cook into the fish without burning it. The fish will continue cooking gently in the residual heat and the steam created by the glaze. Cook for 2-3 minutes, basting the fish with the glaze every 45 seconds using a small spoon. This basting technique is crucial—it ensures every inch of the fish gets coated with the glaze and cooks evenly.
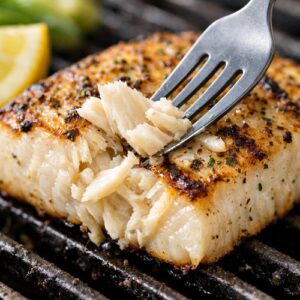
- The fish is perfectly done when a fork inserted into the thickest part of a piece flakes the flesh easily with minimal pressure. The flesh should be opaque throughout (no translucent or raw-looking areas), but still moist. If you're uncertain, remember that fish will continue cooking slightly after you remove it from heat, so it's better to undercook slightly than overcook. Total cooking time from when the fish hits the hot pan to plating should be 5-6 minutes. Yes, really. This is why it fits into a 30-minute weeknight dinner.
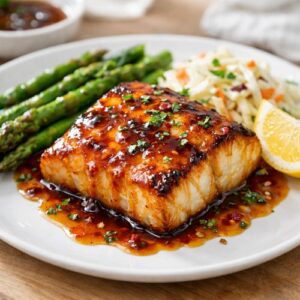
- Transfer each piece of halibut to a warm plate using your fish spatula. Spoon the remaining glaze from the pan over each piece. Serve immediately. The residual heat keeps the fish at the perfect temperature for eating, and the glaze is still glossy and beautiful.
FAQs
Can I use frozen halibut instead of fresh?
Absolutely, with one important caveat: thaw it completely in the refrigerator overnight, then pat it very dry. Frozen halibut contains more water than fresh halibut. When you thaw it, that extra water needs to evaporate, which is why the drying step is crucial. Once it’s properly thawed and dried, frozen halibut cooks identically to fresh. Most grocery store halibut is flash-frozen on the boat anyway, so “frozen” halibut is often fresher than you think.
What if I can’t find halibut?
This recipe works beautifully with other firm white fish. Cod, sea bass, or mahi-mahi will all cook similarly. The only adjustment: mahi-mahi is slightly less delicate than halibut, so you might be able to cook it for another 30 seconds or so. The glaze is fish-agnostic and works with anything white and firm. If you use a fattier fish like salmon or sea trout, reduce the butter in the glaze to 2 tablespoons since those fish have more natural fat.
Can I make this in the oven instead of on the stovetop?
You can, but you’ll lose the beautiful sear. If oven-cooking is your only option, preheat to 425°F, sear the fish for 60 seconds per side in a hot stovetop pan, then transfer to a baking dish, add the glaze, and bake for 3-4 minutes until cooked through. You’ll get about 80% of the restaurant effect, which is still excellent.
Why does my fish stick to the pan?
This is almost always because (1) the pan isn’t hot enough, or (2) the fish isn’t dry enough. Both issues create steam, which prevents browning. Make sure you’re patting the fish very thoroughly and letting the pan get properly hot. If you’re using a non-stick pan, you need less oil and slightly lower heat than you do with stainless steel. For this recipe specifically, I recommend stainless steel or cast iron over non-stick.
Can I make the glaze less sweet?
Yes, reduce the honey to 1 tablespoon and add 1 tablespoon of Dijon mustard instead. This shifts the flavor profile from honey-forward to more savory and complex. You’ll still recognize it as the same dish, but it’ll taste more sophisticated and less sweet. This is actually a beautiful variation if you prefer savory over sweet.
What’s the difference between this and baked cod with lemon and capers?
The primary difference is technique and flavor profile. This halibut recipe uses a high-heat sear to create a crust, then a honey-garlic glaze. The baked cod recipe is more minimalist, emphasizing the fish’s pure flavor with bright lemon and briny capers. This recipe is restaurant-style comfort; the baked cod is lighter and more delicate. Both are excellent—choose based on whether you want bold, sweet-savory flavors or clean, bright flavors.
Common Pantry Staples You’ll Already Have
One of the best parts about this recipe is that most home cooks already have the glaze ingredients on hand. You likely have:
- Butter (assuming you cook at all)
- Honey (nearly universal kitchen staple)
- Soy sauce (in most American kitchen pantries)
- Garlic (fresh or minced)
- Black pepper (absolutely universal)
- Olive oil (standard)
- Sea salt (or kosher salt works fine)
The only ingredient most people need to purchase is the fresh halibut filet, and maybe fresh lemon if you don’t have one. This is a recipe that doesn’t require a special shopping trip for obscure ingredients. That’s genuinely by design—restaurant recipes that require 15 specialty items aren’t worth reverse-engineering.
More Restaurant Copycat Recipes
- Baked Salmon Recipe – a restaurant-quality salmon dish that rivals upscale seafood spots, ready in 25 minutes
- Baked Alaskan