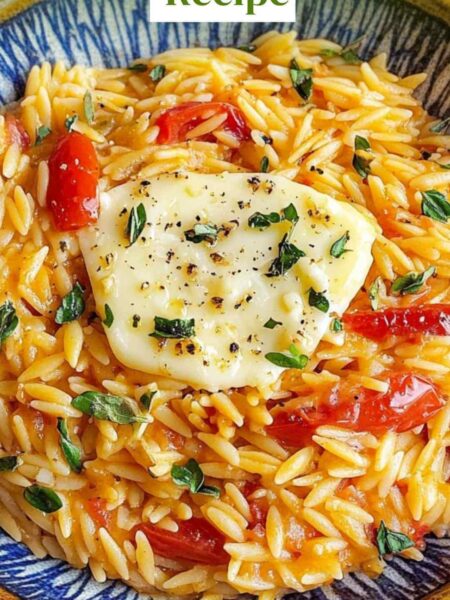
As the holiday season approaches, our kitchens become hubs of activity and excitement. The turkey takes center stage and, let me tell you, the right brine can elevate your Thanksgiving feast from good to unforgettable.
However, what pairs best with this beautifully brined turkey?
Think creamy mashed potatoes, tangy cranberry sauce, and a fresh green bean casserole. Now imagine the table filled with friends and family, each bite met with delighted murmurs of approval. That’s the dream, right?
Now, let’s delve into the process of creating my favorite turkey brine, which guarantees a juicy, flavorful turkey every time. It’s not just a recipe; it’s a tradition that can bring everyone together.

What is My Favorite Turkey Brine?
So, what does my favorite turkey brine consist of?
In short, it’s a blend of simple, wholesome ingredients. The combination of apple cider, dark brown sugar, sea salt, fresh herbs, and crucial spices sets this brine apart. Each ingredient serves a purpose.
For instance, the apple cider adds a hint of sweetness, while the herbs impart a depth of flavor.
Now, you might be wondering, “Why bother with a brine?” Brining not only enhances flavor but also keeps your turkey moist. A well-brined turkey can be the difference between a dry catastrophe and a succulent success.
How Does It Taste Like?
Imagine cutting into a turkey that’s been lovingly brined. The first slice reveals tender, juicy meat that practically begs to be devoured.
Each bite bursts with flavors from the spices and herbs. The sweetness from the apple cider dances with the saltiness while the earthy undertones of the herbs bring balance. It’s a real treat that makes your taste buds happy.
Why You’ll Love This
Beyond incredible taste, this turkey brine is straightforward to prepare. If I can do it, so can you. Whether you are an experienced chef or just starting your culinary journey, this recipe breaks it down into manageable steps.
Plus, it’s a make-ahead option that saves you time on the big day. Just imagine yourself relaxing with a cup of coffee while your turkey brines – how great does that sound?
Ingredients
Let’s get down to the essentials. Here are the ingredients you will need to make my favorite turkey brine:
– 1 whole turkey
– 3 cups apple cider
– 2 cups dark brown sugar
– 1 cup sea salt
– 3 tablespoons mixed peppercorns (black, white, and green)
– 5 whole bay leaves
– 5 garlic cloves, finely minced
– 4 sprigs fresh rosemary, leaves removed
– Peel of three large oranges, cut into large strips
– 1 tablespoon crushed red pepper flakes
– 1 tablespoon fresh thyme leaves

Step by Step Directions
Step 1: Preparation of Ingredients
Start by gathering all the ingredients. The turkey should be thawed if frozen. Rinse it under cold water, both inside and out. This step ensures that you start with a clean slate.
Step 2: Creating the Brine
In a large pot, combine the apple cider, dark brown sugar, and sea salt. Place the pot over medium heat. Stir occasionally until the sugar and salt dissolve completely. Keep an eye on it; you don’t want to boil, just warm until everything is mixed.
Step 3: Add the Spices
Once the sugar and salt dissolve, it’s time to add the mixed peppercorns, bay leaves, minced garlic, rosemary, orange peels, crushed red pepper flakes, and thyme leaves. The aroma will fill your kitchen, getting you in the holiday spirit. Stir the mixture well and remove it from heat.
Step 4: Cooling the Brine
Allow the brine to cool down to room temperature. You cannot add your turkey to a hot brine; trust me, you don’t want to cook it prematurely!
Step 5: Brining the Turkey
Once cooled, place your turkey into a food-safe container (or a large cooler works great). Pour the brine over the turkey, ensuring it is fully submerged. A heavy plate can help keep the turkey in place. Cover and refrigerate for 12-24 hours.
Step 6: Preparing for Cooking
After brining, remove the turkey from the brine and rinse it under cold water to reduce saltiness. Pat it dry with paper towels. At this point, it’s ready for roasting, frying, or however you choose to prepare it.
Tips On Making My Favorite Turkey Brine
Here are a few golden nuggets of wisdom I’ve picked up over the years:
- Always use a fresh turkey. Frozen turkeys can lead to uneven brining. If buying frozen, ensure you allow enough time for it to thaw before brining.
- Experiment with spices. Feel free to change or add spices based on what you have on hand. Cloves or star anise can take it up a notch!
- Use filtered water. If mixing water with your brine, filtered water is best to avoid any strange aftertastes.
- Don’t skip the rinsing. Rinsing the turkey after brining helps manage sodium levels and ensures you’re left with a fantastic flavor balance.
- Plan ahead. Brining takes time. Ensure you prepare the brine a day or at least several hours in advance.
How Do You Store My Favorite Turkey Brine?
You can store leftover brine, as long as it has not come into contact with raw meat.
- In the fridge: It’ll keep for about 3 days.
- In the freezer: If you plan to use it at a later date, pour it into an airtight container and freeze, where it should hold its quality for up to 6 months.
What Other Substitutes Can You Use in My Favorite Turkey Brine?
Here are five ingredient alternatives you might consider:
- Apple Juice Instead of Apple Cider: If you want a sweeter profile, apple juice can work well. It will provide a similar flavor with less acidity.
- Honey or Maple Syrup Instead of Dark Brown Sugar: These options deepen the sweetness while providing a unique flavor twist. Adjust the quantity based on your taste.
- Kosher Salt Instead of Sea Salt: Kosher salt can be coarser, so use a bit less than the specified amount. It will still help tenderize the turkey.
- Thyme Oil or Dried Thyme Instead of Fresh Thyme: If you don’t have fresh herbs on hand, try using dried versions or even essential oils if you’re in a pinch.
- Lemon Peel Instead of Orange Peel: Lemon offers a zestiness that contrasts beautifully and adds a citrus punch.

Conclusion
Brining your turkey can transform an ordinary meal into an extraordinary feast. My favorite turkey brine is simple yet effective, bursting with flavors and making sure your bird stays moist and delicious.
The joy of sharing a meal made with love elevates any gathering. Remember, every detail counts, from the brine to the side dishes.
So, as we prepare our tables and gather loved ones around, let’s celebrate the time-honored traditions of our kitchens and hearts.
With this turkey brine in your culinary toolkit, you’ll be ready to wow your guests and leave them begging for seconds! Now, go ahead and start your brining journey.
Happy feasting!
You’ll also like the following recipes!
- Charleston’s Bread Pudding Copycat Recipe
- How To Make Easily Quick And Easy Poached Chicken
- Best Easy Beef Wellington Recipe

My Favorite Turkey Brine – Easy Meals To Cook
Description
As the holiday season approaches, our kitchens become hubs of activity and excitement. The turkey takes center stage and, let me tell you, the right brine can elevate your Thanksgiving feast from good to unforgettable.
However, what pairs best with this beautifully brined turkey?
Think creamy mashed potatoes, tangy cranberry sauce, and a fresh green bean casserole. Now imagine the table filled with friends and family, each bite met with delighted murmurs of approval. That’s the dream, right?
Now, let’s delve into the process of creating my favorite turkey brine, which guarantees a juicy, flavorful turkey every time. It’s not just a recipe; it’s a tradition that can bring everyone together.
Ingredients
Instructions
Step 1: Preparation of Ingredients
-
Start by gathering all the ingredients. The turkey should be thawed if frozen. Rinse it under cold water, both inside and out. This step ensures that you start with a clean slate.
Step 2: Creating the Brine
-
In a large pot, combine the apple cider, dark brown sugar, and sea salt. Place the pot over medium heat. Stir occasionally until the sugar and salt dissolve completely. Keep an eye on it; you don’t want to boil, just warm until everything is mixed.
Step 3: Add the Spices
-
Once the sugar and salt dissolve, it's time to add the mixed peppercorns, bay leaves, minced garlic, rosemary, orange peels, crushed red pepper flakes, and thyme leaves. The aroma will fill your kitchen, getting you in the holiday spirit. Stir the mixture well and remove it from heat.
Step 4: Cooling the Brine
-
Allow the brine to cool down to room temperature. You cannot add your turkey to a hot brine; trust me, you don’t want to cook it prematurely!
Step 5: Brining the Turkey
-
Once cooled, place your turkey into a food-safe container (or a large cooler works great). Pour the brine over the turkey, ensuring it is fully submerged. A heavy plate can help keep the turkey in place. Cover and refrigerate for 12-24 hours.
Step 6: Preparing for Cooking
-
After brining, remove the turkey from the brine and rinse it under cold water to reduce saltiness. Pat it dry with paper towels. At this point, it’s ready for roasting, frying, or however you choose to prepare it.
Nutrition Facts
Servings 18
- Amount Per Serving
- Calories 485kcal
- % Daily Value *
- Total Fat 5.7g9%
- Saturated Fat 1.6g8%
- Cholesterol 249mg83%
- Sodium 6406mg267%
- Total Carbohydrate 94g32%
- Dietary Fiber 17g68%
- Sugars 75g
- Protein 21g42%
* Percent Daily Values are based on a 2,000 calorie diet. Your daily value may be higher or lower depending on your calorie needs.
Note
- Always use a fresh turkey. Frozen turkeys can lead to uneven brining. If buying frozen, ensure you allow enough time for it to thaw before brining.
- Experiment with spices. Feel free to change or add spices based on what you have on hand. Cloves or star anise can take it up a notch!
- Use filtered water. If mixing water with your brine, filtered water is best to avoid any strange aftertastes.
- Don’t skip the rinsing. Rinsing the turkey after brining helps manage sodium levels and ensures you're left with a fantastic flavor balance.
- Plan ahead. Brining takes time. Ensure you prepare the brine a day or at least several hours in advance.


