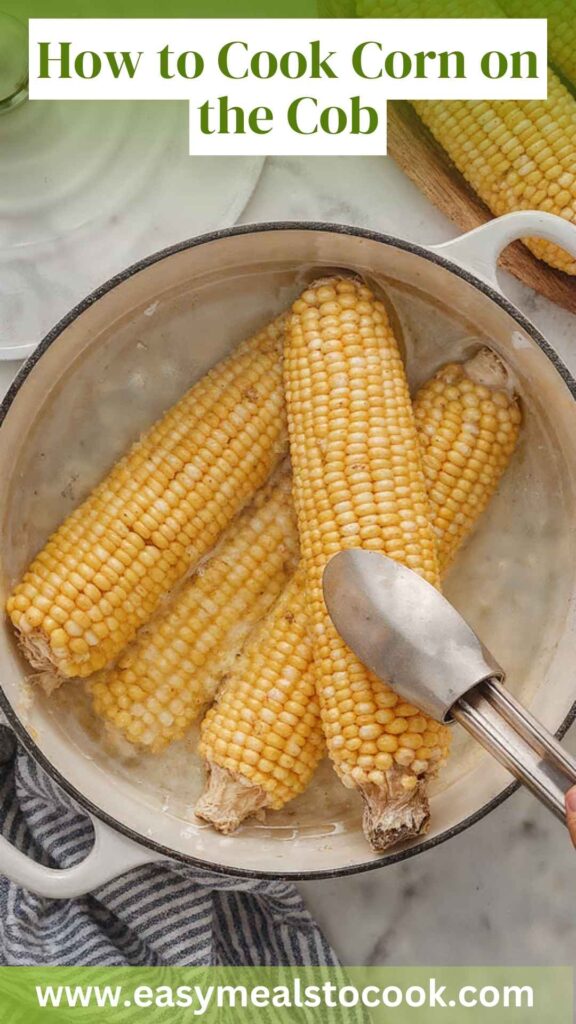
Corn on the cob is one of those iconic summer staples. The vibrant yellow kernels, bursting with sweetness, are a delight at barbecues, family gatherings, or any casual meal. I remember the first time I learned to cook corn on the cob; it felt like a rite of passage in my kitchen journey. Let’s dive into how you can prepare this tasty treat perfectly every time!

What is Cooking Corn on the Cob?
At its core, cooking corn on the cob is about transforming those fresh, plump ears of corn into a mouth-watering side dish. With a few straightforward techniques, you can maximize the flavors and textures of this simple vegetable.
You can grill, boil, or even microwave corn on the cob, each method yielding slightly different results. Regardless of how you do it, the sweet aroma and crunchy texture will elevate any meal you serve.
Why You’ll Love This Corn on the Cob Recipe
There is something undeniably nostalgic about biting into a juicy kernel of corn on the cob. It brings back memories of summer picnics and long evenings spent outdoors. Corn is not just delicious; it’s also incredibly versatile.
You can enjoy it plain, or dress it up with spices and toppings. Plus, cooking corn on the cob is quick and easy, making it a no-brainer for busy weeknights or casual get-togethers.
The Ingredients
Before diving into the cooking process, let’s gather our ingredients. Here’s what you’ll need:
- 4 to 8 ears of fresh sweet corn: Look for bright yellow kernels. They’re sweet and will enhance the dish.
- Sea salt and freshly cracked black pepper: Use these to season your corn to taste.
- 2 tablespoons of butter or flavored compound butter: Let’s admit it, butter takes corn to another level.
- ½ teaspoon smoked paprika: For those who love a gentle smoky kick (optional).
- 1 tablespoon finely chopped fresh parsley or cilantro: This is optional but adds a refreshing touch.

Step by Step Instructions
Cooking corn on the cob is as easy as 1-2-3. Here’s how to do it, step by step.
Step 1: Husk the Corn
First things first, you’ll want to prepare your corn. Remove the husks and silks from each ear. I find that pulling off the husk gently but firmly helps to keep the kernels intact.
Step 2: Choose Your Cooking Method
Here’s where your options come into play: you can boil, grill, or microwave.
Boiling Method:
- Fill a large pot with water and bring it to a boil.
- Once boiling, add the corn. Boil for 4-6 minutes.
- You’ll know it’s done when the kernels look bright and plump.
Grilling Method:
- Preheat your grill to medium-high heat.
- Place the husked corn (or in husks if you want) directly on the grill.
- Grill for about 10-15 minutes, turning occasionally, until the kernels are charred slightly and tender.
Microwaving Method:
- Place a wet paper towel around an ear of corn and put it in the microwave.
- Microwave on high for about 3-4 minutes.
- Let it cool briefly, then remove the towel carefully.
Step 3: Season and Enjoy
Now that your corn is cooked, it’s time to add your toppings. In a pan, melt the butter over low heat, adding smoked paprika if you’re using it. Drizzle this over your corn and season with sea salt and black pepper to taste.
Tips & Tricks
Here are some handy tips to enhance your corn-cooking experience:
- Choose fresh corn: The fresher the corn, the sweeter the flavor. Look for ears with bright green husks and moist silks.
- Don’t overcook: Overcooked corn can turn mushy. Aim for those vibrant yellow kernels.
- Soak before grilling: For grilled corn, soaking the ears in water for 30 minutes can help steam them and prevent burning.
- Try different butters: Experiment with garlic herb butter or even spicy chili butter for a flavor twist.
- Use a corn holder: These handy tools make it easier to eat corn without getting messy.
Nutrition Information
Corn is more than just a tasty side; it’s also packed with nutrients. Here’s a quick overview of what you get in one ear of corn:
- Calories: About 90
- Fiber: 2.4 grams
- Vitamin C: 12% of the Daily Value (DV)
- Thiamin (Vitamin B1): 16% of the DV
- Folate: 8% of the DV
Corn also contains antioxidants that help fight free radicals in your body. It’s great for your eye health too.
Can I Store Cooked Corn on the Cob?
Absolutely! If you find yourself with leftovers, you can store cooked corn in the refrigerator. Just wrap it tightly in plastic wrap or place it in an airtight container. It stays good for about 3-5 days. When you’re ready to reheat, simply microwave it for a minute or two.
What Can I Serve with Corn on the Cob?
Corn on the cob is wonderfully versatile and pairs well with numerous dishes. Here are some ideas:
- Grilled Chicken: The charred meat complements sweet corn nicely.
- BBQ Ribs: Corn is a classic companion to barbecue.
- Salad: Pair it with a fresh garden salad for balance.
- Burgers: A juicy burger with corn on the side screams summer.
- Vegetable Skewers: A colorful veggie mix can make a beautiful plate.
Variations of Corn on the Cob
If you’re feeling adventurous, consider some fun twists on the classic corn on the cob:
- Mexican Street Corn (Elote): Slather your corn with mayonnaise, cotija cheese, lime juice, and chili powder.
- Cajun Corn: Toss your corn in Cajun seasoning before grilling for that Southern kick.
- Herbed Corn: Mix your melted butter with chopped herbs like dill or basil before drizzling it on.
- Bacon-Wrapped Corn: Wrap a slice of bacon around each ear and grill. The result? Pure indulgence!
- Cheesy Corn: After cooking, sprinkle shredded cheese on the hot corn for a melty treat.

Conclusion
Cooking corn on the cob may seem like a simple task, but it embodies the very essence of summertime joy. This guide walks you through everything you need to create that perfect ear of corn, no matter how you choose to do it. From boiling to grilling, each method has its charm.
The best part? You can customize it to your heart’s content. With fresh ingredients and a few tips, you will impress at your next gathering. So, fire up your grill or boil a pot of water. Let’s make cornbread dreams come true! Happy cooking!
You’ll also like the following recipes!

How to Cook Corn on the Cob – Easy Meals To Cook
Description
Corn on the cob is one of those iconic summer staples. The vibrant yellow kernels, bursting with sweetness, are a delight at barbecues, family gatherings, or any casual meal. I remember the first time I learned to cook corn on the cob; it felt like a rite of passage in my kitchen journey. Let’s dive into how you can prepare this tasty treat perfectly every time!
Ingredients
Instructions
Step 1: Husk the Corn
-
First things first, you’ll want to prepare your corn. Remove the husks and silks from each ear. I find that pulling off the husk gently but firmly helps to keep the kernels intact.
Step 2: Choose Your Cooking Method
-
Here’s where your options come into play: you can boil, grill, or microwave.
Boiling Method:
- Fill a large pot with water and bring it to a boil.
- Once boiling, add the corn. Boil for 4-6 minutes.
- You’ll know it’s done when the kernels look bright and plump.
Grilling Method:
- Preheat your grill to medium-high heat.
- Place the husked corn (or in husks if you want) directly on the grill.
- Grill for about 10-15 minutes, turning occasionally, until the kernels are charred slightly and tender.
Microwaving Method:
- Place a wet paper towel around an ear of corn and put it in the microwave.
- Microwave on high for about 3-4 minutes.
- Let it cool briefly, then remove the towel carefully.
- Fill a large pot with water and bring it to a boil.
Step 3: Season and Enjoy
-
Now that your corn is cooked, it’s time to add your toppings. In a pan, melt the butter over low heat, adding smoked paprika if you’re using it. Drizzle this over your corn and season with sea salt and black pepper to taste.
Nutrition Facts
Servings 8
- Amount Per Serving
- Calories 90kcal
Note
- Choose fresh corn: The fresher the corn, the sweeter the flavor. Look for ears with bright green husks and moist silks.
- Don’t overcook: Overcooked corn can turn mushy. Aim for those vibrant yellow kernels.
- Soak before grilling: For grilled corn, soaking the ears in water for 30 minutes can help steam them and prevent burning.
- Try different butters: Experiment with garlic herb butter or even spicy chili butter for a flavor twist.
- Use a corn holder: These handy tools make it easier to eat corn without getting messy.