If you’re like me, nothing satisfies like the rich and fudgy goodness of brownies.
After countless experiments in the kitchen, I discovered sheet pan brownies—a simple, delightful treat that never fails to impress. In a busy world, having a quick dessert that serves many is a lifesaver. Sharing a sheet pan of brownies feels festive, like a big hug from the kitchen.
Brownies have a special place in many hearts, their appeal stretching far and wide. From bake sales to birthday parties, they show up everywhere. The beauty of this sheet pan version is its size.
You can cut them into generous squares or delicate bites, depending on the occasion.
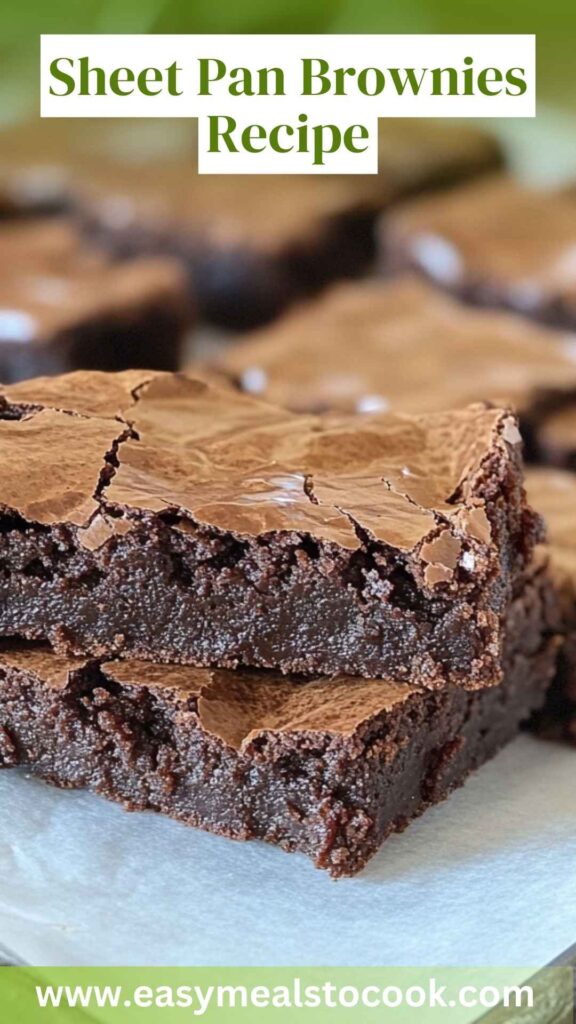
What Are Sheet Pan Brownies?
Sheet pan brownies are an expanded take on traditional brownies. Instead of baking in a small pan, you pour your batter into a larger sheet pan, allowing for a thinner, more expansive brownie.
This method makes it easier to serve a crowd, with less fuss, and gives you those delicious edges that everyone fights over.
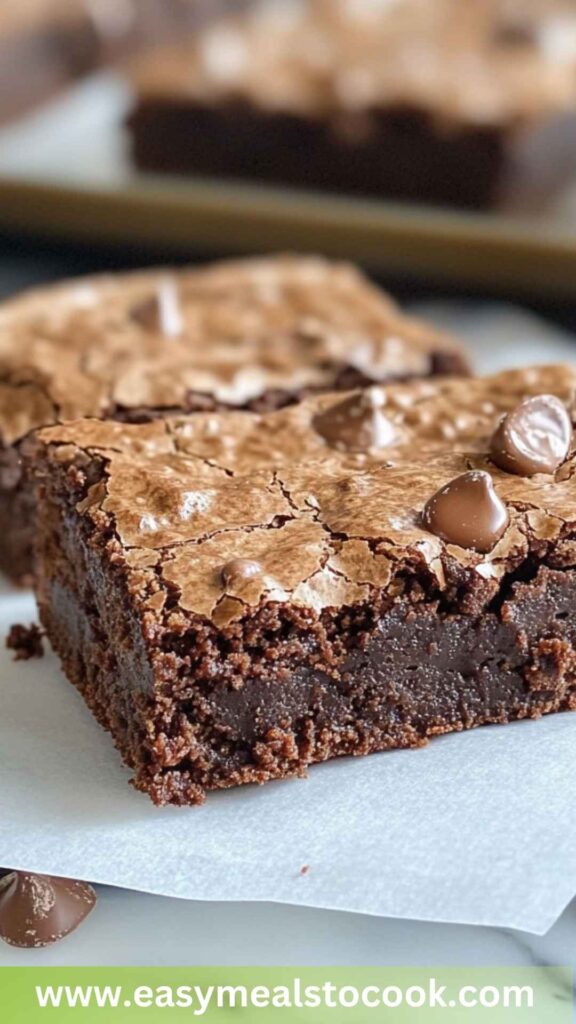
Each brownie is a satisfying combination of chewy and fudgy—perfectly dense while remaining soft in the center. The texture is a delightful contrast to their rich chocolate flavor, making them irresistible to anyone with a sweet tooth.
How Does It Taste?
The flavor profile of sheet pan brownies is rich, deep, and utterly chocolatey. Using a mix of bittersweet and semisweet chocolate, you get an indulgent treat that’s not overly sweet.
There’s a hint of vanilla, and the cocoa powder adds a slight bitterness, making the bite balanced and delightful.
Each mouthful is a mix of textures—from the slightly crisp edges to the gooey center—creating an experience that dances on your palate. Add some chocolate chips, and you introduce a melty burst of chocolate that enhances every square!
Why You’ll Love This
You’ll love sheet pan brownies for several reasons. First, they’re incredibly easy to make. With basic ingredients and straightforward steps, you’ll find yourself whipping up a batch in no time. This means more time enjoying treats with friends and family!
Second, they’re versatile. You can customize the recipe by adding nuts, marshmallows, or even swirls of cookie dough. You could also play around with flavored extracts, such as mint or almond, for a twist.
Lastly, the community aspect is hard to beat. Share a tray with friends, and you’ll be the hit of the gathering. There’s something about brownies that brings people together.
Ingredients
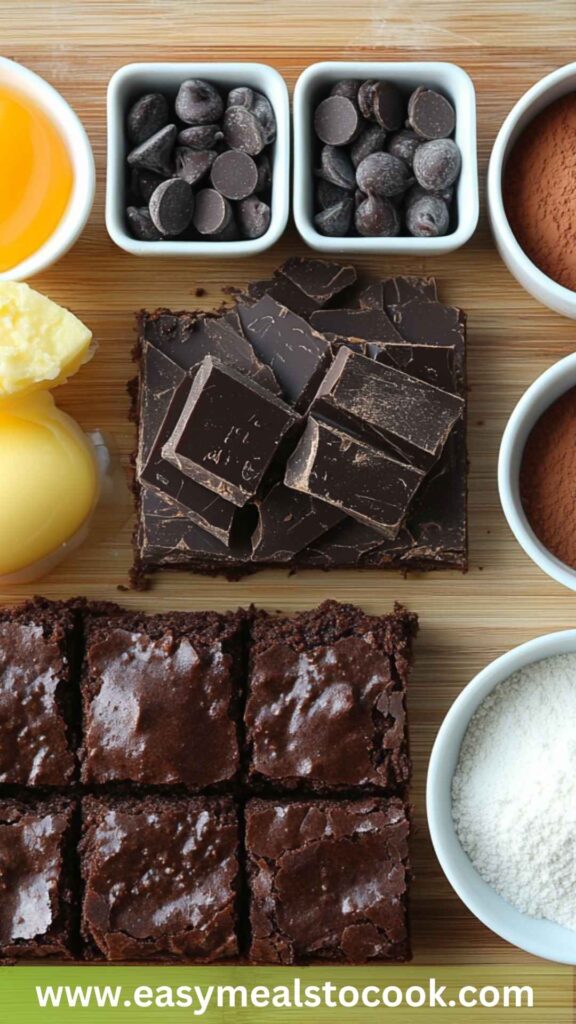
Here’s your shopping list for the ultimate sheet pan brownies:
- 1 lb bittersweet or semisweet chocolate, coarsely chopped
- 3 sticks (340 g) salted butter (24 tbsp)
- 5 large eggs, room temperature
- 1 cup (212 g) light brown sugar, packed
- ½ cup (106 g) granulated sugar
- 1 ½ tbsp pure vanilla extract
- 1 ⅓ cups (189 g) all-purpose flour, sifted
- ½ tbsp baking powder
- ½ tsp fine sea salt
- 1 to 2 cups (170 to 340 g) semisweet chocolate chips
- 2 tbsp dark rum (optional, but recommended)
- ¼ cup (60 g) cocoa powder
These ingredients come together to create a dessert that is simple yet satisfying. Let’s break down the steps to create these brownies in your kitchen.
Step by Step Directions
Step 1: Preheat the Oven
Preheat your oven to 350°F (175°C). This gives your brownies a perfect baking environment right from the start. Line a half-sheet pan (18×13 inches) with parchment paper for easy removal later. It helps to create that flawless corners we all love!
Step 2: Melt the Chocolate and Butter
In a large microwave-proof bowl, combine the chopped chocolate and butter. Melt them together in the microwave in short intervals, stirring in between. This way, your chocolate won’t seize up. Aim for about 1-2 minutes of melting time.
Step 3: Whisk the Sugars and Eggs
Once your chocolate and butter mixture has cooled slightly, whisk in the light brown sugar and granulated sugar until fully combined. Then add the eggs one at a time, mixing well after each addition. This incorporates air into your batter, which helps with the structure.
Step 4: Add the Flavorings
Pour in the vanilla extract and stir gently. If you’re feeling adventurous, add the dark rum here. It enhances the chocolate flavor without making the brownies taste boozy.
Step 5: Combine the Dry Ingredients
In a separate bowl, sift together the flour, cocoa powder, baking powder, and salt. This helps to distribute the leavening agent evenly. Gradually add this dry mixture to the wet mixture, folding gently with a spatula. Be careful not to overmix; you want to keep the brownies tender.
Step 6: Stir in the Chocolate Chips
Fold in the chocolate chips. You can adjust the amount based on how indulgent you want your brownies. Less is more for a more balanced chocolate flavor, but who are we kidding? Chocolate chips are life!
Step 7: Pour and Bake
Pour the batter into the prepared sheet pan, spreading it evenly. Bake for about 20-25 minutes or until a toothpick comes out with a few moist crumbs. The edges should look set, while the center remains slightly soft.
Step 8: Cool and Serve
Let the brownies cool in the pan for at least 30 minutes before lifting them out using the parchment paper. Once cooled, cut them into squares, and get ready for the compliments to roll in!
Tips on Making Sheet Pan Brownies
- Use quality chocolate: The flavor of your brownies relies heavily on the chocolate you use. Don’t skimp! Choose high-quality bittersweet or semisweet chocolate for the best results.
- Room temperature eggs: Using room temperature eggs helps them mix better into the batter, resulting in a smoother texture.
- Sift your dry ingredients: Sifting isn’t just for show. It helps to aerate the flour and cocoa powder, ensuring a lighter brownie.
- Watch your baking time: No one wants dry brownies! Check a couple of minutes early to avoid the dreaded overbake. Remember, they firm up as they cool.
- Try different mix-ins: Don’t be afraid to let your creativity shine! Consider adding nuts, caramel swirls, or even crushed candy bars to make your brownies completely unique.
How Do You Store Sheet Pan Brownies?
To ensure your brownies stay fresh, store them in an airtight container. Place parchment paper between the layers if you stack them.
They can sit at room temperature for up to 4-5 days or in the fridge for about a week, though they might dry out slightly in the fridge. For long-term storage, freeze the brownies for up to three months.
Just wrap them tightly in plastic wrap and foil before placing them in an airtight freezer container.
What Other Substitutes Can You Use in Sheet Pan Brownies?
- Almond flour: Replace a portion of the all-purpose flour with almond flour for a gluten-free option. This adds a slight nuttiness while retaining moisture.
- Coconut oil: Swap out butter for melted coconut oil for a dairy-free alternative. This adds a unique flavor and keeps the brownies fudgy.
- Maple syrup: Use maple syrup instead of granulated sugar for a more natural sweetener. It may alter the texture slightly, but it’s a delicious twist.
- Greek yogurt: For a healthier twist, substitute half of the butter with Greek yogurt. It adds moisture while cutting down on fat.
- Nut butters: Consider mixing in almond or peanut butter for depth of flavor. You may want to reduce the amount of chocolate or sugar to balance it out.
Conclusion
Sheet pan brownies are a delightful way to satisfy your sweet tooth while making enough to share (or not!). With their simple steps, versatile ingredients, and rich taste, these brownies can transform any gathering into a memorable event.
Whether you’re baking for a special occasion or just because you crave something sweet, these brownies fit the bill every time.
So, gather your ingredients, preheat your oven, and enjoy the fantastic world of brownie bliss! Who knows? You might just become the neighborhood brownie hero!
You’ll also like the following recipes!
- Sheet Pan Shrimp Boil Copycat Recipe
- How to Make Mahi Mahi Sheet Pan
- Best Greek Sheet Pan Chicken Recipe

Sheet Pan Brownies Recipe – Easy Meals To Cook
Description
Before we dive into the delicious world of sheet pan brownies, let’s chat about what you can serve alongside these delectable treats. Think of pairing them with some vanilla ice cream for that warm-cold contrast.
The melting ice cream over a warm brownie?
That’s a match made in heaven. You can also bring in a drizzle of salted caramel or chocolate sauce. A teaspoon of whipped cream can take it over the top, too.
If you’re feeling adventurous, consider some fresh berries. Strawberries or raspberries add a nice tartness that cuts through the sweetness.
If you want to give a bit of a gourmet twist, sprinkle some sea salt over the brownie before serving. Sweet and salty is always a crowd-pleaser!
Now, let’s dig into the heart of the matter—sheet pan brownies.
Ingredients
Instructions
Step 1: Preheat the Oven
-
Preheat your oven to 350°F (175°C). This gives your brownies a perfect baking environment right from the start. Line a half-sheet pan (18x13 inches) with parchment paper for easy removal later. It helps to create that flawless corners we all love!
Step 2: Melt the Chocolate and Butter
-
In a large microwave-proof bowl, combine the chopped chocolate and butter. Melt them together in the microwave in short intervals, stirring in between. This way, your chocolate won't seize up. Aim for about 1-2 minutes of melting time.
Step 3: Whisk the Sugars and Eggs
-
Once your chocolate and butter mixture has cooled slightly, whisk in the light brown sugar and granulated sugar until fully combined. Then add the eggs one at a time, mixing well after each addition. This incorporates air into your batter, which helps with the structure.
Step 4: Add the Flavorings
-
Pour in the vanilla extract and stir gently. If you’re feeling adventurous, add the dark rum here. It enhances the chocolate flavor without making the brownies taste boozy.
Step 5: Combine the Dry Ingredients
-
In a separate bowl, sift together the flour, cocoa powder, baking powder, and salt. This helps to distribute the leavening agent evenly. Gradually add this dry mixture to the wet mixture, folding gently with a spatula. Be careful not to overmix; you want to keep the brownies tender.
Step 6: Stir in the Chocolate Chips
-
Fold in the chocolate chips. You can adjust the amount based on how indulgent you want your brownies. Less is more for a more balanced chocolate flavor, but who are we kidding? Chocolate chips are life!
Step 7: Pour and Bake
-
Pour the batter into the prepared sheet pan, spreading it evenly. Bake for about 20-25 minutes or until a toothpick comes out with a few moist crumbs. The edges should look set, while the center remains slightly soft.
Step 8: Cool and Serve
-
Let the brownies cool in the pan for at least 30 minutes before lifting them out using the parchment paper. Once cooled, cut them into squares, and get ready for the compliments to roll in!
Nutrition Facts
Servings 40
- Amount Per Serving
- Calories 218kcal
- % Daily Value *
- Total Fat 9.3g15%
- Saturated Fat 4.5g23%
- Cholesterol 44mg15%
- Sodium 82mg4%
- Total Carbohydrate 27g9%
- Dietary Fiber 2g8%
- Sugars 19g
- Protein 7g15%
* Percent Daily Values are based on a 2,000 calorie diet. Your daily value may be higher or lower depending on your calorie needs.
Note
- Use quality chocolate: The flavor of your brownies relies heavily on the chocolate you use. Don’t skimp! Choose high-quality bittersweet or semisweet chocolate for the best results.
- Room temperature eggs: Using room temperature eggs helps them mix better into the batter, resulting in a smoother texture.
- Sift your dry ingredients: Sifting isn’t just for show. It helps to aerate the flour and cocoa powder, ensuring a lighter brownie.
- Watch your baking time: No one wants dry brownies! Check a couple of minutes early to avoid the dreaded overbake. Remember, they firm up as they cool.
- Try different mix-ins: Don't be afraid to let your creativity shine! Consider adding nuts, caramel swirls, or even crushed candy bars to make your brownies completely unique.


